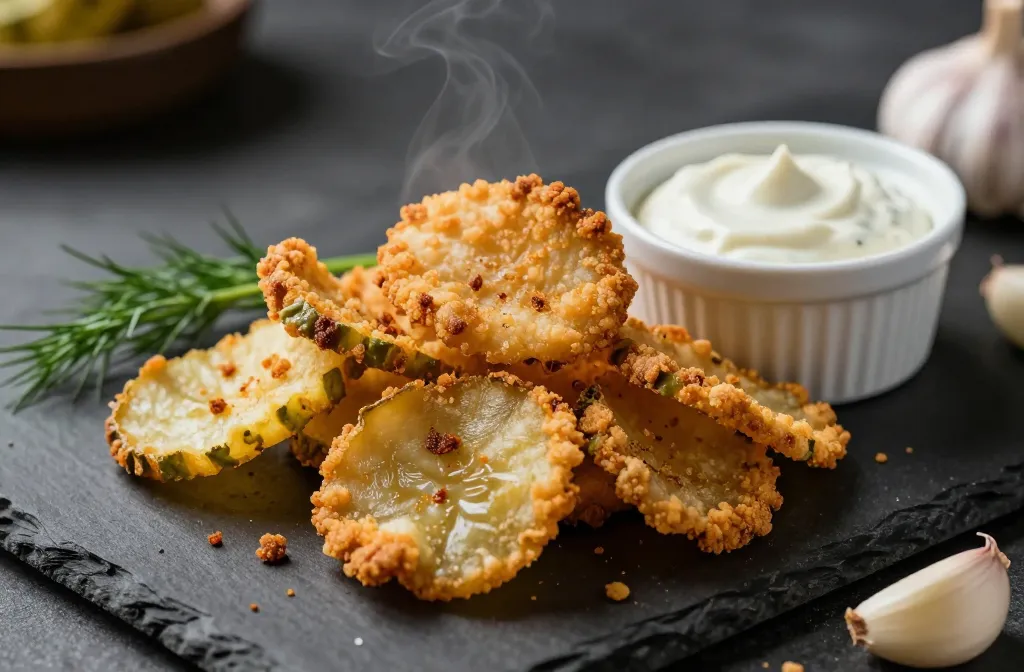
I started making air fryer fried pickles after realizing my oven never delivered that pub-style crunch. The trick I landed on wasn’t a fancy flour blend — it was crushed pork rinds. They crisp like breadcrumbs, stay low-carb, and actually stick if you build the coating right. In this guide, I’ll show you the exact method, the right pickle cut, and the timing that keeps them shatter-crisp instead of soggy.
Choose the Right Pickles and Cut for Maximum Crunch
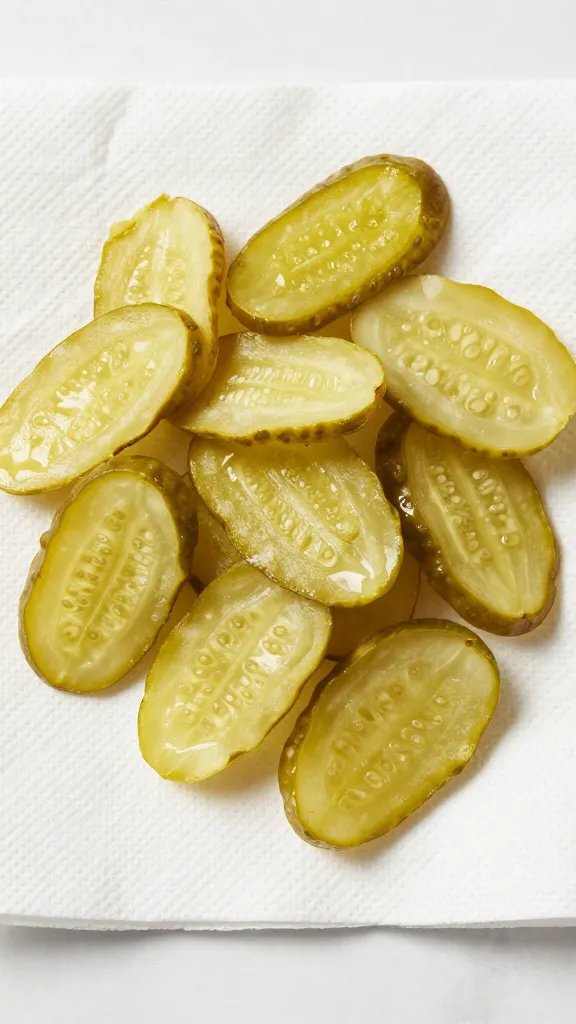
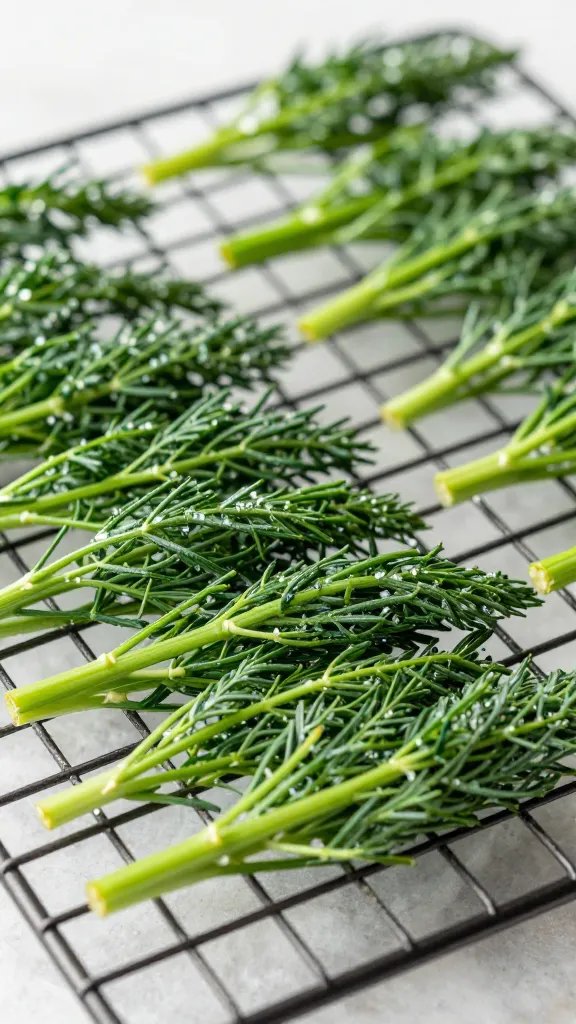
Crunch starts with the pickle itself. I use cold, firm dill chips or spears from the fridge — not sweet or bread-and-butter styles, which brown too fast and taste off once hot.
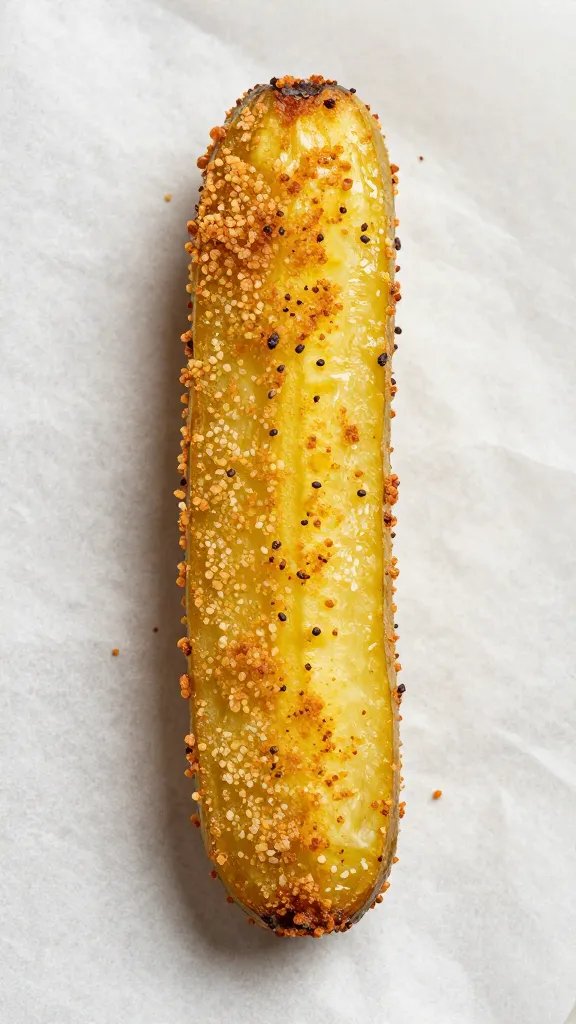
Cut size matters. For classic bites, go with ¼-inch thick chips. For spears, keep them ½-inch thick so the coating doesn’t over-brown before the center warms.
Avoid crinkle chips packed in extra-briny liquid; the extra surface area holds more moisture and can steam the crust.
Action today: Open a jar of chilled dill chips and lay 20–24 slices on a paper towel to start drying.
Drying and Seasoning: The Simple Step Most People Skip
Water ruins crisping. I pat the pickles dry on both sides, then rest them between fresh paper towels for 10 minutes. If you see beads of moisture, you’re not done.
Season the pickles, not just the coating. A light dusting of garlic powder and black pepper on the dried chips ensures flavor throughout. Skip extra salt — pork rinds and brined pickles bring plenty.
Warning Signs You Didn’t Dry Enough
- Coating slides off when dipped in egg.
- Wet patches on the tray after breading.
- Sputtering and steam clouds in the air fryer basket.
Action today: After the first pat-dry, press each slice once more with a fresh towel until no moisture transfers.
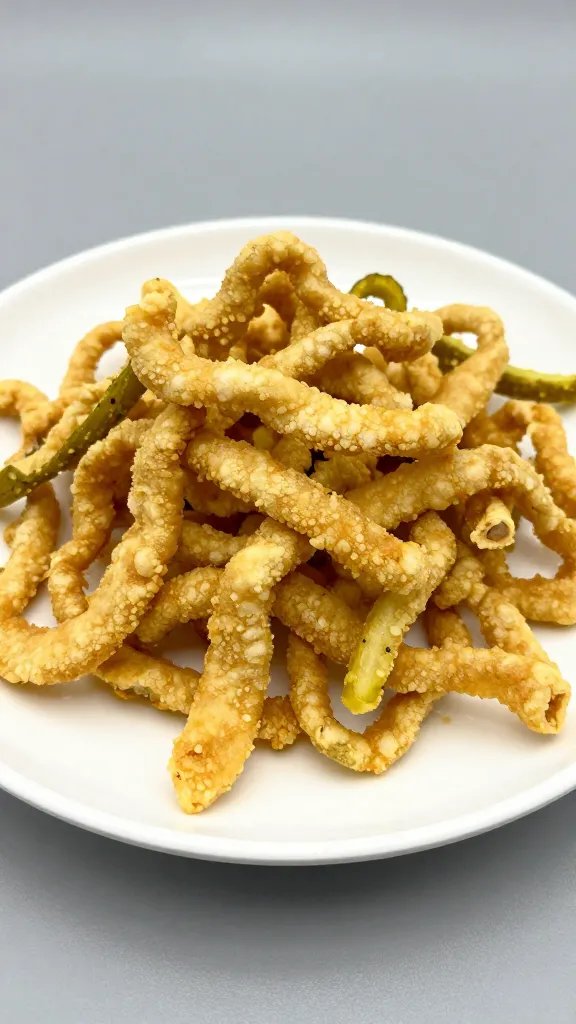
Build a Three-Part Coating That Actually Sticks
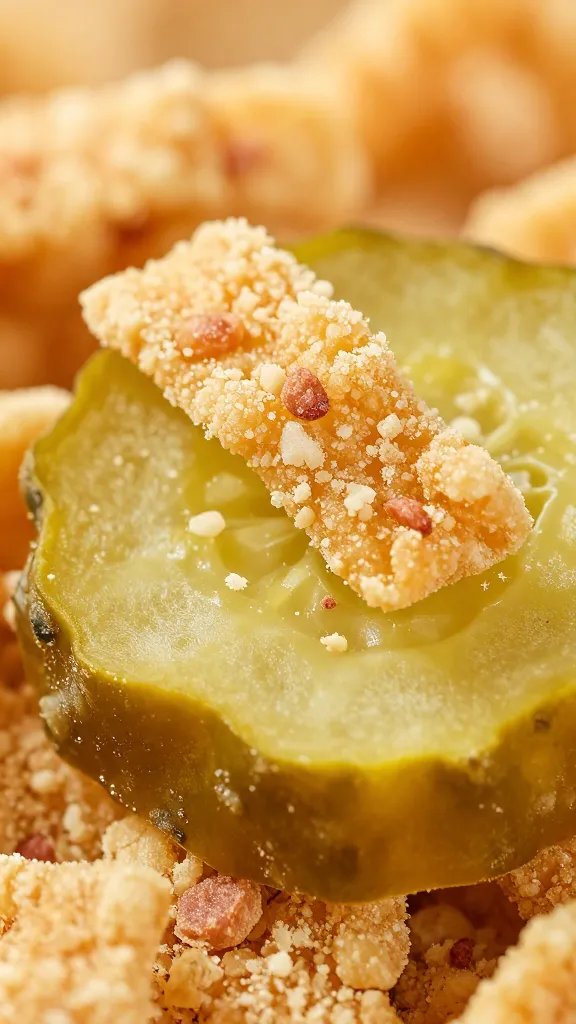
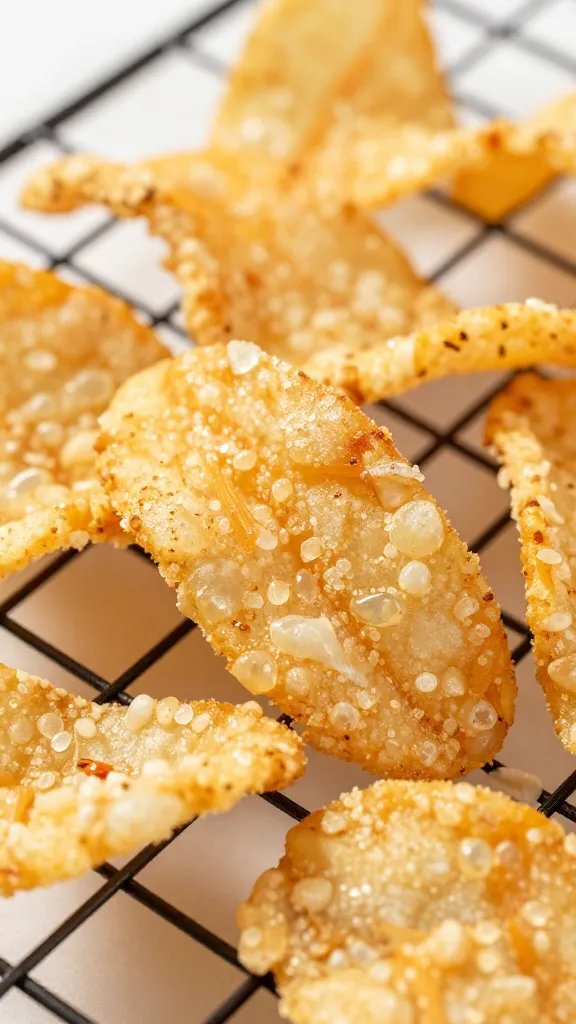
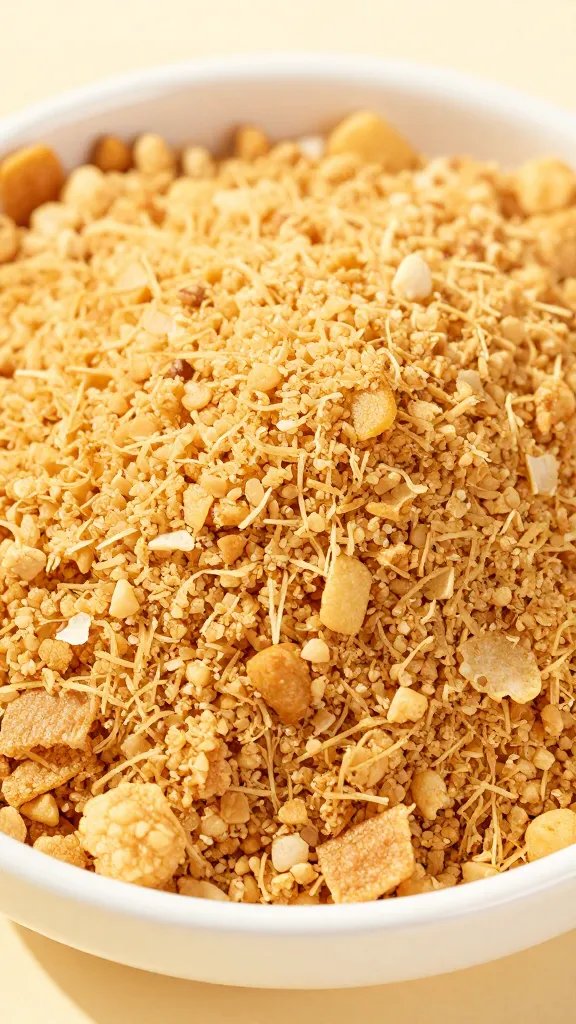
Pork rinds need structure to cling. I crush plain pork rinds in a zip bag with a rolling pin to fine crumbs — think panko-size, not dust. I mix in a little grated Parmesan for binding and browning, plus paprika for color.
I use a classic three-bowl setup: seasoned almond flour for the first coat, beaten eggs, then pork rind crumbs. The almond flour creates a dry base so the egg grabs, and the egg helps the rinds lock on.
Step-by-Step Coating Setup
- Bowl 1: ½ cup almond flour + ½ tsp garlic powder + ½ tsp onion powder.
- Bowl 2: 2 large eggs, beaten until smooth.
- Bowl 3: 1½ cups crushed pork rind crumbs + ¼ cup grated Parmesan + ½ tsp paprika + ¼ tsp black pepper.
Work with one pickle at a time: dredge in almond flour, shake off excess; dip in egg, let drip; press firmly into pork rind mix, coating both sides. Set on a rack for five minutes so the crust sets before air frying.
Action today: Crush a full 2–3 ounce bag of pork rinds now; any extra stores in an airtight jar for a week.
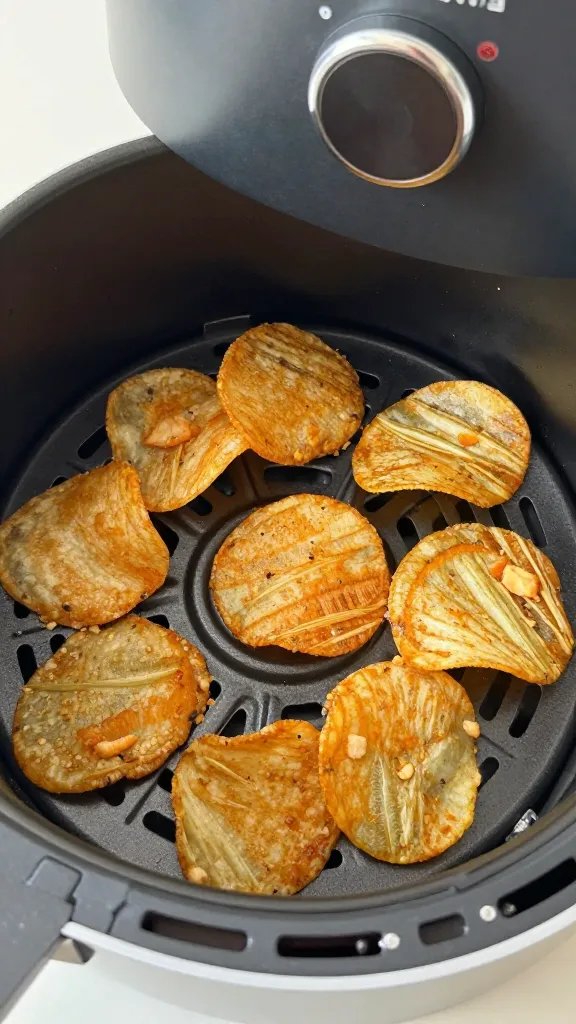
Air Fryer Temperatures, Timing, and Placement That Prevent Soggy Spots
I preheat the air fryer to 400°F (205°C) for 3–5 minutes. A hot start stops the crust from absorbing moisture.
Lightly mist the basket and the tops of the coated pickles with avocado oil spray. Space them so they don’t touch; crowded pieces steam and lose crunch.
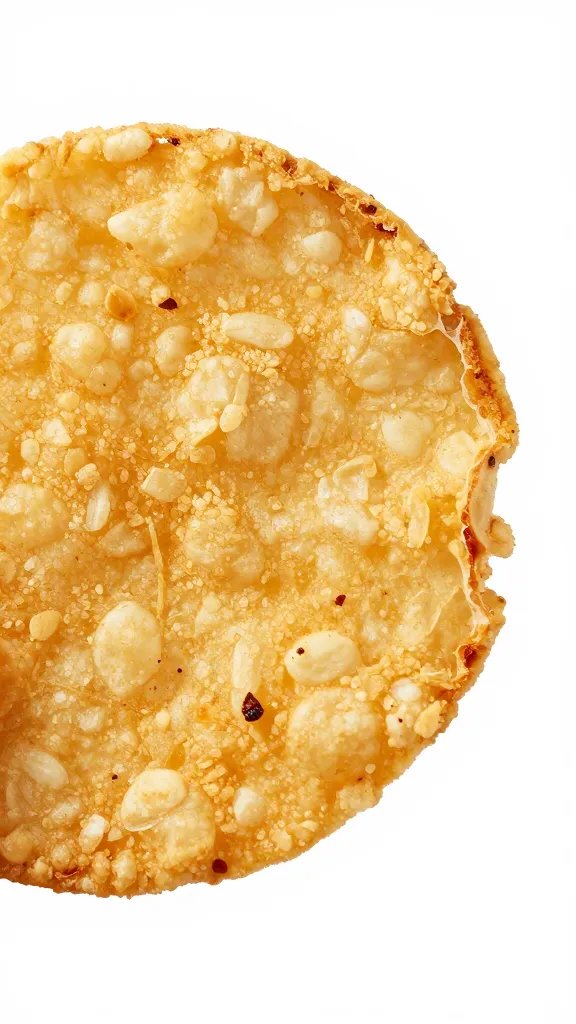
Cook at 400°F for 6–8 minutes for chips and 8–10 minutes for spears, flipping halfway. After the flip, mist again. You want even, deep golden color with no pale patches.
If They Aren’t Browning Evenly
- Move thinner pieces to the center for the last 2 minutes.
- Give the basket a gentle shake before flipping to loosen any sticking.
- Add 1–2 more minutes if you see light tan spots.
Action today: Preheat your air fryer now and run it empty for 3 minutes; you’ll see a 20–30% improvement in crisping.
Keep Them Crunchy: Resting, Serving, and Reheating
Rest the cooked pickles on a wire rack for 3 minutes. A flat plate traps steam and softens the bottom crust.
Serve with a cool, thick dip that won’t soak the coating. I stir together ¾ cup sour cream, 2 tbsp mayo, 1 tbsp pickle brine, ½ tsp dried dill, and a squeeze of lemon.
For reheating, return to the air fryer at 375°F for 3–4 minutes. The microwave turns them limp.
Action today: Set a wire rack over a sheet pan before you start cooking — it’s your insurance against sogginess.
Flavor Variations That Work With Pork Rinds
Pork rinds take seasoning well, but strong wet coatings make them slide. Keep flavors dry or finely grated.
- Nashville-Style Heat: Add ½ tsp cayenne and ½ tsp smoked paprika to the rind mix; finish with a light drizzle of warm oil mixed with a pinch of cayenne.
- Everything Bagel: Stir 1 tbsp everything seasoning into the rind mix; serve with chive cream cheese dip.
- Lemon-Pepper: Add 1 tsp lemon zest and ¾ tsp coarse black pepper to the rind mix; finish with a squeeze of lemon at the table.
Action today: Zest a lemon before you start — zest sticks to crumbs better than juice sticks to crusts.
Exact Ingredient List and One-Pass Method
Here’s the full, tested batch for 4 servings (appetizer):
- 24 dill pickle chips, ¼-inch thick, well-dried
- ½ cup almond flour
- 2 large eggs, beaten
- 1½ cups crushed plain pork rinds (from a 2–3 oz bag)
- ¼ cup grated Parmesan
- ½ tsp garlic powder, ½ tsp onion powder, ½ tsp paprika, ¼ tsp black pepper
- Avocado oil spray (or light olive oil spray)
- Pat pickles completely dry; season lightly with garlic powder and pepper.
- Set up three bowls: almond flour mix; beaten eggs; pork rind mix with Parmesan and paprika.
- Coat each pickle: almond flour, egg, pork rinds. Press to adhere. Rest on a rack 5 minutes.
- Preheat air fryer to 400°F. Spray basket and tops of pickles lightly.
- Cook 6–8 minutes for chips (8–10 for spears), flipping and misting halfway, until deep golden.
- Rest on a wire rack 3 minutes. Serve with dill-sour cream dip.
Action today: Do a 3-piece test run first; adjust time by ±1 minute for your specific air fryer model.
Frequently Asked Questions
Do I need almond flour, or can I skip it?
Use almond flour for the first dredge because it creates a dry, grippy base so the egg can cling. Skipping it leads to patchy spots where the pork rinds won’t adhere. If you don’t have almond flour, use a light dusting of cornstarch. Keep the layer thin so it doesn’t taste chalky.
My coating falls off when I flip — what am I doing wrong?
You likely started with wet pickles or rushed the set time. Dry thoroughly and rest the breaded pieces on a rack for 5 minutes before cooking. Flip with a thin spatula or tongs and support the underside rather than pinching hard. A mid-cook oil mist also helps seal the crust.
Can I make these ahead for a party?
Bread them up to 4 hours ahead and refrigerate uncovered on a rack to keep the coating dry. Air fry right before serving, then hold on a rack in a warm oven (200°F) for up to 20 minutes. Re-crisp in the air fryer for 2–3 minutes if needed.
What kind of pork rinds work best?
Use plain, unflavored pork rinds and crush to a fine crumb with a few larger bits for texture. Flavored rinds often contain sugar or colorings that burn at air fryer temperatures. Store extra crumbs in an airtight jar for one week to keep them crisp.
How do I prevent a greasy aftertaste?
Go light on oil spray — a thin mist is enough. Over-spraying saturates the coating and dulls the crunch. Choose avocado or light olive oil spray and avoid aerosol propellants that can leave an off flavor; a refillable pump mister works well.
Conclusion
You don’t need a deep fryer or specialty flours to nail pub-level crunch — just dry pickles, a smart three-part coating, and hot, even air. Start with a three-piece test batch, dial your time, and you’ll have a reliable party snack you can whip up on a weeknight. Next step: try the lemon-pepper variation and lock in your house favorite.