I used to avoid eggplant because every batch turned limp or oily, no matter how carefully I sliced it. When I finally cracked a method that stayed keto and delivered real crunch in the air fryer, I wrote it down step by step so I could repeat it — and you can too. In this guide I’ll show you the exact cut size, salting window, and breading mix that keeps the inside silky while the outside shatters. You’ll learn how to pick the right eggplant, set your air fryer for even browning, and get a true Parmesan crust without breadcrumbs.
Choose the Right Eggplant for Sweet Flavor and Firm Texture
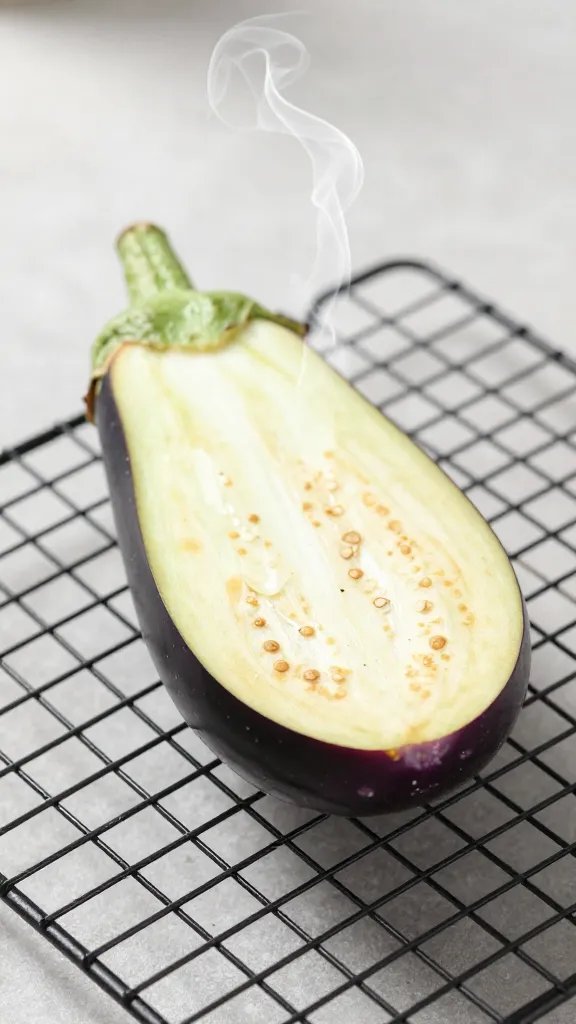
Start with medium eggplants that feel heavy for their size, with glossy skin and a green, springy cap. Overgrown fruit tastes bitter and spongy, which sabotages texture even before you slice.
Press the skin gently — it should bounce back without leaving a dent. Soft spots or dull, wrinkled skin mean the flesh has already started to break down and will steam instead of crisp.
For the best shape, pick fruits that are evenly cylindrical; tapered ends cook too fast and dry out. I use two medium globe eggplants or three slender Italian eggplants for four servings.
Action today: Pick up eggplants that are 8–10 inches long with tight, bright caps and a firm bounce-back when pressed.
Slice Thickness and Salting: The Non-Negotiables

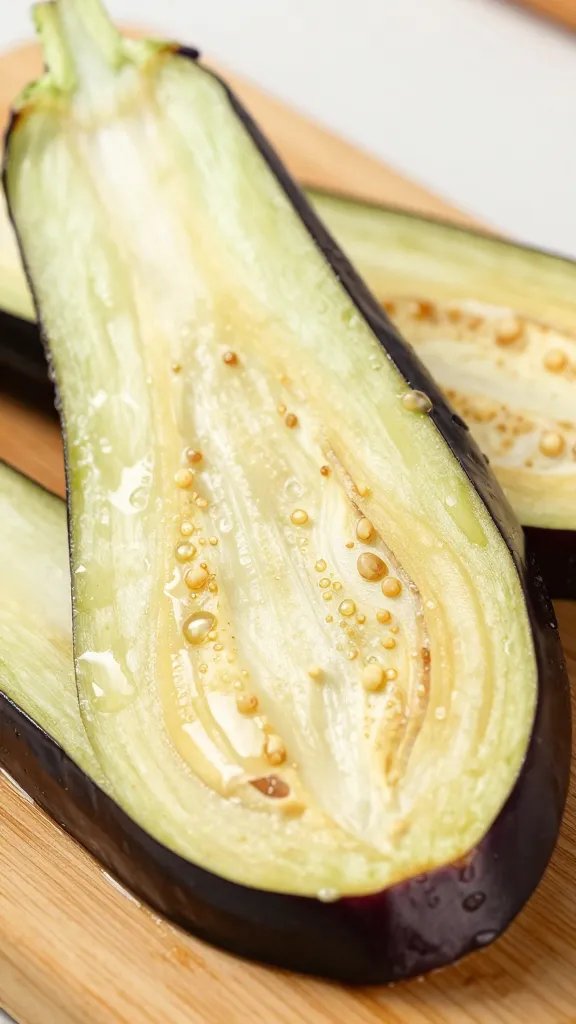
Cut rounds to a consistent 1/2 inch. Thinner slices dry before the crust browns; thicker slices resist crisping and stay spongy.
Lay slices on a rack or baking sheet and sprinkle both sides with 1/2 teaspoon kosher salt per medium eggplant. Rest for 25 minutes. This draw-out phase pulls excess moisture and tames bitterness without collapsing the flesh.
Warning Signs You Undersalted or Oversalted
- Undersalted: Beads of moisture never form on the surface; slices fry up soggy.
- Oversalted: Deep surface wrinkling and harsh briny taste after blotting.
After resting, blot both sides very well with paper towels until the surfaces look matte. Do not rinse; you’ll reintroduce water.
Action today: Set a 25-minute timer after salting so you don’t skip the moisture pull — it’s the difference between crisp and soggy.
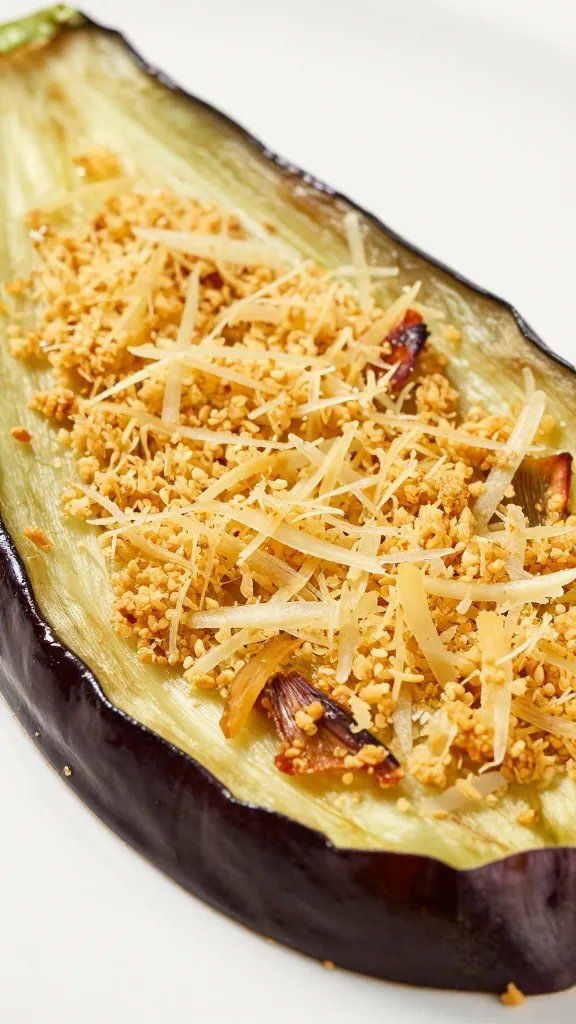
Keto Parmesan “Breading” That Actually Browns

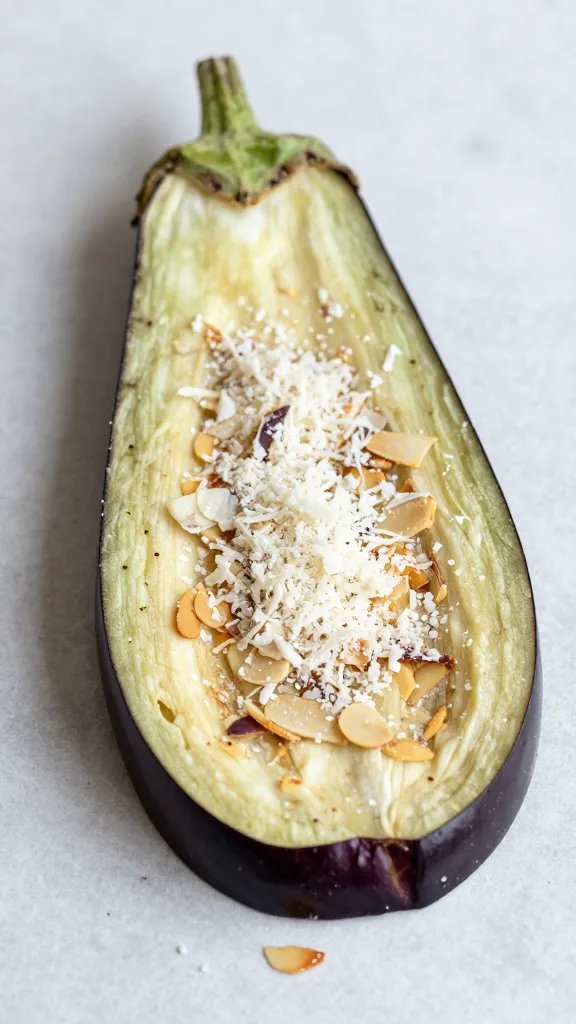
Breadcrumbs aren’t keto, so I use a mix that crisps and browns without turning greasy. The secret is balancing grated and shredded Parmesan with almond flour and a little pork rind crumb for structure.
In a shallow bowl, whisk together:
- 1/2 cup finely grated Parmesan (the powdery kind)
- 1/2 cup finely shredded Parmesan (for lacy crisp edges)
- 1/2 cup almond flour
- 1/3 cup finely crushed pork rinds (optional but best crunch)
- 1 teaspoon garlic powder, 1 teaspoon Italian seasoning, 1/2 teaspoon black pepper
For adhesion, beat 2 large eggs with 1 tablespoon water until smooth. Skip oil in the egg wash; the air fryer provides the dry heat that the cheese needs to set.
Action today: Mix your dry coating first so you can move straight from blotting to breading without letting salted slices sit wet on the counter.
Air Fryer Setup: Heat, Space, and Light Oil
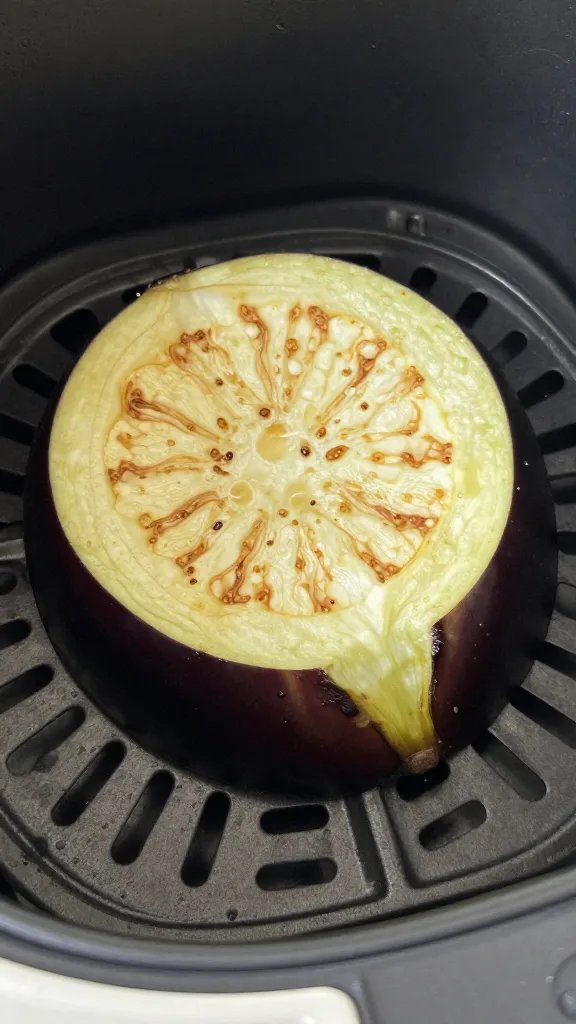
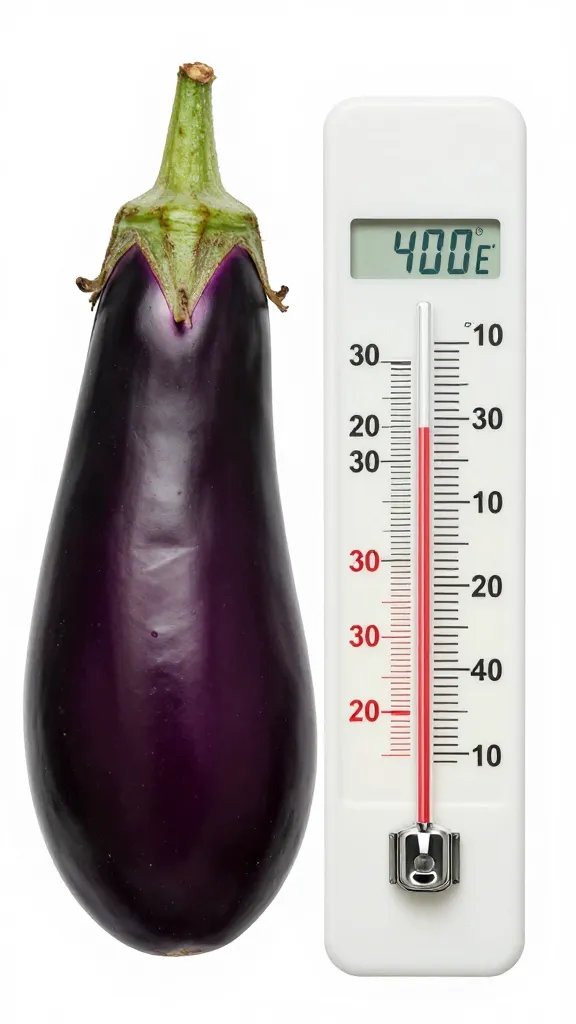
Preheat your air fryer to 390°F for a full 5 minutes. A hot basket starts the cheese crust immediately and prevents sticking.
Lightly spray the basket with avocado oil or olive oil. Do not soak — too much oil melts the cheese coating before it sets. I hold the sprayer about 10 inches away for a fine mist.
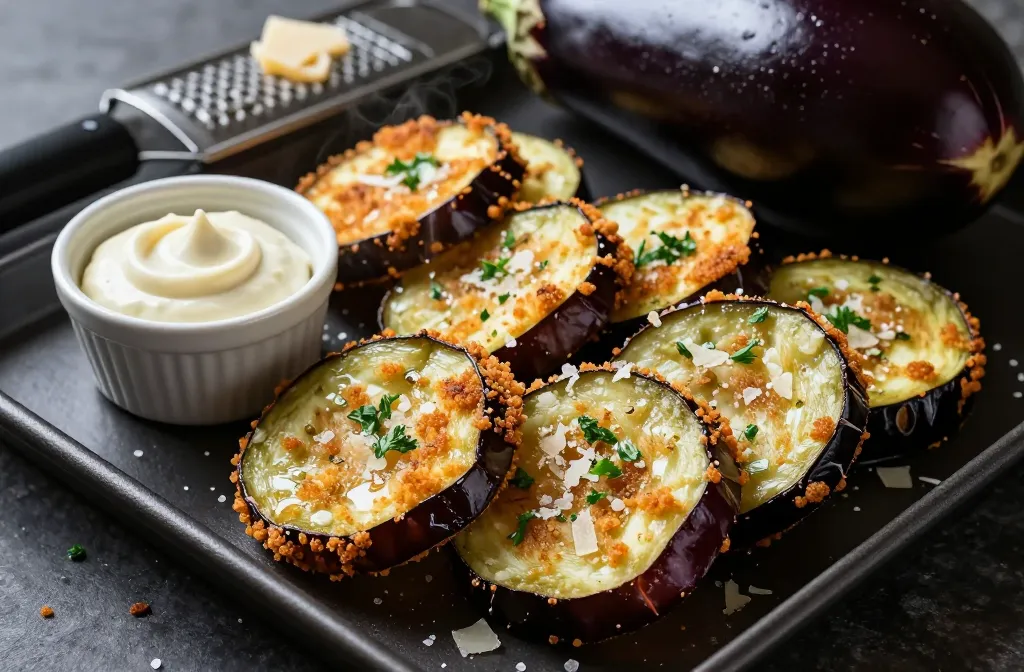
Work one slice at a time: dip in egg, let excess drip, press into the Parmesan mixture, then tap off loose bits. Lay slices in a single layer with at least 1/4 inch space between pieces so air can circulate.
Action today: Preheat your empty basket for 5 minutes and mist it lightly; that single step slashes sticking and patchy browning.
Cook Time and Flip Strategy for Even Crisping
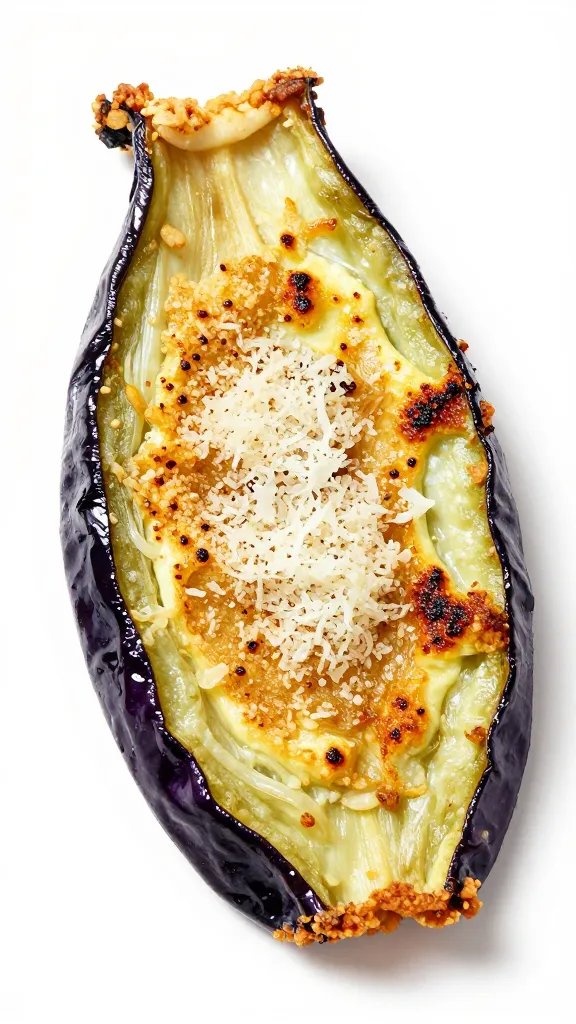
Air fry at 390°F for 7 minutes, then flip with a thin spatula to keep the crust intact. Mist the tops lightly after flipping and cook another 5–7 minutes until deep golden with browned, lacy edges.
The sweet spot is when the center yields to gentle pressure but doesn’t feel squishy. If the coating browns too fast, drop to 370°F and add 2 minutes. If pale after 12–14 minutes total, increase to 400°F for the last 2 minutes.
Step-by-Step Fix If Your First Batch Is Soggy
- Blot the next batch again until surfaces feel dry to the touch.
- Press slices more firmly into the dry mix to build a uniform coat.
- Increase preheat to 6–7 minutes and cook 8 minutes before flipping.
- Finish at 400°F for 2 minutes to lock the crust.
Action today: Flip at the 7-minute mark and finish to color — don’t stop at “golden”; go for medium brown on the high spots.
Seasoning, Sauces, and Low-Carb Toppings That Don’t Soften the Crust
Salt the finished slices only if needed; the cheese is already salty. I sprinkle red pepper flakes and a squeeze of lemon for brightness.
For dipping, serve with thick marinara warmed until it barely bubbles, or garlic-herb yogurt (1/2 cup Greek yogurt, 1 tablespoon olive oil, grated garlic, chopped parsley). Keep sauces on the side so the crust stays crisp.
To turn slices into a meal, layer with fresh mozzarella medallions and basil right before serving. Avoid baking them again under cheese — trapped steam softens the crust.
Action today: Plate the eggplant on a cooling rack set over a tray and serve sauces on the side to keep that shatter-crisp exterior.
Make-Ahead, Reheating, and Storage Without Losing Crunch
Cool leftovers on a rack, then store in a paper towel–lined container for up to 48 hours. Paper absorbs surface moisture so the crust revives better.
Reheat in the air fryer at 360°F for 4–6 minutes straight from the fridge. Skip the microwave — it steams the coating. If freezing, par-cook for 6 minutes, cool, freeze in a single layer, then bag; finish from frozen at 380°F for 8–10 minutes.
Action today: Line your storage container with fresh paper towels before the first piece goes in — it’s a small step that keeps tomorrow’s texture.
Frequently Asked Questions

Do I have to salt the eggplant, or can I skip it?
Salt it. Salting for 25 minutes pulls out excess moisture so the crust sets instead of steaming. If you truly need to skip, choose smaller Italian eggplants and slice to 3/8 inch, then cook longer at 380–390°F, but expect less crunch. Blotting aggressively becomes even more important without the salt step.
What if I don’t eat pork — can I replace the pork rinds?
Yes. Use an extra 1/4 cup almond flour plus 2 tablespoons finely ground golden flaxseed to add structure. The crust will be slightly less shattery but still crisp if you preheat well and finish the last 2 minutes at 400°F. Keep the two textures of Parmesan to encourage browning.
My coating falls off when I flip — what am I doing wrong?
Two issues cause this: wet surfaces and thick, gloppy egg wash. Blot until the slices feel dry, let excess egg drip for 3–4 seconds, and press firmly into the dry mix. Use a thin, wide spatula to flip at 7 minutes, not tongs, and slide under the crust instead of lifting by the edge.
Can I make this dairy-free and still keep it keto?
For dairy-free, swap Parmesan with a finely ground mix of almond flour (3/4 cup) and nutritional yeast (1/4 cup), plus 1 tablespoon sesame seeds for toastiness. You’ll get good color but slightly softer structure. Preheat longer and finish hotter (400°F for 2–3 minutes) to compensate for the lack of cheese melt.
How do I scale this for a crowd without losing crispness?
Work in batches and hold cooked slices on a wire rack in a 200°F oven. Don’t stack. Refresh the final tray in the air fryer at 380°F for 2 minutes before serving. Mix a double batch of the dry coating up front so you maintain the press-and-go rhythm.
Conclusion
You don’t need breadcrumbs or deep oil to get eggplant that crunches outside and stays silky inside — you need the right fruit, a 25-minute salt, a smart Parmesan-almond coating, and a properly heated air fryer. Set up your first batch exactly as written, then adjust the final 2 minutes to match your preferred color. If you’re ready to expand, try the same method with zucchini rounds next and compare browning times — once you master the crust, you can apply it to half your summer produce without breaking keto.