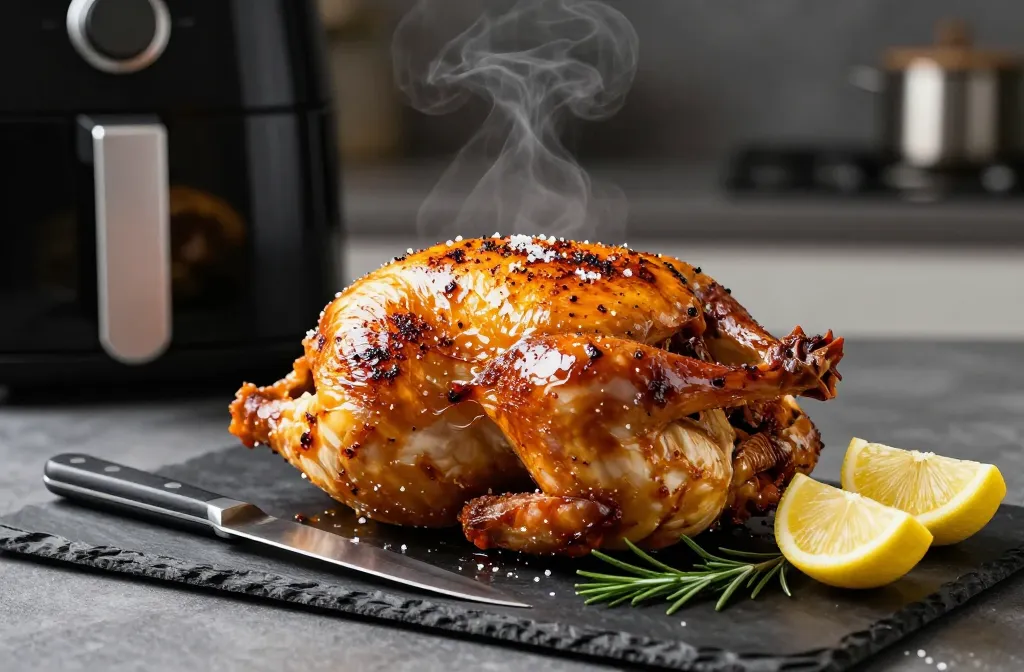
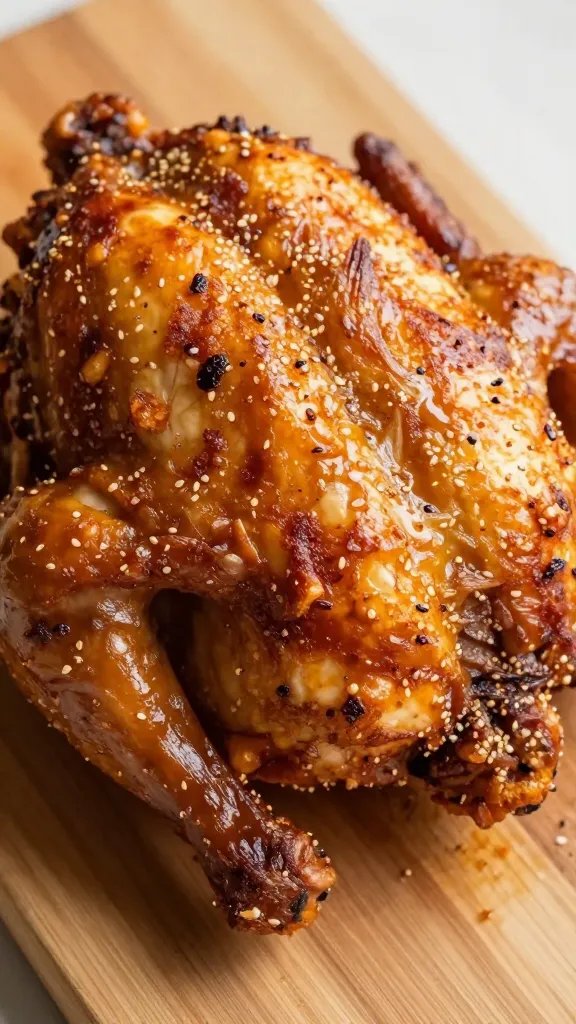
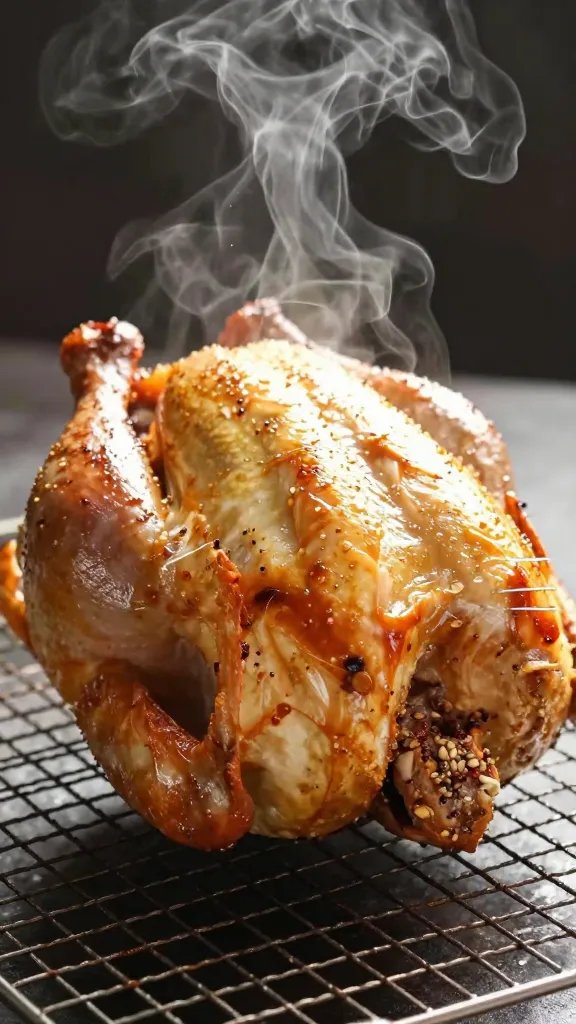
A whole chicken with crackling skin and evenly cooked meat — breast pulling cleanly from the bone, thighs at the temperature where the fat has finished rendering — achieved in under an hour in the air fryer using a technique borrowed from professional rotisserie: breast-side down first. The dry brine is what separates serviceable skin from genuinely crispy skin, and the breast-side-down method is what separates dry breast meat from a bird worth carving. Below: the mechanics of both, a complete timing guide by bird size, four seasoning variations including a Middle Eastern version worth making, and a meal prep framework that turns one cook into four distinct meals.
Keto Air Fryer Rotisserie-Style Chicken
Ingredients
Equipment
Method
- Pat chicken completely dry with paper towels, including inside the cavity. Mix salt, pepper, smoked paprika, garlic powder, onion powder, and thyme. Rub generously over the entire surface and under the skin wherever accessible. Refrigerate uncovered on a wire rack for 4–24 hours.
- Remove chicken from fridge 20 minutes before cooking. Brush thoroughly with avocado oil or ghee. Tuck wing tips behind the back and tie the legs together if possible.
- Preheat air fryer to 360°F (182°C) for 5 minutes.
- Place chicken breast-side down in the basket. Cook for 30 minutes.
- Using tongs and a wooden spoon through the cavity, carefully flip the chicken breast-side up. Cook for a further 20–30 minutes until the breast reads 160–162°F (71–72°C) and the thighs read 175–185°F (79–85°C).
- Rest on a wire rack for 10–15 minutes before carving. Carryover heat will bring the breast to the safe 165°F (74°C) threshold during the rest.
Notes
The breast-side-down method is not optional if even cooking is the goal: starting skin-side down on the more forgiving thigh meat gives the delicate breast a lower ambient temperature for the first half of the cook.
Why This Recipe Works
Three mechanisms determine whether a whole chicken cooked in an air fryer is worth making or just technically edible. All three are addressed here.
Breast-side down for the first 30 minutes solves the fundamental whole-chicken problem. Breast meat and thigh meat have different optimal temperatures — breast is done at 165°F and becomes dry above it; thighs benefit from 175–185°F for full fat rendering and collagen conversion. Starting breast-side down places the most delicate meat furthest from the heating element and in the lower-temperature zone of the air fryer basket for the first half of the cook. The thighs, sitting on top, face the highest heat first and begin rendering. By the time the chicken is flipped, the breast has a head start on temperature without having been overexposed to high heat. The result is a bird where both cuts finish within their correct ranges simultaneously.
The dry brine removes surface moisture — the direct cause of soft skin. Water on the skin surface requires energy to evaporate before the skin temperature can rise high enough for Maillard browning. A dry brine draws moisture out of the skin via osmosis; that moisture is then reabsorbed into the meat, carrying salt with it, before further evaporation under refrigeration removes it from the surface entirely. A 4-hour brine produces a clear improvement over unbaked; a 24-hour brine produces the best result. The fridge environment — cool, dry air — accelerates surface drying in a way no room-temperature rest can replicate.
The air fryer’s convection heat reaches the entire surface simultaneously. A conventional oven heats primarily from above and below, leaving the sides of the bird in a lower-heat zone throughout the cook. The air fryer’s circulating hot air surrounds the bird on all sides — which is why the skin on the legs, back, and sides of the breast crisps to the same quality as the top surface, something a conventional oven cannot reliably achieve without rotation.
On resting before carving: Resting is not about letting the chicken cool down — it is about allowing the proteins to reabsorb moisture they expelled during cooking. A breast pulled at 160–162°F and rested for 10–15 minutes on a wire rack will carry over to 165°F and retain significantly more juice when carved than one pulled at 165°F and carved immediately. The wire rack matters: resting on a flat surface traps steam under the back and softens the skin on the underside.
Which Method Is Right for You?
A whole bird is the best use of this recipe, but the air fryer imposes size limits that make the spatchcock method worth understanding before you start.
| Method | Best For | Cook Time | Difficulty |
|---|---|---|---|
| Whole bird, breast-side down first | Best skin coverage, most even result, maximum yield | 50–60 min at 360°F | Beginner |
| Spatchcock (backbone removed, flattened) | Larger birds, faster cook, more even skin contact | 35–45 min at 370°F | Intermediate |
| Bone-in thighs and drumsticks — same rub | Smaller air fryer, faster weeknight cook, no flipping required | 24–28 min at 375°F | Beginner |
| Halved chicken (cut through backbone and keel) | Fits most 4-quart baskets, retains whole-bird flavour | 30–35 min at 370°F | Intermediate |
For a first cook, use a whole bird under 2kg (4.5 lb) with the breast-side-down method. It requires no additional butchery, uses the natural structure of the bird to manage the temperature differential between breast and thigh, and fits most 5–6 quart basket air fryers. If your bird is above 2kg, spatchcock — the flattened bird cooks faster and more evenly in a confined space than a tall upright bird competing with the basket walls for airflow.
Timing Guide by Bird Size and Method
| Bird Size | Method | First Stage | Second Stage | Rest |
|---|---|---|---|---|
| 1.4–1.6kg (3–3.5 lb) | Whole, breast-down | 25 min at 360°F | 15–20 min at 360°F | 10 min |
| 1.8–2kg (4–4.5 lb) | Whole, breast-down | 30 min at 360°F | 20–30 min at 360°F | 12–15 min |
| 2–2.3kg (4.5–5 lb) | Spatchcock | 20 min at 370°F skin-down | 15–25 min at 370°F skin-up | 10 min |
| Any size — pieces only | Thighs + drumsticks | 15 min at 375°F | 9–13 min at 375°F flipped | 5 min |
Times are a starting framework — always verify with a thermometer. The thickest part of the breast should read 160–162°F at pull; the thigh should read 175°F minimum. Air fryer models vary in heating efficiency, and a bird that fits snugly in the basket will cook faster than one with clearance on all sides due to reflected heat. When in doubt, extend the second stage in 5-minute increments and check temperature rather than pulling at the scheduled time.

Six Technique Points That Determine the Result
In order of impact. The first three are the difference between a competent cook and an excellent one.
- Dry brine uncovered in the fridge — not on the counter, not in a bag. The refrigerator’s dry air is part of the process. Sealing the chicken in a bag after applying the dry rub traps moisture against the skin rather than allowing it to evaporate. Place on a wire rack over a tray, uncovered, for the full brine period. If the fridge shelf is not available, any cool, dry surface will do — the fridge simply produces the most consistent result.
- Pat completely dry and bring to room temperature before cooking. Even a well-brined bird will have some surface moisture after refrigeration. Pat with paper towels immediately before seasoning with oil. Twenty minutes at room temperature before cooking reduces the temperature differential between the cold meat and the hot air fryer, which shortens the total cook time and produces more even cooking throughout.
- Get the rub under the skin wherever accessible. The skin acts as an insulating layer — seasoning applied only to the surface flavours the skin, not the meat underneath. Loosen the skin over the breast and thighs with your fingers and work the rub directly onto the meat surface. The fat in the ghee or avocado oil under the skin also bastes the meat as it renders during cooking.
- Tuck the wing tips and tie the legs. Exposed wing tips will char before the rest of the bird is cooked — tuck them firmly behind the back. Tied legs hold the bird’s shape in the basket and prevent the cavity from flopping open, which would allow hot air to circulate inside the bird and overcook the breast from the inside out.
- Use a thermometer on both the breast and the thigh before pulling. The breast and thigh will reach their target temperatures at different times depending on the specific bird and the air fryer model. Check both. A bird where the breast reads 165°F but the thigh reads 165°F is not done — the thigh will not have the right texture. A bird where the thigh reads 185°F but the breast reads 155°F needs more time. Both targets must be met simultaneously.
- Rest on a wire rack, not a cutting board. A cutting board traps steam under the back of the bird and softens the skin on the underside during the rest period. A wire rack allows air circulation on all sides, which maintains the skin quality on the back and legs while the proteins reabsorb moisture and the carryover heat completes the breast cook.
The difference between a 4-hour dry brine and a 24-hour dry brine on the same recipe is visible before the chicken goes into the air fryer. The overnight bird has noticeably drier, more taut skin. It produces a different surface going into the cook — and a different result coming out of it.

Four Seasoning Variations Worth Making
The method does not change across any of these. Only the rub changes. All are applied in the same quantities and under the skin in the same way.
Lemon-Herb
Replace smoked paprika with sweet paprika and add 1 tsp lemon zest, 1 tsp fresh rosemary (finely chopped), and an extra ½ tsp dried thyme to the rub. Finish immediately after the rest with a squeeze of half a lemon over the carved meat — not before, as the acid will soften the skin surface if applied during cooking. A brighter, cleaner flavour profile than the base recipe; better paired with a zucchini or asparagus side than a heavier cauliflower mash.
~0g net carbs Best for: weeknights, lighter mealsMiddle Eastern Spice
Replace the base rub with: 1 tsp sumac, 1 tsp ground coriander, 1 tsp ground cumin, 1 tsp smoked paprika, ½ tsp turmeric, ½ tsp cinnamon, 1 tsp garlic powder, 1 tsp salt, ½ tsp black pepper. Use ghee as the fat — the milk solids carry the spice compounds more evenly under the skin than avocado oil. Serve with a tahini-lemon sauce (tahini, lemon juice, water, garlic, salt) alongside the carved bird. One of the strongest flavour variations on this base technique.
~1g net carbs Best for: entertaining, varietySmoky Chipotle
Add 1 tsp chipotle powder and ½ tsp ground cumin to the base rub. Chipotle brings a smokiness distinct from paprika — darker and slightly sweet from the dried jalapeño rather than the clean smoke of paprika. Apply lime zest to the rub and finish the carved chicken with fresh cilantro and a squeeze of lime. Works well with a shredded slaw or avocado alongside rather than a heavier keto side.
~1g net carbs Best for: meal prep bowls, informal servingGarlic-Parmesan Finish
Use the base rub as written. In the final 5 minutes of the second cooking stage, brush the breast and thigh skin with a mix of 1 tbsp melted ghee, 1 tsp garlic powder, and 2 tbsp finely grated Parmesan. The Parmesan forms a thin crust on the skin surface during the final minutes of cooking — it adds approximately 0.5g net carbs per serving and a savoury crust that reads well against the plain skin of the base recipe.
~0.5g net carbs Best for: dinner party, weekend cookWhat to Serve With This
A whole chicken at 360 calories per quarter portion has room for sides with more substance — the protein and fat content are high enough that the sides can be lighter without the meal feeling incomplete.
- Cauliflower mash with roasted garlic and butter: Steam cauliflower until completely tender, blitz with 2 tbsp butter, 2 cloves roasted garlic, salt, and a splash of cream. The richness of the mash sits alongside the rendered chicken fat without competing — a natural pairing that absorbs the pan juices well. Adds approximately 5g net carbs per cup serving.
- Shaved Brussels sprouts pan-seared in bacon fat: Trim and halve Brussels sprouts, sear cut-side down in bacon fat over high heat until the cut surface chars, finish with a splash of apple cider vinegar and a pinch of mustard powder. The bitterness and acid cut through the richness of the chicken skin. Adds 5g net carbs per cup.
- Zucchini ribbons with lemon and dill: Use a peeler to strip zucchini into wide ribbons, sauté briefly in butter — 90 seconds maximum, or they release water — and finish with lemon zest and fresh dill. A light, fast side that does not compete with the chicken for attention on the plate. Adds under 3g net carbs per serving.
Keto macro note (quarter chicken + cauliflower mash): Approximately 5g net carbs | 40g protein | 28g fat | 430 calories. With Brussels sprouts instead: 5g net carbs | 40g protein | 26g fat | 415 calories. The pan juices from the rested chicken — ghee, rendered chicken fat, and spice residue — make a simple pan sauce: deglaze the resting rack tray with 2 tbsp chicken stock and pour over the mash.
Meal Prep and Storage
A 2kg chicken yields approximately 700–800g of usable meat. Carved and portioned correctly, it produces four distinct meals with no repetition — which is the practical case for making this over boneless cuts that yield less volume and fewer options.
How to carve for meal prep: Remove both legs (thigh and drumstick attached) first — pull the leg away from the body and cut through the joint. Separate the thigh from the drumstick at the joint. Remove both breasts by cutting along the keel bone and following the ribcage. Slice breasts against the grain for the best texture. Pull any remaining meat from the carcass and wings — this is the most flavourful meat for salads and bowls.
Portion ideas for the week:
- Day 1: Carved chicken with cauliflower mash and pan juices — use the warm bird the same evening it is cooked for the best skin.
- Day 2: Chicken Cobb — sliced breast over cos lettuce with avocado, crispy bacon, blue cheese, and ranch. The breast holds its texture cold better than the thigh.
- Day 3: Shredded thigh meat in lettuce wraps with ranch, celery, and a few drops of hot sauce — the thigh’s higher fat content makes it the better choice for eating cold.
- Day 4: Pulled carcass meat through zoodles with butter, Parmesan, and cream — the smaller irregular pieces from the carcass absorb sauce better than sliced breast or thigh.
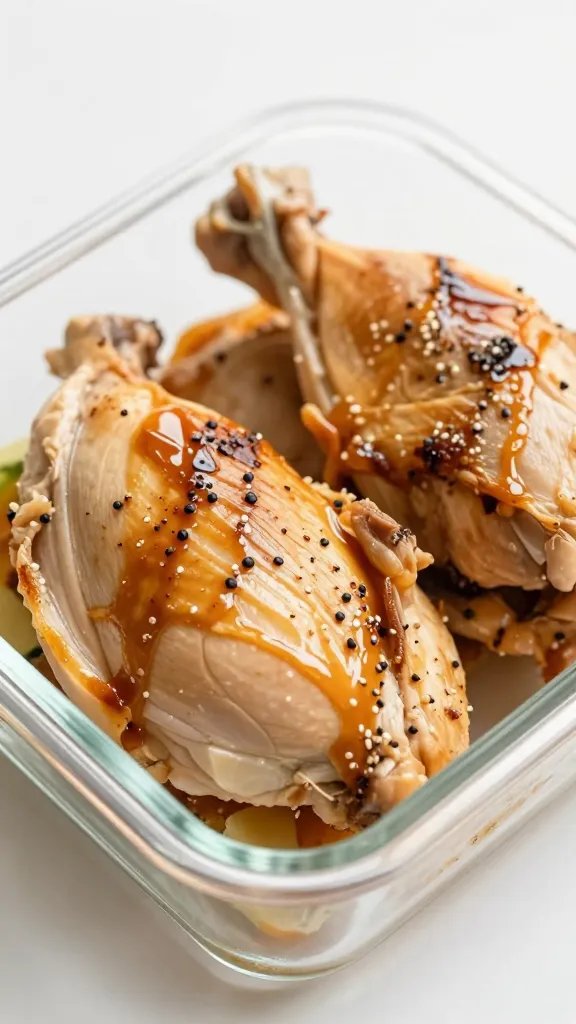
Storage: Store white and dark meat separately in airtight containers — white meat dries out faster and benefits from being stored with a tablespoon of chicken stock or pan juices. Fridge: 3–4 days. Freezer: up to 3 months, tightly wrapped or vacuum-sealed.
To reheat: Air fryer at 350°F for 5–7 minutes for pieces with skin. For shredded or sliced meat going into a salad or bowl, microwave briefly with a splash of broth — skin quality is irrelevant in that context and the microwave preserves moisture better than the air fryer for already-pulled meat.
On the carcass: Do not discard it. Simmer the carcass with a celery stalk, half an onion, a bay leaf, and water for 2–3 hours for a basic chicken stock. Zero carbs, useful for reheating the stored meat without drying it out, and the gelatin from the bones improves the texture of any sauce or mash it goes into.
Troubleshooting

Frequently Asked Questions
Most whole-chicken recipes were developed for conventional ovens where the heat source is fixed and rotation is not practical. In an air fryer, you can flip — and the physics of whole-chicken cooking make flipping worthwhile. Breast meat is done at 165°F; thigh meat benefits from 175–185°F. Cooking breast-side down for the first 30 minutes places the breast furthest from the heating element during the high-temperature early stage and allows the thighs to begin rendering at the correct pace. By the time the bird is flipped, the breast has a safe temperature head start and the thighs have begun crisping. Both cuts finish within their target ranges at roughly the same time.
Some is, most is not. The majority of supermarket rotisserie chickens are brined in a solution that contains dextrose or modified starch, and the seasoning blend typically includes sugar. The carbohydrate content is low enough to remain broadly keto-compatible — usually 1–3g per serving — but the ingredients are not clean, and the sodium content is often very high. Making it at home removes the sugar entirely and gives you full control over the seasoning. The cooking time difference between supermarket convenience and home-cooked is approximately 60 minutes with minimal active involvement.
A whole frozen chicken should not go directly into the air fryer. The outside will cook and begin to burn before the interior has thawed, producing a bird with a charred exterior and a raw or underdone centre. Thaw completely in the fridge — a 2kg bird takes 24–36 hours — before proceeding with the dry brine and cook. If time is the constraint, cold-water thawing in a sealed bag in a bowl of cold water, changed every 30 minutes, thaws a 2kg bird in approximately 2 hours. Dry and brine after thawing.
Ghee produces a more flavourful result under the skin because its milk solids caramelise slightly during cooking and produce a brown, nutty quality that avocado oil — being fully neutral — cannot replicate. Avocado oil has a higher smoke point (approximately 270°C versus ghee at 250°C) and is the better choice if your air fryer tends to run hot or if the rub is applied very thickly. For a standard cook at 360°F, the smoke point difference is not relevant — ghee is the better flavour choice and both perform safely at this temperature.
A 5–6 quart basket air fryer will accommodate most birds up to 2kg (4.5 lb) with enough clearance for air to circulate. The test before seasoning: place the uncooked bird breast-side down in the cold basket — there should be at least 2–3cm clearance between the back of the bird and the top of the basket when the basket is inserted. If the bird presses against the heating element cover, it is too large for whole-bird cooking in that unit and should be spatchcocked or broken into pieces.
Your Next Recipe
Keto Air Fryer Chicken Meal Prep — 4 Flavours, 1 Hour — once you have the whole-bird yield logic in place from this recipe, the meal prep format expands it across four flavour profiles cooked simultaneously.
The dry-brine technique carries directly across; the difference is in batch cooking multiple smaller pieces rather than one whole bird, which changes the yield-to-time ratio in favour of higher variety across the week.
The whole chicken is the most efficient protein purchase in the supermarket — more usable meat per kilogram than any boneless cut, with the carcass producing stock that has practical use throughout the week. The air fryer closes the gap between whole-bird cooking and convenience by removing the hour-and-a-half oven time and the basting cycle that conventional recipes require. What was a Sunday project becomes a viable weeknight decision. The dry brine is still an overnight commitment — but that is passive time, not active time, and the skin quality it produces is not achievable any other way.
Did you cook the whole bird or spatchcock it — and which size air fryer were you working with?
More Keto Air Fryer Chicken Recipes
Printable Recipe Card
Want just the essential recipe details without scrolling through the article? Get our printable recipe card with just the ingredients and instructions.