Craving something cute, crunchy, and ridiculously easy? These air fryer Rice Krispie treats bring Easter magic with zero oven drama. We’re talking adorable shapes, fast set times, and mix-ins that’ll make your inner child do cartwheels. Ready to turn a humble cereal bar into party-level dessert? Let’s hop to it.
1. The No-Melt, No-Mess Base You’ll Nail Every Time
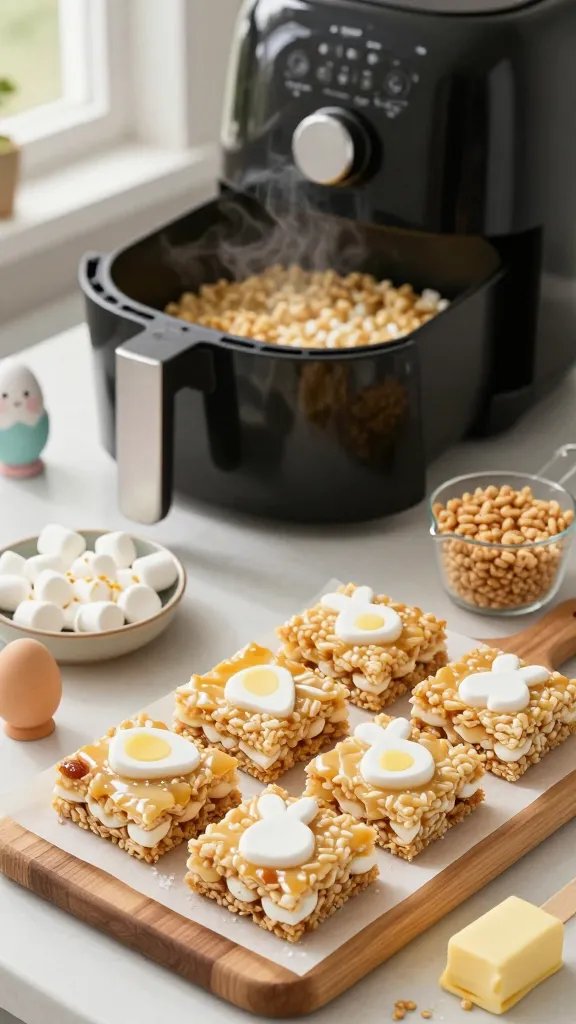
You can’t rock fun shapes or wild mix-ins without a foolproof base. We’ll keep it classic and tweak it so it holds shape, slices cleanly, and still tastes like buttery, marshmallowy nostalgia. The air fryer adds a quick set and just-right warmth without scorching.
Core Ingredients That Just Work
- Butter: 4 tablespoons (salted = better flavor, IMO)
- Mini marshmallows: 10 ounces (mini melt faster and more evenly)
- Rice Krispies: 6 cups (or any crisp rice cereal)
- Pinch of salt: Trust me, it sharpens the sweetness
- Vanilla extract: 1 teaspoon for that bakery vibe
Quick Air Fryer Method
- Line a square pan with parchment, leaving flaps to lift. Lightly spritz with nonstick spray.
- Melt butter and marshmallows on the stovetop over low heat (or microwave in 20–30 second bursts), then stir in salt and vanilla.
- Fold in cereal gently until coated. Don’t crush it—you want that signature snap.
- Press into pan with a buttered spatula or parchment. Pop the pan into the air fryer at 250°F for 2–3 minutes to lightly warm and fuse.
- Cool 15–20 minutes before cutting, or chill 10 minutes if impatient (same).
Use this base for every shape and add-in you try. It’s sturdy but soft—a sweet spot for cute molds and clean cuts.
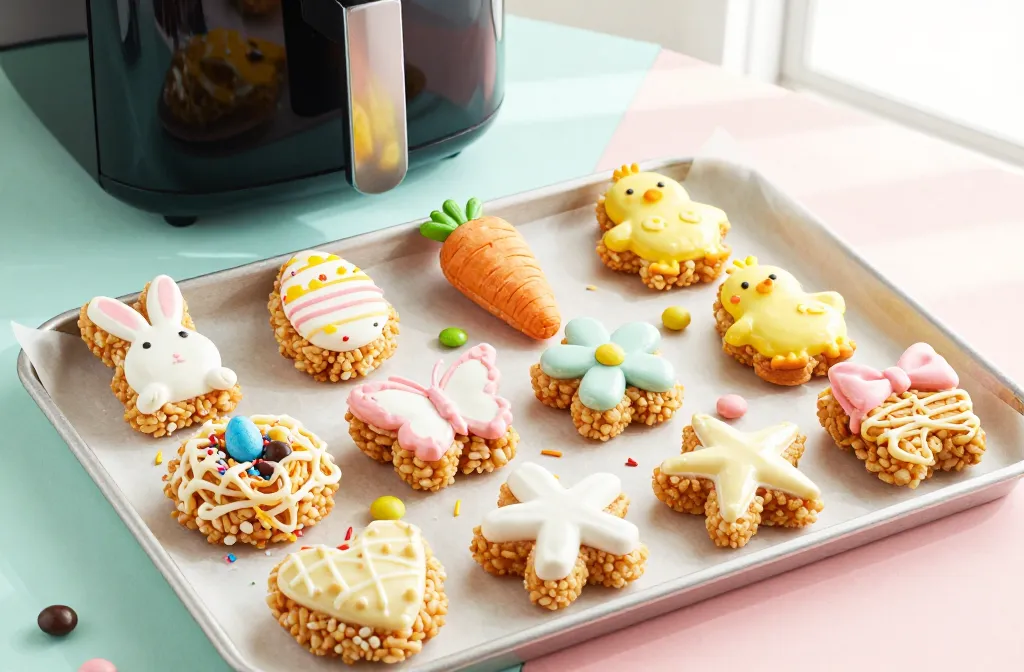
2. 12 Easter Shapes That Look Boutique (But Take Minutes)
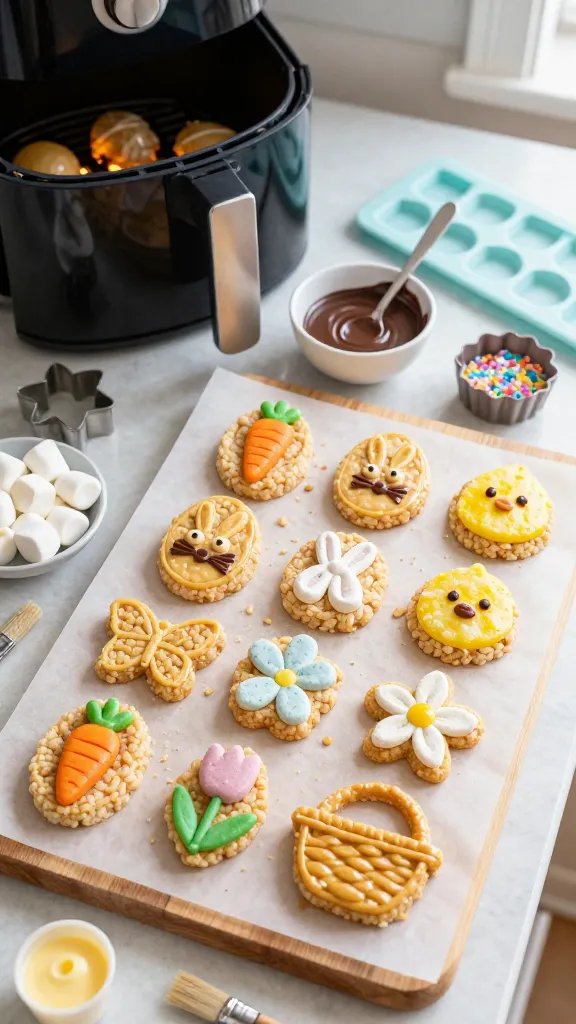
Let’s get festive. You don’t need fancy tools—cookie cutters, silicone molds, and your hands will do the trick. The air fryer’s quick warm-up helps “set” edges so shapes hold better and don’t crumble.
Shape Menu: Pick Your Favorite Dozen
- 1) Classic Egg Ovals: Use an egg-shaped cookie cutter. Dip in buttered spray between cuts for perfect edges.
- 2) Bunny Faces: Round cutter for the face; add mini marshmallow halves for cheeks and draw whiskers with melted chocolate.
- 3) Carrots: Cut triangles, tint a third of the mix orange with gel color. Add green coconut “tops.”
- 4) Crosses: Simple and elegant. Drizzle white chocolate and sprinkle gold sugar.
- 5) Baby Chicks: Round shapes with a yellow candy melt coat. Add mini chocolate chip eyes and an orange sprinkle beak.
- 6) Tulips: Tulip cookie cutter + pink sanding sugar for sparkle.
- 7) Lambs: Cut circles, pipe mini marshmallow “wool” around the edge. Black sprinkle eyes = instant cute.
- 8) Bunny Ears Dippers: Elongated ovals on popsicle sticks. Dip tips in white chocolate and pink sugar.
- 9) Basket Squares: Score a crisscross pattern on top and fill indent with mini egg candies.
- 10) Butterfly Halves: Cut two teardrops and join at a center jellybean “body.”
- 11) Mini Nests: Press warm mix into silicone muffin cups. Add shredded coconut “hay” and chocolate eggs.
- 12) Speckled Eggs: Dip ovals in pastel candy melts; flick cocoa + vanilla extract with a brush for speckles.
Shaping Tips
- Work while warm. If the mix stiffens, air fry the whole pan at 200–225°F for 1–2 minutes to soften.
- Grease everything—cutters, hands, spatulas. A tiny dab of butter prevents pulling.
- For sticks, insert lollipop or popsicle sticks while still warm, then quick-chill 10 minutes.
These shapes turn a basic treat into a dessert tray star. Party platters, bake sales, lunchbox surprises—done and done.
3. Mix-In Magic: 20+ Ideas That Don’t Wreck the Texture
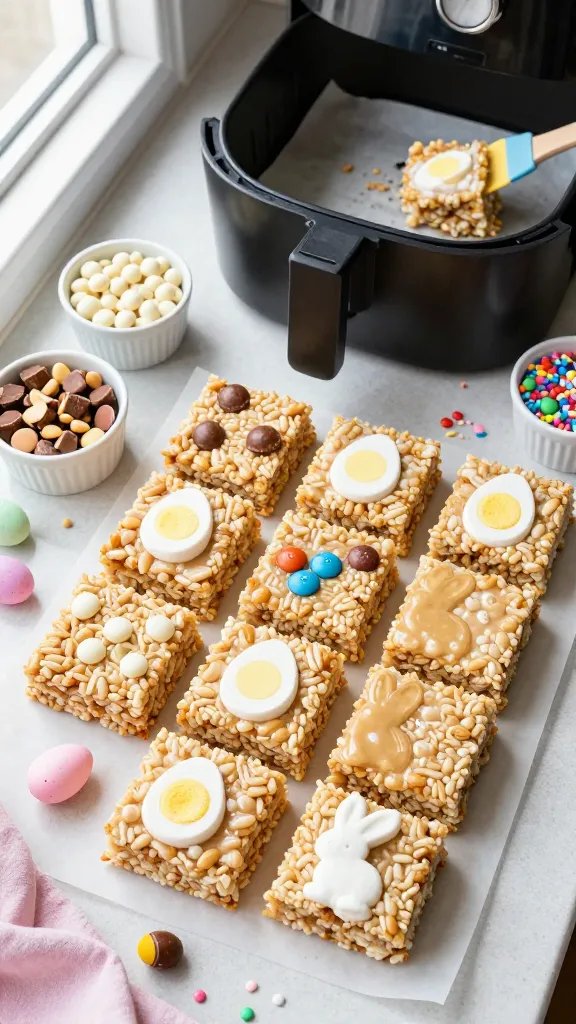
You can throw the pantry at Rice Krispie treats, but not everything plays nice. These mix-ins add flavor, color, and crunch without turning your bars soggy or rock-hard. Start with small amounts and build to taste.
Chocolates & Candies
- Mini M&Ms or pastel M&Ms (fold in after slight cooldown so they don’t melt)
- White chocolate chips or chopped candy melts
- Mini chocolate eggs (press on top instead of mixing to avoid crumbling)
- Chopped peanut butter cups or mini PB chips
- Sprinkles (jimmies work best; nonpareils can bleed—FYI)
Fruity & Fun
- Freeze-dried strawberries or raspberries (crush slightly; big flavor, zero moisture)
- Dried blueberries or cherries (chop small)
- Orange zest + white chocolate drizzle = classy brunch energy
- Shredded coconut (toasted for extra depth)
Crunch Add-Ons
- Crushed pretzels or salted potato chips for a sweet-salty hit
- Toasted almonds or pistachios, finely chopped
- Mini marshmallows folded in at the end for pockets of goo
Flavor Bombs
- Brown butter instead of regular—cook butter until nutty and golden
- Almond extract or lemon extract (go light—these are potent)
- Cinnamon or cardamom for cozy vibes
- Peanut butter or Biscoff spread (2–3 tablespoons melted into the marshmallow)
How Much To Add
- Mix-ins: 1–1.5 cups total per batch, max. Too much = crumbles.
- Big chunks (eggs, cookies): press on top after spreading, then air fry 1–2 minutes at 250°F to set.
Mix-ins personalize your treats without extra fuss. Aim for color + texture combos that scream spring and you’re golden.
4. Decorating Like You Actually Know What You’re Doing
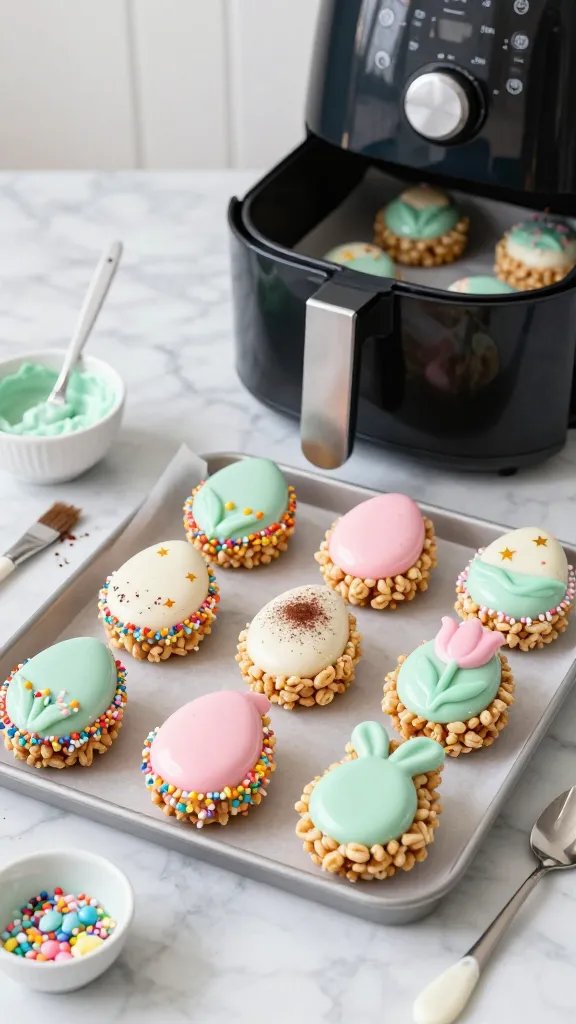
Decor doesn’t need piping skills or an art degree. Simple drizzles, dips, and dustings make your shapes look bakery-bought. The air fryer helps candy melts set quickly so you can stack and go.
Easy Finishes
- Pastel drizzle: Melt candy wafers in 20-second bursts; drizzle with a fork in two colors.
- Speckles: Mix cocoa powder with a splash of vanilla extract; flick with a pastry brush.
- Confetti edges: Dip sides in melted white chocolate, then roll in sprinkles.
- Gilded touch: Edible gold stars or gold sanding sugar on crosses and tulips.
- Coconut snow: Toss coconut with one drop green gel color + a teaspoon water for “grass.”
Smart Workflow
- Decorate on parchment so you can lift and move quickly.
- After drizzling, air fry at 180–200°F for 30–60 seconds to gently melt and self-level, then chill 5 minutes.
- Store decorated pieces in a single layer until fully set, then stack with parchment between.
These tricks make your treats camera-ready with minimal effort. Great for gifts, dessert boards, or that “wow” moment before brunch.
Color Palette That Pops
- Soft pastels: Pale pink, mint, lilac, butter yellow
- Neutrals to balance: White drizzle, milk chocolate dots
- One bold accent: Hot pink or teal, used sparingly
Stick to three colors max so your tray looks cohesive, not chaotic. Your feed will thank you.
5. Make-Ahead, Storage, and Party Tricks (Because You’re Busy)
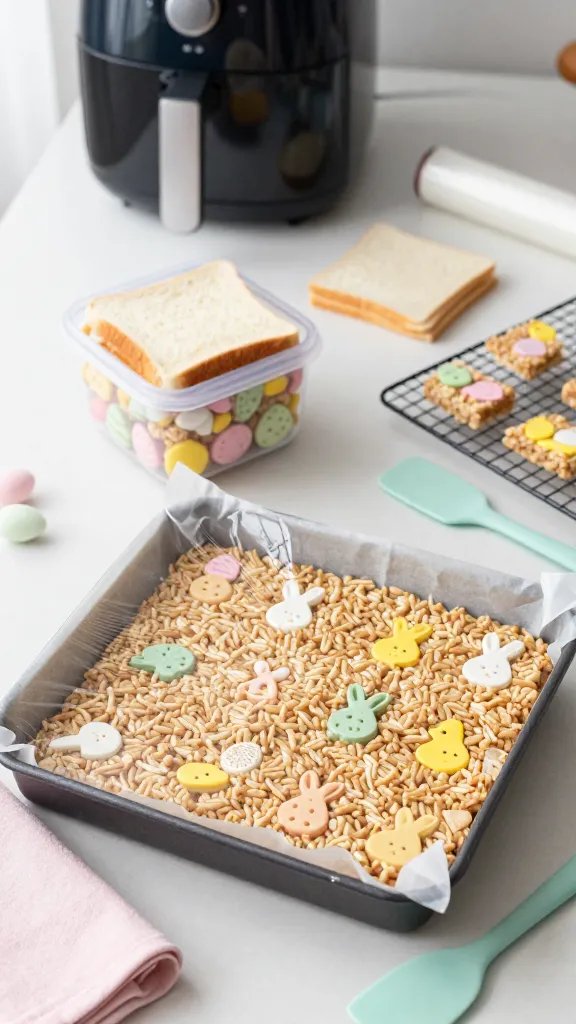
Nothing kills the vibe like stale cereal. A few tweaks keep your treats chewy and fresh for days. Plus, a couple hosting hacks so you don’t play dessert Tetris an hour before guests arrive.
Timing & Storage
- Make-ahead: 1–2 days early works great. Shape and set, then store undecorated.
- Wrap right: Layer in airtight containers with parchment. Press plastic wrap directly onto the surface if storing in a pan.
- Keep soft: Tuck a slice of soft bread in the container (like with cookies). Replace daily.
- Room temp only: Refrigeration can harden them. If they firm up, air fry 1 minute at 200°F to soften, then cool 5 minutes.
Batching For Parties
- Make one base, split into 2–3 bowls, and add different mix-ins to each. Instant variety.
- Press each flavor into a separate parchment-lined quarter sheet for easy lifting and cutting.
- Cut shapes, then decorate in “stations” by color. You’ll feel like a confectionery CEO.
Packaging & Gifting
- Wrap individual shapes in cellophane with pastel ribbon and a tag.
- For kid favors, add a popsicle stick handle and a sprinkle dip.
- Transport in snug containers so decorations don’t smudge.
These tips save time and tantrums. You’ll serve treats that taste bakery-fresh, even on day two—seriously.
Ready to make Easter sweeter without babysitting an oven? Grab a bag of marshmallows, fire up the air fryer, and start shaping your cutest dessert yet. With 12 shapes and endless mix-ins, you’ll crank out tray-worthy treats that disappear faster than jelly beans after brunch.