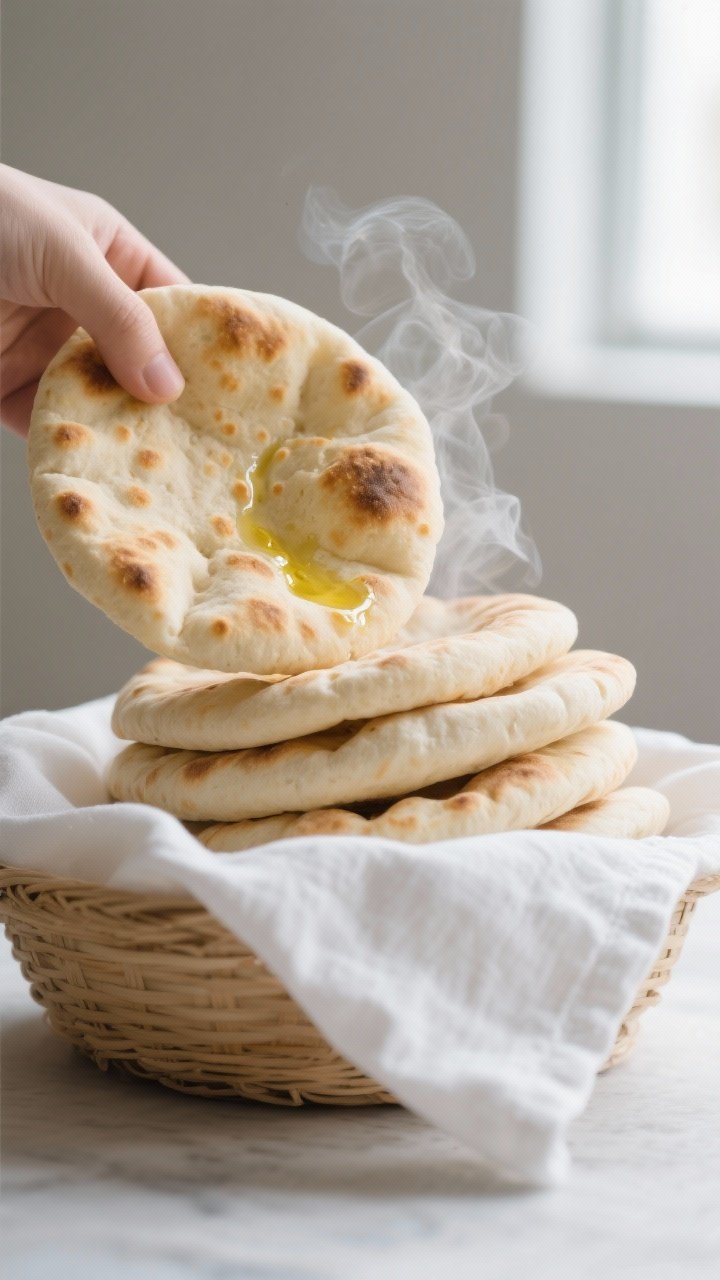
Warm, fresh pita bread is one of those small kitchen wins that feels big. You get soft pockets, a little chew, and a hint of toastiness—perfect for stuffing, dipping, or tearing into pieces at the table. This version uses an air fryer to simplify the process and speed things up.
You’ll still mix and rest the dough, but the cooking time drops to just a few minutes per pita. If you’ve ever been intimidated by homemade bread, this is a gentle place to start.
Why This Recipe Works
This recipe leans on a simple yeast dough that’s easy to handle and forgiving. The air fryer’s consistent, high heat helps create steam inside the dough, encouraging that signature pita pocket.
Because the air fryer heats quickly and cooks in small batches, each round turns out evenly. The dough includes a touch of olive oil for flavor and tenderness, and a short rest after shaping gives the pitas a better puff.
Ingredients
- 2 1/2 cups (300 g) all-purpose flour, plus more for dusting
- 1 cup (240 ml) warm water (about 105–110°F/40–43°C)
- 2 1/4 tsp (1 packet) active dry yeast
- 1 tsp sugar or honey
- 1 tsp fine sea salt
- 1–2 tbsp olive oil, plus a little more for greasing
- Optional: 1/4 cup (30 g) whole wheat flour for added flavor and texture (reduce AP flour accordingly)
Instructions
- Activate the yeast. In a mixing bowl, combine warm water and sugar. Sprinkle the yeast on top and let it sit for 5–10 minutes until foamy.
If it doesn’t foam, start over with fresh yeast.
- Make the dough. Add flour, salt, and olive oil to the yeast mixture. Stir with a spoon until a shaggy dough forms. Turn onto a lightly floured surface and knead for 5–7 minutes until smooth and slightly springy.
The dough should be soft but not sticky.
- First rise. Lightly oil a clean bowl and place the dough inside, turning to coat. Cover with a damp towel or plastic wrap. Let rise in a warm spot for 60–75 minutes, or until doubled in size.
- Divide and shape. Punch down the dough to release air.
Divide into 6–8 equal pieces, depending on how large you want your pitas. Roll each piece into a smooth ball, then cover and rest for 10 minutes to relax the gluten.
- Roll the pitas. On a lightly floured surface, roll each ball into a 6–7 inch circle, about 1/8 inch thick. Keep the thickness even for the best puff.
Cover the rolled rounds with a towel to prevent drying while you preheat.
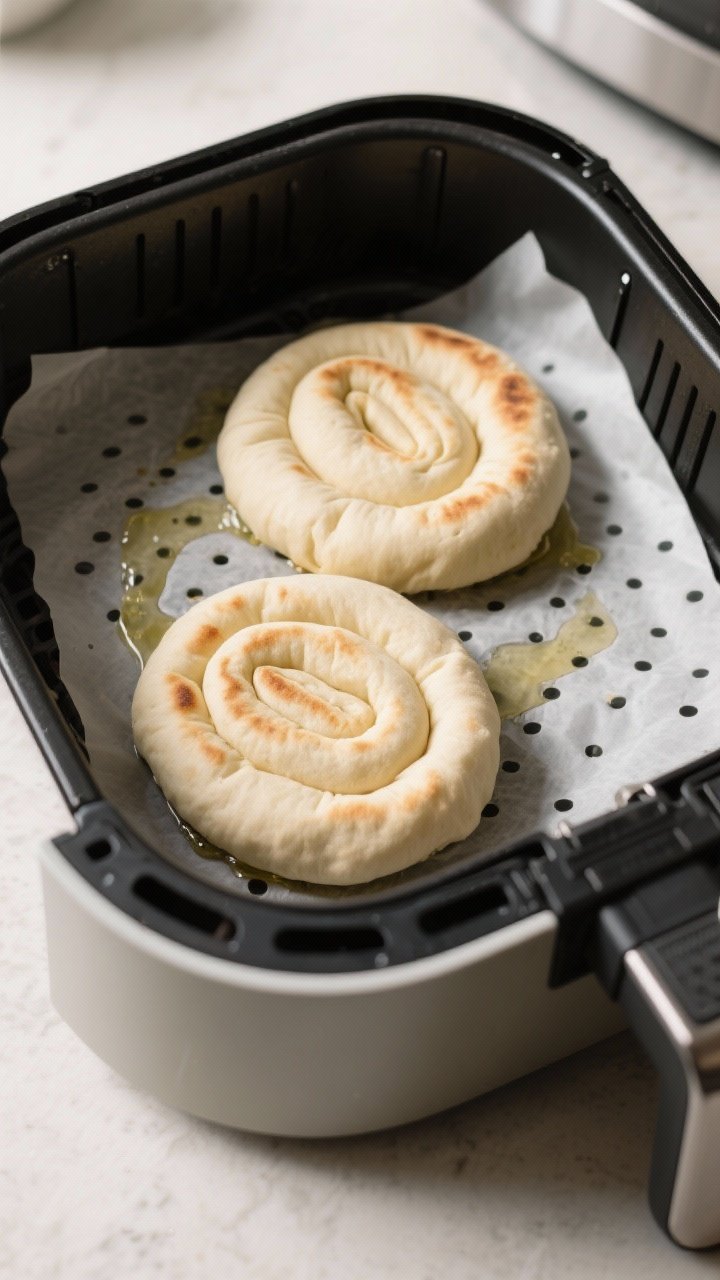
- Preheat the air fryer. Heat your air fryer to 400°F (200°C) for 3–5 minutes. If your basket tends to stick, lightly brush it with oil or use a perforated parchment liner rated for air fryers.
- Cook in batches. Place 1–2 pitas in the basket (don’t crowd). Air fry for 3–4 minutes.
They should puff dramatically by minute 2 and get light golden spots. If needed, flip and cook for 30 seconds more for even color.
- Keep warm and soft. As each pita finishes, stack them and wrap in a clean kitchen towel. The steam keeps them pliable and tender.
- Serve or cool. Enjoy warm right away, or cool completely on a rack before storing.
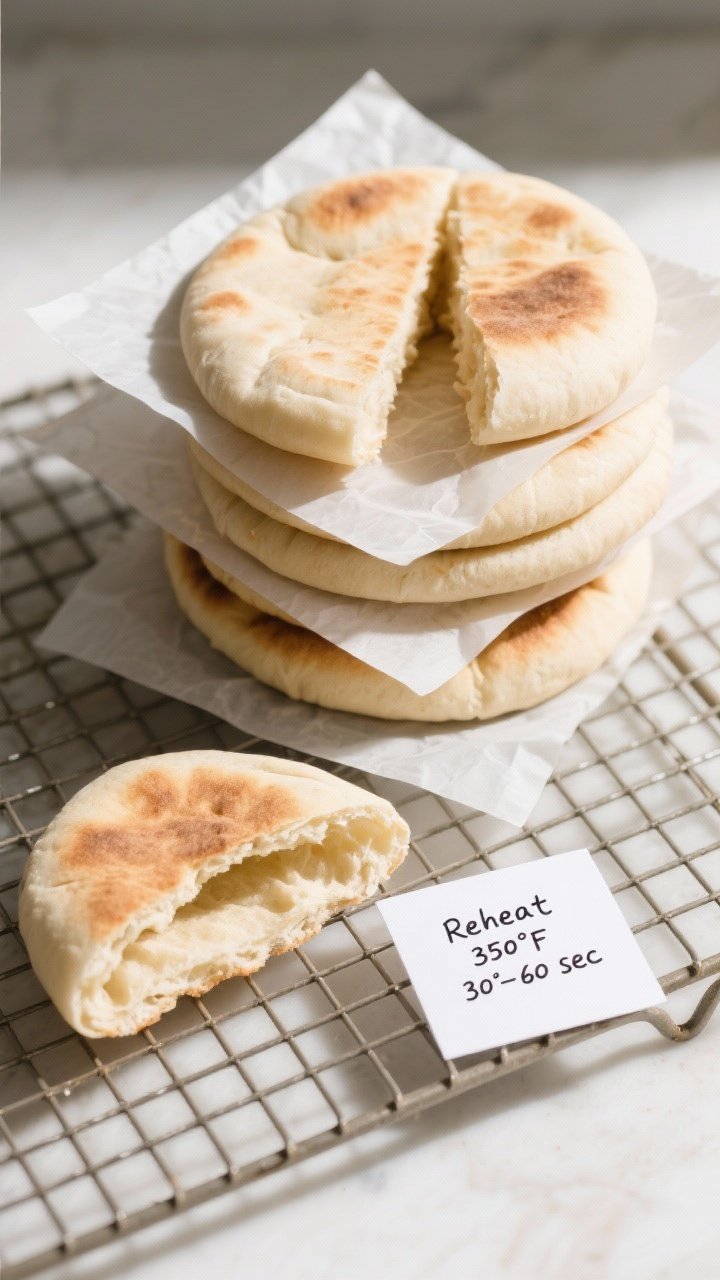
Storage Instructions
- Room temperature: Store cooled pitas in an airtight bag for up to 2 days.
Reheat in the air fryer at 350°F (175°C) for 30–60 seconds.
- Freezer: Wrap individually and freeze in a zip-top bag for up to 2 months. Thaw at room temp, then warm in the air fryer or toaster.
- Prevent drying: Add a small piece of parchment between pitas before freezing so they don’t stick and tear when separated.
Benefits of This Recipe
- Fast cooking time: The air fryer bakes each pita in minutes, making fresh bread doable on a weeknight.
- Reliable puff: The enclosed, hot environment encourages pocket formation without needing a blazing oven or stone.
- Flexible dough: Works with all-purpose flour, a blend with whole wheat, or even bread flour for extra chew.
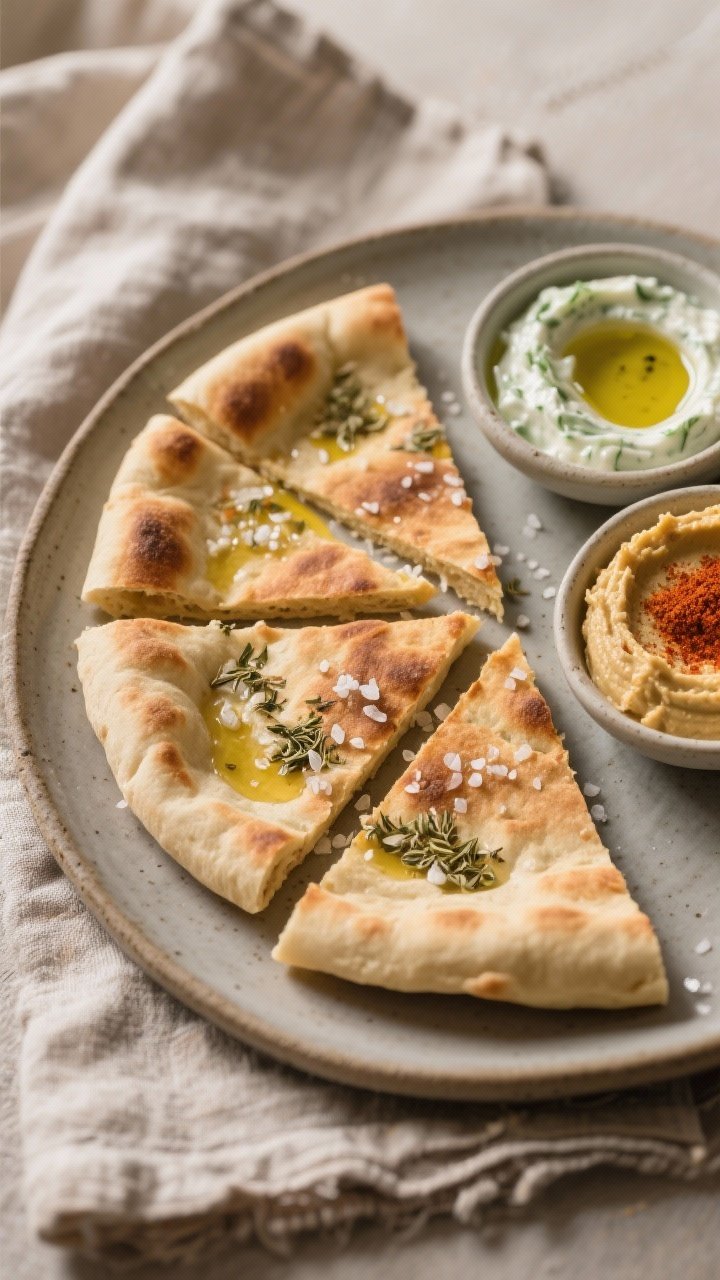
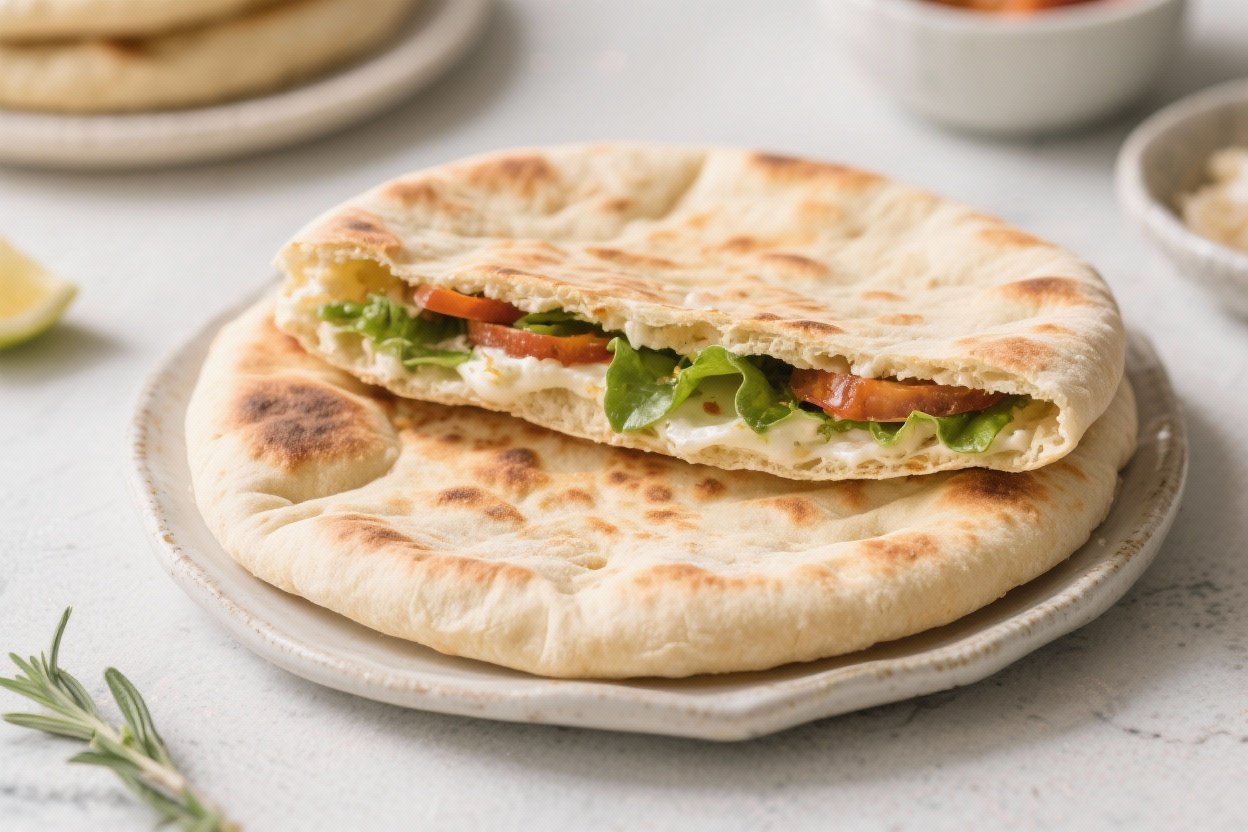
- Versatile serving: Use as wraps, with dips like hummus and tzatziki, or as a quick flatbread base for toppings.
- Beginner-friendly: Minimal shaping, no special equipment, and forgiving rise times.
Common Mistakes to Avoid
- Water too hot or too cold: Overly hot water kills yeast; cold water slows activation. Aim for warm, not hot.
- Rolling too thick or uneven: Thick or uneven discs won’t puff well.
Keep the dough around 1/8 inch and even from center to edge.
- Skipping the rest after shaping: Resting relaxes gluten and improves puff. Ten minutes makes a difference.
- Overcrowding the basket: Air needs to circulate. Bake one or two at a time for best results.
- Letting the dough dry out: Cover dough balls and rolled rounds with a towel to prevent crusty edges that block pocket formation.
- Underproofing or overproofing: Dough that hasn’t risen enough can be dense; over-risen dough may collapse.
Look for roughly doubled volume and a gentle spring-back when poked.
Alternatives
- Flour swaps: Replace up to 1/3 of the flour with whole wheat for a nuttier flavor. Add a tablespoon of vital wheat gluten if you want extra chew with higher whole wheat percentages.
- Yeast options: Use instant yeast by mixing it directly with the dry ingredients and skipping the activation step. Keep the same amounts.
- Dairy addition: For a softer, richer pita, substitute 2–3 tablespoons of the water with plain yogurt or milk.
- Flavor boosts: Add 1 tsp garlic powder, 1 tsp dried oregano, or a pinch of za’atar to the dough.
Brush warm pitas with olive oil and sprinkle flaky salt for a simple finish.
- No air fryer: Cook on a preheated cast-iron skillet over medium-high heat, 1–2 minutes per side, or on a 475°F (245°C) baking sheet in the oven for 3–4 minutes.
FAQ
Why didn’t my pitas puff?
Common reasons include dough rolled too thick, uneven thickness, dough that dried out, low air fryer heat, or underproofed dough. Make sure the rounds are evenly thin, the air fryer is fully preheated, and the dough has risen properly. Cover the dough at every stage to keep moisture in.
Can I make the dough ahead?
Yes.
After the first rise, refrigerate the dough for up to 24 hours. Bring it to room temperature for 30–45 minutes, then divide, rest, roll, and cook. Cold dough can be stiffer, so the extra rest helps.
Do I need parchment in the air fryer?
Not always.
If your basket is nonstick and you lightly oil it, the pitas usually release easily. If sticking is an issue, use perforated air fryer parchment so air can circulate.
How do I keep pitas soft?
Stack them in a clean towel as they come out of the air fryer. The trapped steam keeps them pliable.
If they firm up later, reheat briefly and wrap again for a minute.
What’s the best flour for pitas?
All-purpose flour works great. Bread flour gives more chew and structure, while a partial whole wheat blend adds flavor. If using mostly whole wheat, add a splash more water as whole grains absorb more moisture.
Can I make mini pitas?
Absolutely.
Divide the dough into 10–12 pieces and roll smaller rounds. Reduce cook time slightly, keeping an eye around the 2–3 minute mark.
How do I get more color on the pitas?
Brush lightly with olive oil before cooking or cook 30–60 seconds longer. You can also flip halfway for more even browning, but don’t overcook or they’ll dry out.
Can I make them gluten-free?
Gluten-free pitas won’t puff the same way because they lack gluten structure.
Use a trusted gluten-free flatbread recipe and cook in the air fryer for a similar quick finish, but expect a flatbread, not a pocket.
In Conclusion
Air fryer pita bread brings bakery-style results into everyday cooking. With a short list of ingredients and a quick cook time, you can turn out warm, soft pockets whenever you want. Keep the dough covered, preheat well, and roll evenly for the best puff.
Serve them with dips, fill them with grilled chicken and veggies, or enjoy them plain with olive oil and salt. Simple, fast, and endlessly useful—this is a recipe you’ll come back to often.
Air Fryer Pita Bread – Soft, Puffy, and Fast
Ingredients
Method
- Activate the yeast. In a mixing bowl, combine warm water and sugar. Sprinkle the yeast on top and let it sit for 5–10 minutes until foamy.If it doesn’t foam, start over with fresh yeast.
- Make the dough. Add flour, salt, and olive oil to the yeast mixture. Stir with a spoon until a shaggy dough forms. Turn onto a lightly floured surface and knead for 5–7 minutes until smooth and slightly springy.The dough should be soft but not sticky.
- First rise. Lightly oil a clean bowl and place the dough inside, turning to coat. Cover with a damp towel or plastic wrap. Let rise in a warm spot for 60–75 minutes, or until doubled in size.
- Divide and shape. Punch down the dough to release air.Divide into 6–8 equal pieces, depending on how large you want your pitas. Roll each piece into a smooth ball, then cover and rest for 10 minutes to relax the gluten.
- Roll the pitas. On a lightly floured surface, roll each ball into a 6–7 inch circle, about 1/8 inch thick. Keep the thickness even for the best puff.Cover the rolled rounds with a towel to prevent drying while you preheat.
- Preheat the air fryer. Heat your air fryer to 400°F (200°C) for 3–5 minutes. If your basket tends to stick, lightly brush it with oil or use a perforated parchment liner rated for air fryers.
- Cook in batches. Place 1–2 pitas in the basket (don’t crowd). Air fry for 3–4 minutes.They should puff dramatically by minute 2 and get light golden spots. If needed, flip and cook for 30 seconds more for even color.
- Keep warm and soft. As each pita finishes, stack them and wrap in a clean kitchen towel. The steam keeps them pliable and tender.
- Serve or cool. Enjoy warm right away, or cool completely on a rack before storing.
Printable Recipe Card
Want just the essential recipe details without scrolling through the article? Get our printable recipe card with just the ingredients and instructions.