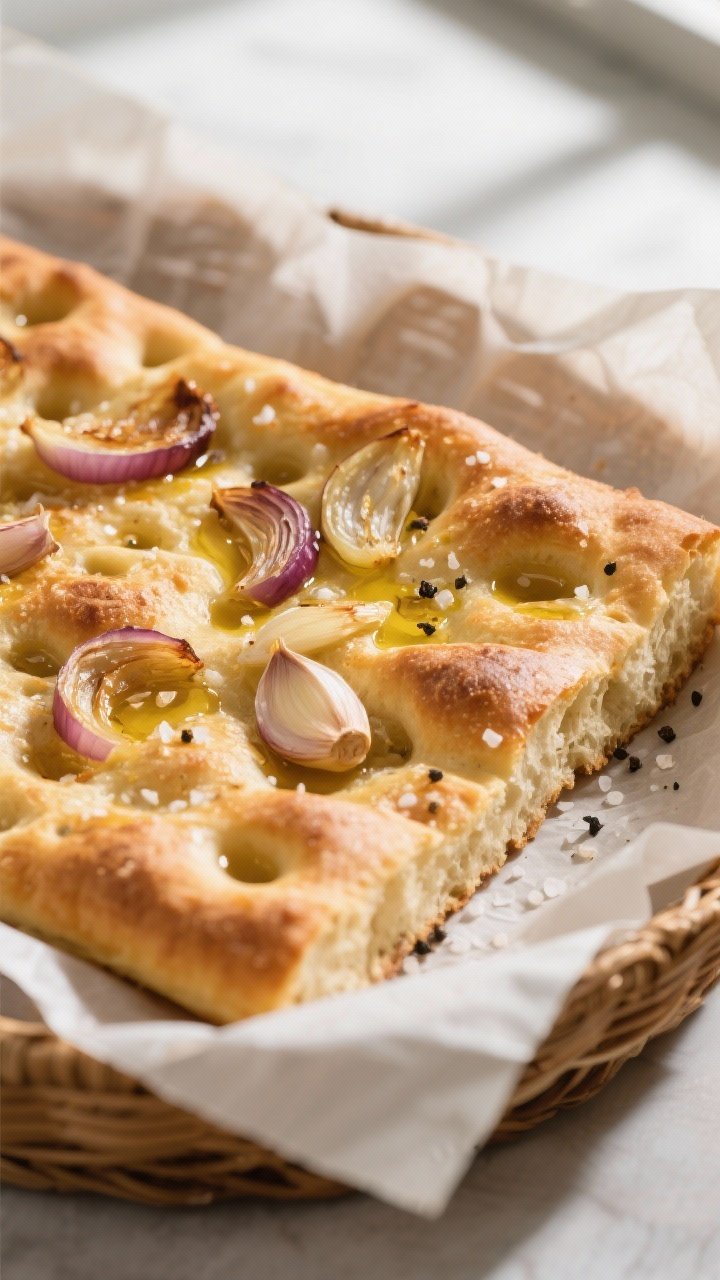
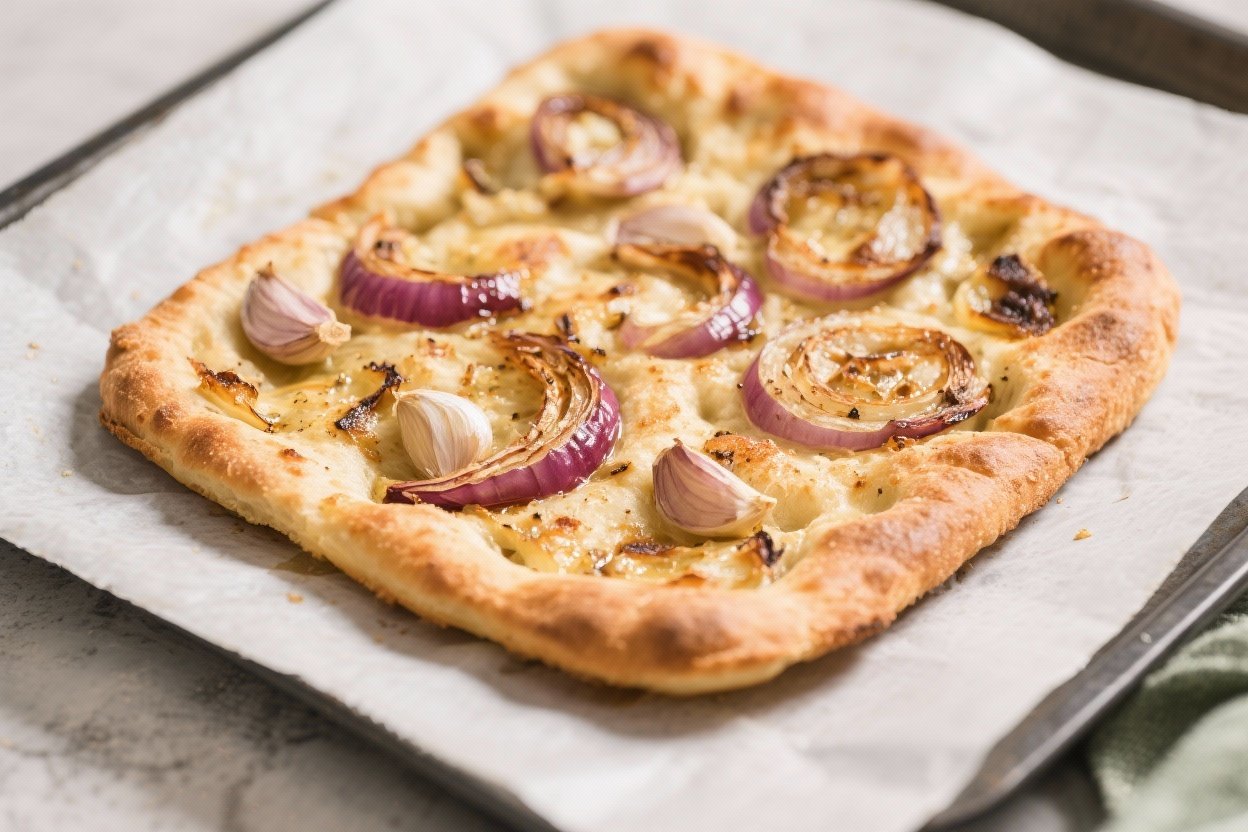
Focaccia is one of those breads that feels special without being fussy. This version uses an air fryer to create a golden crust and pillowy center in a fraction of the time. Roast onions and garlic add a deep, savory sweetness that makes every bite irresistible.
If you’ve been nervous about baking bread, this recipe is a gentle, rewarding place to start. It’s great as a snack, a side for soup, or sliced for sandwiches.
Why This Recipe Works
- Air fryer efficiency: The compact space and hot circulating air give you a crisp top and tender middle, similar to a small bakery oven.
- Cold rise for flavor: A short rest in the fridge helps the dough develop better taste and texture without extra effort.
- Roasted aromatics: Slowly cooked onion and garlic bring sweetness, complexity, and that classic focaccia aroma.
- Olive oil matters: Generous oil keeps the bread moist, prevents sticking, and helps create that signature dimpled surface.
- Small-batch friendly: Perfect for air fryer baskets and weeknight timing—no need to heat a full oven.
Ingredients
- For the dough:
- 2 cups (260 g) all-purpose flour, plus extra for dusting
- 1 cup (240 ml) warm water, about 105–110°F
- 1 1/2 teaspoons instant or rapid-rise yeast
- 1 teaspoon fine sea salt
- 1 teaspoon sugar or honey
- 2 tablespoons extra-virgin olive oil (plus more for the pan and topping)
- For the topping:
- 1 medium yellow onion, thinly sliced
- 4–6 garlic cloves, thinly sliced
- 2–3 tablespoons extra-virgin olive oil
- 1 teaspoon fresh thyme leaves or 1/2 teaspoon dried thyme (optional)
- Flaky sea salt, to finish
- Freshly ground black pepper, to taste
How to Make It
- Make the dough: In a bowl, combine warm water, yeast, and sugar. Let it sit for 5 minutes until slightly foamy.
Add flour, salt, and 2 tablespoons olive oil. Stir with a spoon until a shaggy dough forms.
- Knead briefly: Turn the dough onto a lightly floured surface and knead for 2–3 minutes until smooth and elastic. It should be soft and slightly tacky but not sticky.
- First rise: Place the dough in a lightly oiled bowl, cover, and let it rise at room temperature for 45–60 minutes, or until doubled.
- Prepare the onions and garlic: While the dough rises, warm 1 tablespoon olive oil in a skillet over low heat.
Add the onion with a pinch of salt. Cook slowly, stirring now and then, for 8–10 minutes until softened and lightly golden. Add garlic and thyme, and cook 1–2 minutes more.
Remove from heat and cool.
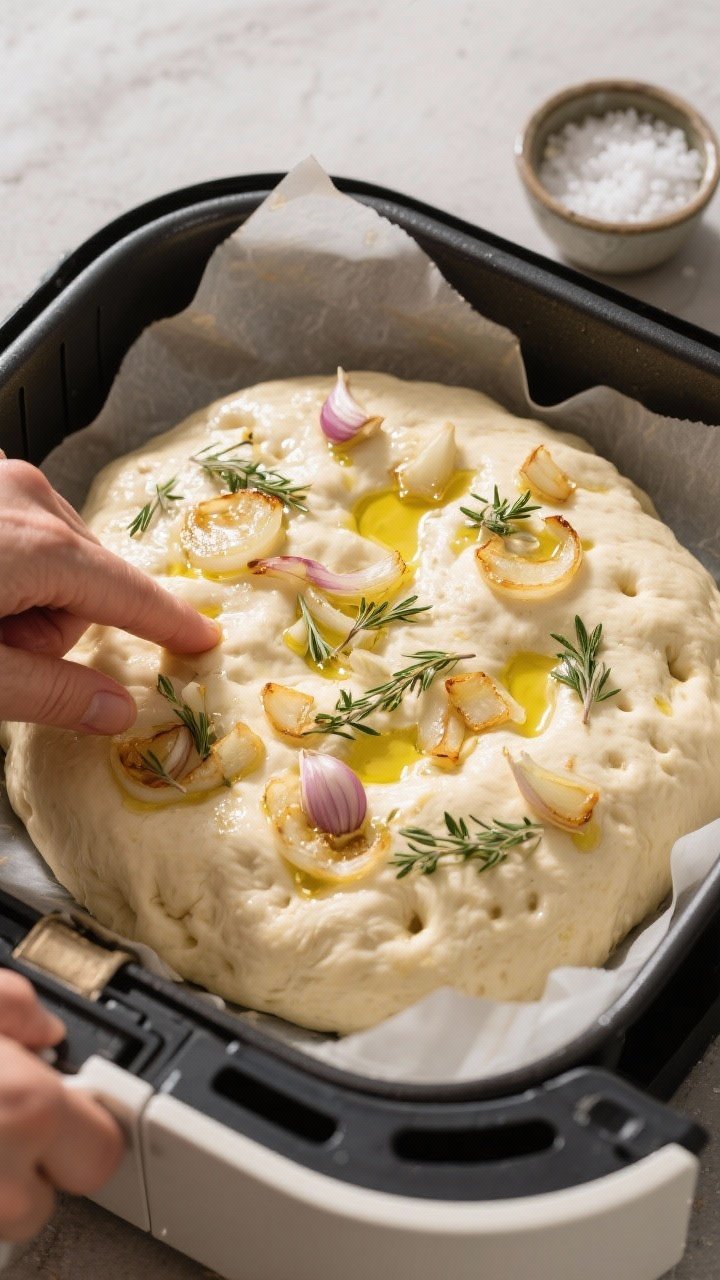
- Pan and shape: Line your air fryer basket or insert pan with parchment and brush generously with olive oil. Gently turn the risen dough into the basket and press it out to fit, about 3/4–1 inch thick. If it springs back, let it rest 5 minutes and try again.
- Second rise: Drizzle 1 tablespoon olive oil over the dough.
Cover loosely and let it rise for 20–25 minutes until slightly puffy.
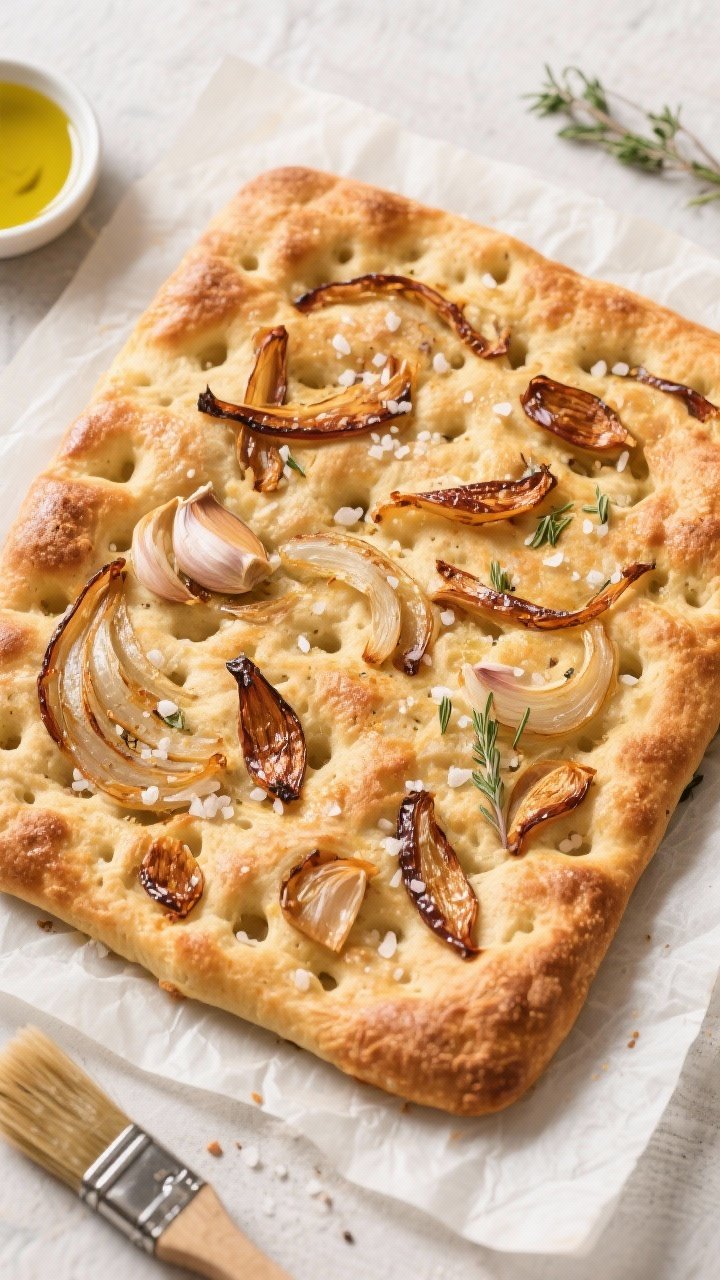
- Dimple and top: With oiled fingertips, press deep dimples all over the surface. Scatter the cooled onion and garlic evenly. Drizzle another tablespoon of olive oil on top, and add a pinch of flaky salt and pepper.
- Air fry: Preheat the air fryer to 350°F (175°C) if your model requires it.
Cook for 14–18 minutes, until the top is golden brown and the center feels set. If the top browns too fast, tent loosely with foil during the last few minutes.
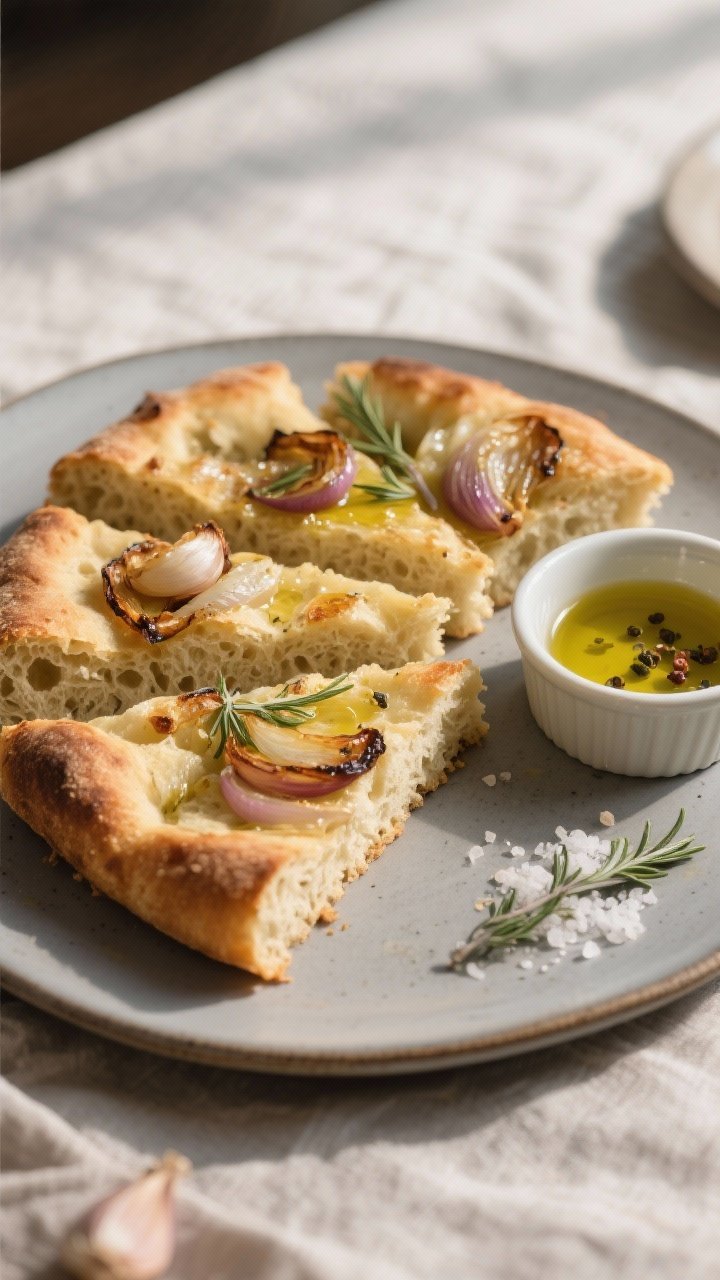
- Finish: Let the focaccia cool for 5–10 minutes, then lift it out using the parchment. Brush lightly with more olive oil and a little flaky salt.
Slice and serve warm.
How to Store
- Room temperature: Keep in an airtight container for up to 2 days. Reheat in the air fryer at 320°F for 2–3 minutes to refresh.
- Freezer: Wrap slices tightly in plastic, then foil, and freeze for up to 2 months. Reheat from frozen at 320°F for 4–6 minutes.
- Avoid the fridge: Refrigeration dries out bread.
If you must, reheat before serving to restore softness.
Benefits of This Recipe
- Faster than oven baking: Shorter preheat and quicker bake mean focaccia on the table sooner.
- Small-batch friendly: Ideal for two to four people without leftovers going stale.
- Beginner-friendly dough: No complex techniques—just mix, rise, and press.
- Customizable: The base handles many toppings, herbs, and cheeses without losing structure.
- Budget-conscious: Uses pantry staples and simple aromatics for big flavor.
Common Mistakes to Avoid
- Too little oil: Skimping on oil leads to sticking and a dry top. Be generous for a glossy, tender crumb.
- Overproofing: Letting the second rise go too long can cause collapse. Stop when the dough is puffy, not airy.
- Thick onion slices: Large pieces won’t soften fully in the air fryer.
Slice thin for even cooking.
- High heat too fast: Cranking the temp can brown the top before the center cooks. Stick to 350°F and check doneness.
- Skipping dimples: Dimples help hold oil and toppings. They also prevent large bubbles that can scorch.
Variations You Can Try
- Tomato and Basil: Add halved cherry tomatoes and torn basil after baking, then drizzle with balsamic glaze.
- Olive and Rosemary: Press pitted olives into the dough and sprinkle with fresh rosemary and lemon zest.
- Cheesy Crust: Add 1/3 cup grated Parmesan or Pecorino in the last 3–4 minutes of cooking.
- Chili-Garlic Heat: Add red pepper flakes to the topping and finish with chili oil.
- Whole-Wheat Boost: Swap 1/2 cup of the flour for whole-wheat flour and add 1–2 teaspoons extra water if needed.
FAQ
Can I use active dry yeast instead of instant?
Yes.
Bloom 1 1/2 teaspoons active dry yeast in the warm water with sugar for 5–10 minutes until foamy, then proceed. Rise times may be a bit longer.
What if my air fryer is small?
Make two smaller rounds instead of one. Cook each for 10–14 minutes, checking at the 10-minute mark.
Smaller pieces brown faster.
How do I know it’s done?
The top should be deep golden, and the bread should spring back when pressed lightly. An internal temperature near 200°F indicates doneness.
Can I make the dough ahead?
Yes. After the first rise, cover and refrigerate up to 24 hours.
Let it sit at room temperature for 30–45 minutes before shaping and baking.
What oil is best?
Use a good-quality extra-virgin olive oil. Its flavor carries the topping and makes a big difference in the finished bread.
Can I skip the onion and garlic?
You can. The base dough is great with just olive oil, salt, and herbs.
Add whatever toppings you like, keeping them thin and not too heavy.
How do I prevent soggy spots?
Cool the onion and garlic before topping, and avoid excess moisture. If needed, pat the onions dry with a paper towel before adding.
Is gluten-free flour okay?
Use a cup-for-cup gluten-free blend designed for yeasted doughs, and check the package for added xanthan gum. The texture will be different but still tasty.
Final Thoughts
This Air Fryer Roast Onion and Garlic Focaccia proves that bread baking doesn’t need to be complicated.
With a few pantry ingredients and some olive oil, you can create a fragrant, golden loaf that tastes like it came from a bakery. Keep the steps simple, watch the rise, and let the air fryer do the rest. Serve warm, tear by hand, and enjoy it with soup, salad, or as a snack straight from the basket.
Air Fryer Roast Onion and Garlic Focaccia - Golden, Fluffy, and Packed With Flavor
Ingredients
Method
- Make the dough: In a bowl, combine warm water, yeast, and sugar. Let it sit for 5 minutes until slightly foamy.Add flour, salt, and 2 tablespoons olive oil. Stir with a spoon until a shaggy dough forms.
- Knead briefly: Turn the dough onto a lightly floured surface and knead for 2–3 minutes until smooth and elastic. It should be soft and slightly tacky but not sticky.
- First rise: Place the dough in a lightly oiled bowl, cover, and let it rise at room temperature for 45–60 minutes, or until doubled.
- Prepare the onions and garlic: While the dough rises, warm 1 tablespoon olive oil in a skillet over low heat.Add the onion with a pinch of salt. Cook slowly, stirring now and then, for 8–10 minutes until softened and lightly golden. Add garlic and thyme, and cook 1–2 minutes more.Remove from heat and cool.
- Pan and shape: Line your air fryer basket or insert pan with parchment and brush generously with olive oil. Gently turn the risen dough into the basket and press it out to fit, about 3/4–1 inch thick. If it springs back, let it rest 5 minutes and try again.
- Second rise: Drizzle 1 tablespoon olive oil over the dough.Cover loosely and let it rise for 20–25 minutes until slightly puffy.
- Dimple and top: With oiled fingertips, press deep dimples all over the surface. Scatter the cooled onion and garlic evenly. Drizzle another tablespoon of olive oil on top, and add a pinch of flaky salt and pepper.
- Air fry: Preheat the air fryer to 350°F (175°C) if your model requires it.Cook for 14–18 minutes, until the top is golden brown and the center feels set. If the top browns too fast, tent loosely with foil during the last few minutes.
- Finish: Let the focaccia cool for 5–10 minutes, then lift it out using the parchment. Brush lightly with more olive oil and a little flaky salt.Slice and serve warm.
Printable Recipe Card
Want just the essential recipe details without scrolling through the article? Get our printable recipe card with just the ingredients and instructions.