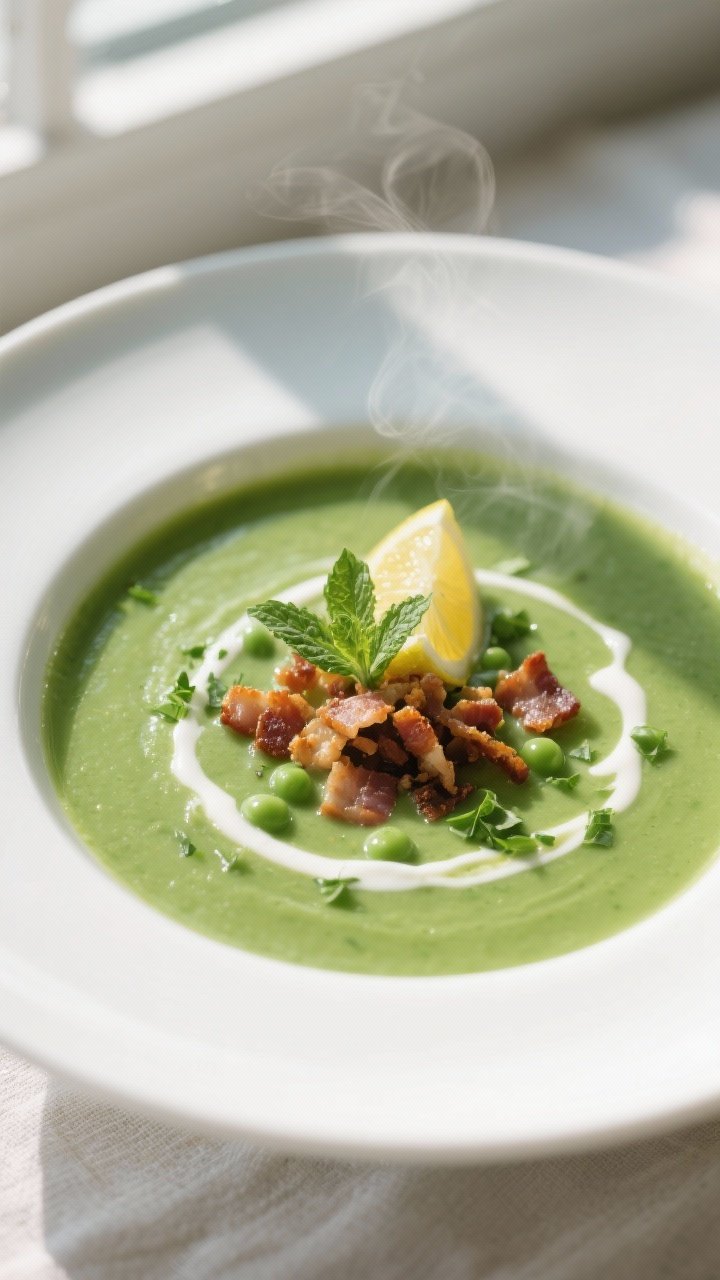
Pea soup usually sounds like a slow Sunday project, but this version is fast, fresh, and weeknight-friendly. The air fryer takes care of the bacon while you simmer a quick, vibrant pea base on the stove. The result is a silky, bright-green soup topped with salty, crunchy bits for contrast.
It tastes like comfort food, but it’s light and lively. If you’ve got 20–25 minutes, you’ve got dinner.
Why This Recipe Works
- Speed without compromise: Frozen peas cook in minutes and blend into a velvety soup. No long simmering needed.
- Air fryer efficiency: Bacon gets evenly crisp without babysitting a skillet.
Cleanup is easier, too.
- Balanced flavor: A little onion and garlic add depth, while lemon and fresh herbs brighten the sweetness of the peas.
- Texture contrast: Creamy soup meets crackly bacon and optional crunchy toppings like croutons or toasted seeds.
- Flexible and forgiving: Works with chicken or vegetable stock, dairy or dairy-free options, and simple pantry swaps.
What You’ll Need
- 6 slices bacon (standard-cut; thick-cut also works, just add a minute or two)
- 2 tablespoons olive oil or butter
- 1 small onion, chopped (yellow or sweet)
- 2 cloves garlic, minced
- 4 cups frozen peas (do not thaw)
- 3 to 4 cups low-sodium chicken or vegetable stock (start with 3 cups, adjust for thickness)
- 1/4 cup heavy cream or half-and-half (optional, for richness)
- 1 tablespoon fresh lemon juice (plus extra to taste)
- 1/4 cup fresh herbs like mint, parsley, or dill, chopped (pick one or mix)
- Salt and black pepper to taste
- Optional toppings: croutons, a swirl of yogurt, grated Parmesan, toasted pumpkin seeds, or chopped chives
Instructions
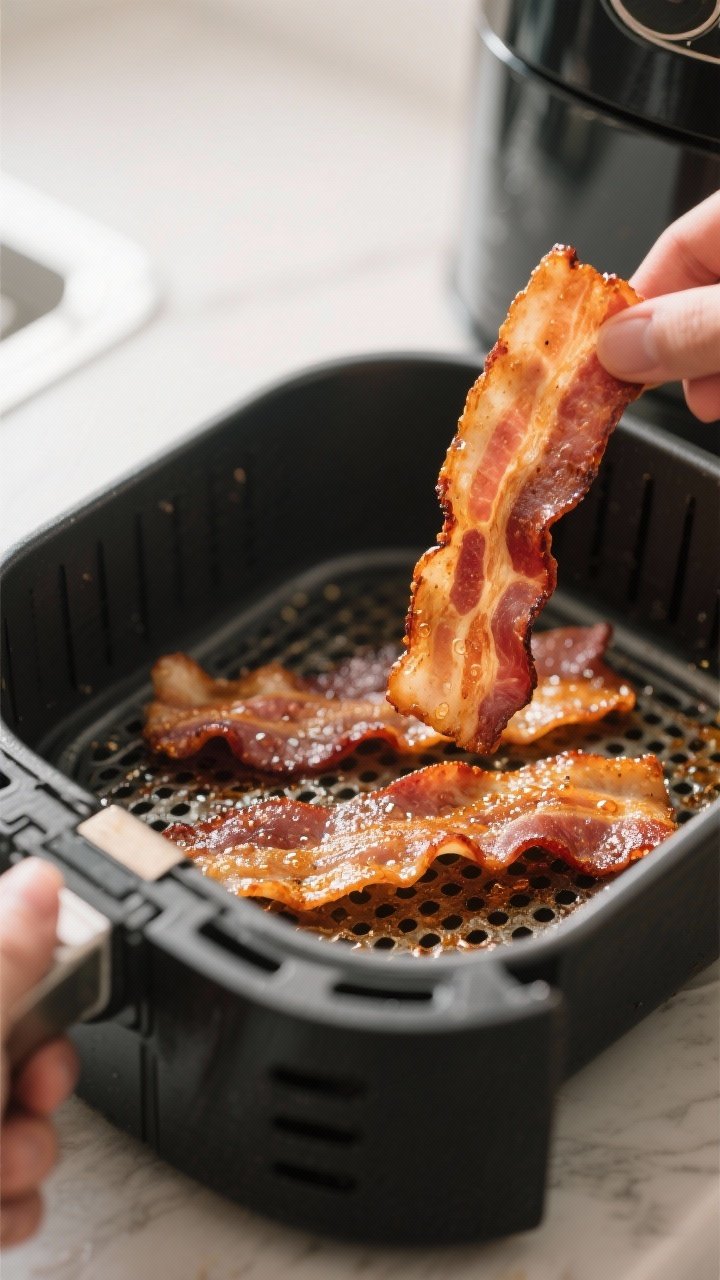
- Crisp the bacon in the air fryer: Line the air fryer basket with a perforated liner or a light foil layer (poke holes for airflow). Lay bacon in a single layer. Air fry at 375°F (190°C) for 6–9 minutes, flipping once, until crisp.
Transfer to a paper towel–lined plate. Reserve 1 tablespoon bacon fat if you like.
- Sauté aromatics: In a medium pot over medium heat, warm olive oil (or butter/bacon fat). Add chopped onion with a pinch of salt.
Cook 4–5 minutes until translucent and soft. Stir in garlic and cook 30 seconds until fragrant.
- Add peas and stock: Tip in frozen peas and 3 cups stock. Bring to a simmer and cook 4–6 minutes until peas are tender and bright green.
Do not overcook or the color will dull.
- Blend until smooth: Remove from heat. Add herbs and lemon juice. Use an immersion blender to puree until silky.
For an ultra-smooth finish, blend in batches in a countertop blender, venting the lid carefully.
- Adjust texture and season: If the soup is too thick, stir in more stock until you like the consistency. Swirl in cream if using. Season with salt and black pepper.
Add extra lemon to brighten if needed.
- Crumble bacon: Chop or crumble the crisp bacon into small pieces.
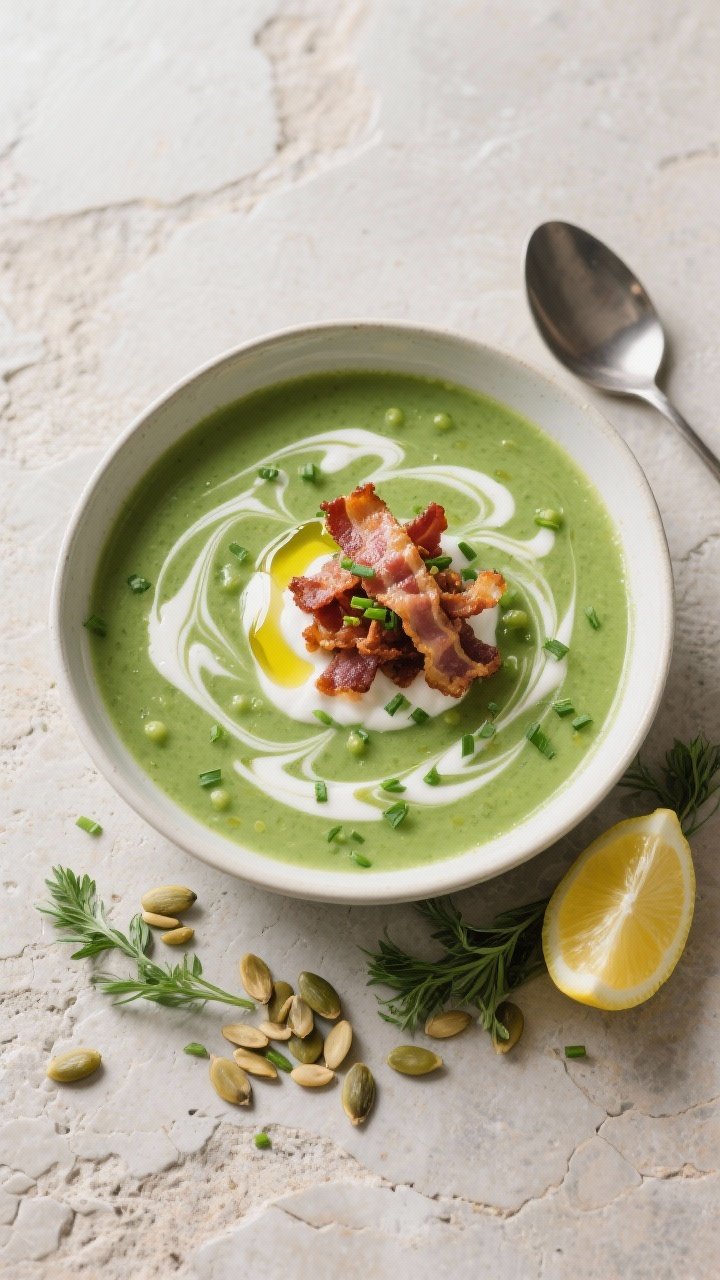
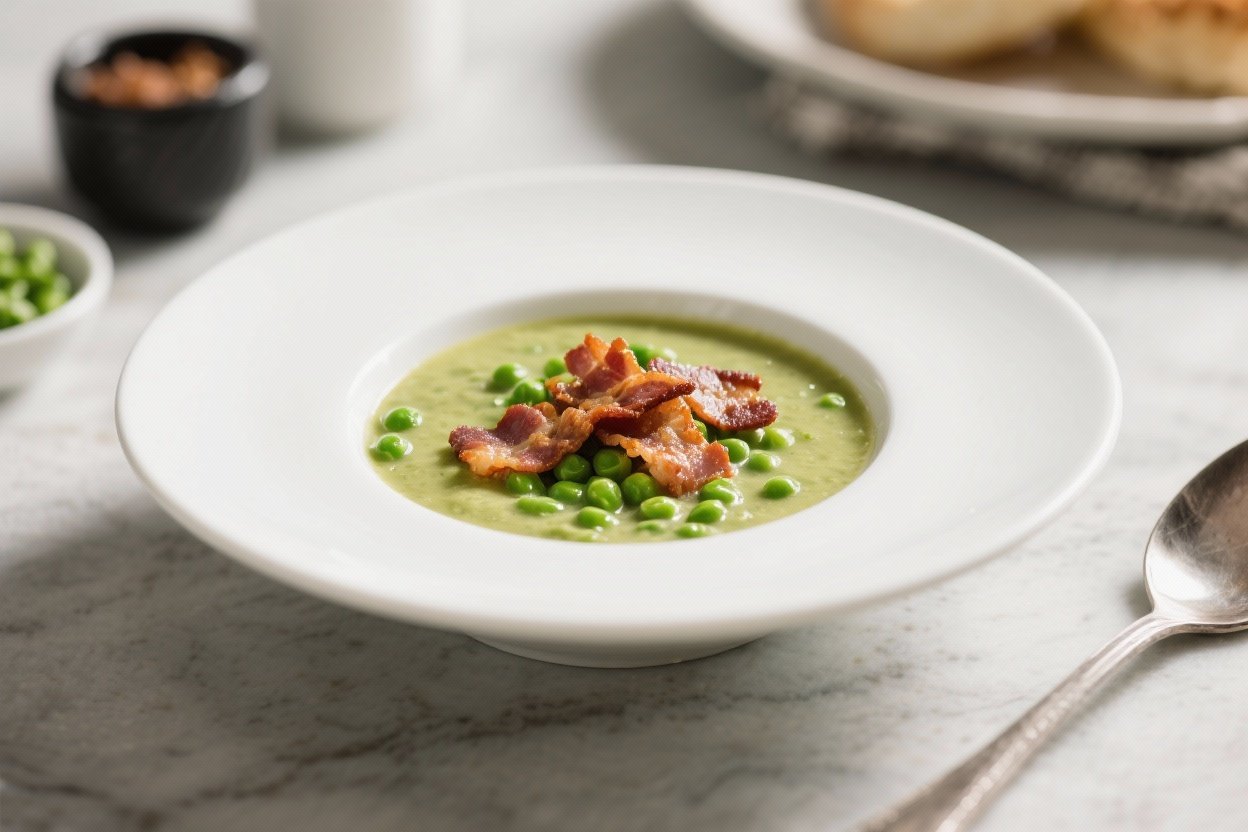
- Serve: Ladle soup into bowls. Top with bacon and any extras like a spoonful of yogurt, croutons, Parmesan, or chives. Serve hot.
Storage Instructions
- Refrigerator: Cool completely, then store soup (without bacon on top) in an airtight container for up to 4 days.
Keep bacon in a separate container lined with paper towel.
- Freezer: Freeze soup (without cream and without bacon) for up to 3 months. Thaw overnight in the fridge. Reheat gently and add cream after warming if desired.
- Reheating: Warm on the stove over medium-low heat, stirring occasionally.
Add a splash of stock or water if thick. Re-crisp bacon in the air fryer for 1–2 minutes at 350°F (175°C).
Health Benefits
- Protein and fiber from peas: Peas are packed with plant protein and fiber, which helps keep you full and supports steady energy.
- Micronutrient boost: Peas deliver vitamin C, vitamin K, and B vitamins, plus minerals like manganese and iron.
- Lower sodium control: Using low-sodium stock lets you season to taste without overdoing salt.
- Balanced indulgence: A small amount of cream makes the soup satisfying; you can skip it or use Greek yogurt for lighter richness.
- Herbs for freshness: Mint, parsley, or dill add antioxidants and brighten flavor without extra calories.
Pitfalls to Watch Out For
- Overcooking the peas: Long simmering turns the soup dull and mushy. Keep the simmer short for a vibrant color and fresh taste.
- Soggy bacon: Crowding the air fryer or stacking slices traps steam.
Cook in a single layer and give pieces space.
- Too thick or too thin: Start with 3 cups stock and adjust after blending. It’s easier to thin than to thicken.
- Flat flavor: Don’t skip lemon and herbs. They cut through sweetness and add life.
Taste and adjust salt, pepper, and acidity.
- Blender safety: If using a countertop blender, vent the lid and cover with a towel to prevent hot splatters.
Variations You Can Try
- Smoky pea soup: Add 1/2 teaspoon smoked paprika to the onions, and finish with a sprinkle on top.
- Dairy-free: Skip cream and blend in 1–2 tablespoons olive oil for a silky texture. Coconut milk works too for a subtle sweetness.
- Extra greens: Toss in a handful of spinach or watercress right before blending for more color and nutrients.
- Herb switches: Try tarragon for an anise note or basil for a sweet, summery twist.
- Cheesy finish: Stir in grated Parmesan or Pecorino after blending for savory depth.
- Vegetarian: Use vegetable stock and swap bacon for air-fried smoked tempeh, roasted chickpeas, or crispy shallots.
- Spicy kick: Add a pinch of red pepper flakes to the onions, or finish with a drizzle of chili oil.
FAQ
Can I use fresh peas instead of frozen?
Yes. Fresh peas work beautifully.
Simmer just 2–3 minutes until tender and bright, then blend. Fresh peas vary in sweetness, so taste and adjust lemon and salt.
What if I don’t have an immersion blender?
A regular blender is fine. Blend in batches, filling the jar halfway and venting the lid.
Return the soup to the pot and adjust thickness and seasoning.
How do I make the bacon extra crispy?
Use standard-cut bacon, pat it dry, and cook in a single layer at 375°F (190°C). Add 1–2 minutes if needed. Let it cool on paper towels to set the crispness.
Can I make it ahead?
Absolutely.
Cook and blend the soup, then refrigerate up to 4 days or freeze up to 3 months (without cream). Crisp the bacon right before serving for best texture.
What stock is best?
Low-sodium chicken stock gives a savory backbone. Vegetable stock keeps it vegetarian-friendly and still flavorful.
Avoid very dark, strong broths that can overshadow the peas.
How can I thicken the soup without cream?
Blend a portion of the soup longer for more body, or add a small cooked potato or a tablespoon of soaked cashews before blending.
Can I add other vegetables?
Yes. Leeks, celery, or a small peeled potato simmer well with the peas. Keep cook times short to protect the color and freshness.
Wrapping Up
This Air Fryer Quick Pea Soup with Crispy Bacon brings bright flavor and cozy comfort with almost no fuss.
The air fryer handles the crunchy topping while the stovetop soup comes together in minutes. Keep it classic with cream and mint, or mix it up with smoky spices and fresh herbs. It’s an easy way to turn a bag of peas into a satisfying meal, any night of the week.

Air Fryer Quick Pea Soup With Crispy Bacon - Cozy Flavor in Minutes
Ingredients
Method
- Crisp the bacon in the air fryer: Line the air fryer basket with a perforated liner or a light foil layer (poke holes for airflow). Lay bacon in a single layer. Air fry at 375°F (190°C) for 6–9 minutes, flipping once, until crisp.Transfer to a paper towel–lined plate. Reserve 1 tablespoon bacon fat if you like.
- Sauté aromatics: In a medium pot over medium heat, warm olive oil (or butter/bacon fat). Add chopped onion with a pinch of salt.Cook 4–5 minutes until translucent and soft. Stir in garlic and cook 30 seconds until fragrant.
- Add peas and stock: Tip in frozen peas and 3 cups stock. Bring to a simmer and cook 4–6 minutes until peas are tender and bright green.Do not overcook or the color will dull.
- Blend until smooth: Remove from heat. Add herbs and lemon juice. Use an immersion blender to puree until silky.For an ultra-smooth finish, blend in batches in a countertop blender, venting the lid carefully.
- Adjust texture and season: If the soup is too thick, stir in more stock until you like the consistency. Swirl in cream if using. Season with salt and black pepper.Add extra lemon to brighten if needed.
- Crumble bacon: Chop or crumble the crisp bacon into small pieces.
- Serve: Ladle soup into bowls. Top with bacon and any extras like a spoonful of yogurt, croutons, Parmesan, or chives. Serve hot.
Printable Recipe Card
Want just the essential recipe details without scrolling through the article? Get our printable recipe card with just the ingredients and instructions.