Love that shatteringly crisp pork belly but hate the mess and waiting? This air fryer version gives you all the crunch with far less hassle. The skin blisters beautifully while the meat stays juicy and tender.
No deep fryer. No oil splatters. Just simple prep, a smart technique, and a short cook time.
What Makes This Recipe So Good
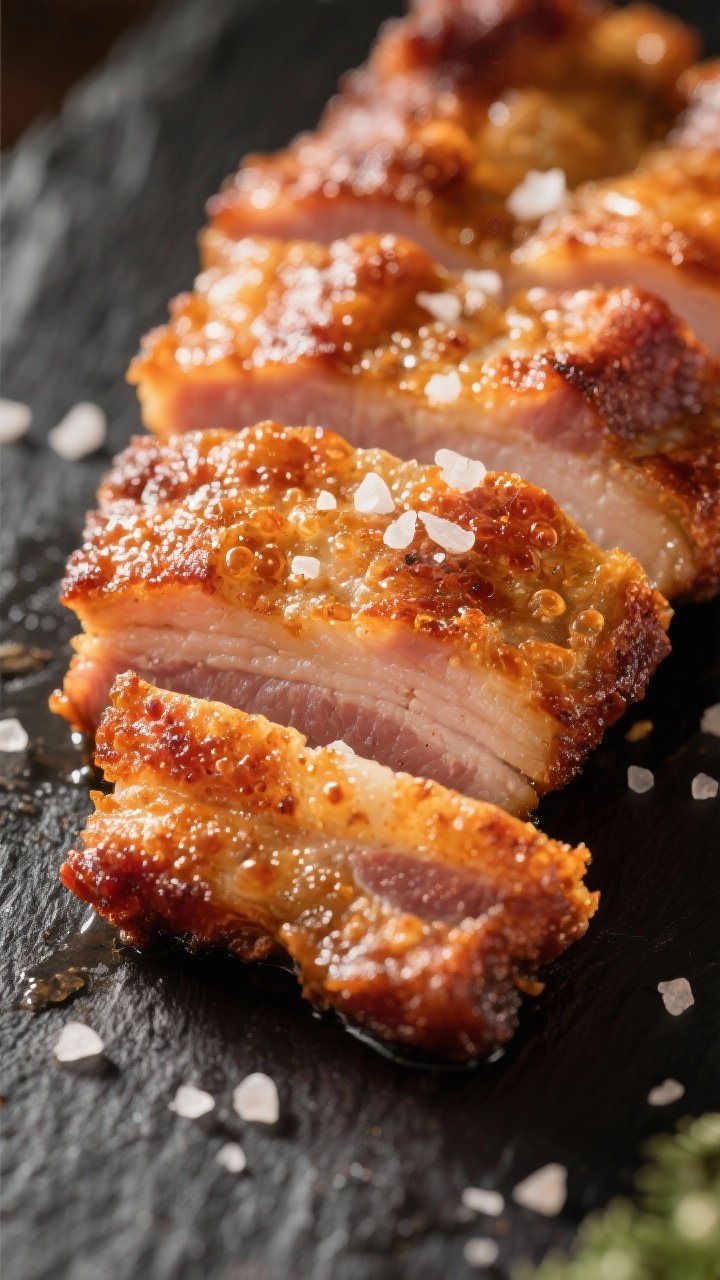
- Ultra-crispy skin without deep-frying: The air fryer creates a dry, hot environment that blisters the skin like a pro.
- Juicy, flavorful meat: A quick overnight dry and a simple seasoning keep the pork moist inside.
- Faster than the oven: You’ll get restaurant-style results in a fraction of the time.
- Minimal mess: No big pots of oil or stovetop splatter to clean up.
- Flexible flavors: Keep it classic with salt and pepper, or add Asian-inspired aromatics for a deeper profile.
What You’ll Need
- 2 to 2.5 pounds pork belly, skin on, in one slab
- 1 to 1.5 teaspoons kosher salt, plus more for skin
- 1 teaspoon ground white pepper or black pepper
- 1 teaspoon garlic powder
- 1 teaspoon Chinese five-spice (optional but great)
- 1 tablespoon rice vinegar or white vinegar
- 1 tablespoon neutral oil (optional, for extra blistering)
- Aluminum foil
- Paper towels
- Toothpick, metal skewer, or meat tenderizer with fine needles for pricking the skin
Step-by-Step Instructions

- Prep the pork belly. Pat the pork belly very dry on all sides.
If the skin came packaged wet, blot thoroughly. The drier the skin, the better the crackling.
- Score or prick the skin. Using a sharp knife, make shallow scores across the skin, or prick the skin all over with a toothpick or skewer. Do not cut into the meat; keep it shallow so fat renders and the skin blisters properly.
- Season the meat side. Flip the pork belly skin-side down. Rub with kosher salt, pepper, garlic powder, and five-spice if using.
Keep the skin plain for now.
- Dry out the skin. Flip back to skin-side up. Brush the skin with a thin layer of vinegar, then sprinkle a light dusting of salt over the skin. Place uncovered in the fridge for at least 6 hours, ideally overnight.
This dries the skin and deepens flavor.
- Wrap the sides to control splatter. When ready to cook, create a “boat” with aluminum foil around the sides of the pork belly, leaving the skin fully exposed on top. This keeps the meat juicy and reduces drips.
- Preheat the air fryer. Heat to 360°F (182°C) for 3–5 minutes. A hot start helps the skin blister.
- Optional oil finish. Dab the skin dry again, then brush on a very thin layer of neutral oil.
This helps even browning, especially if your skin isn’t super dry.
- First cook. Place pork belly skin-side up in the air fryer basket. Cook at 360°F (182°C) for 30–35 minutes. Check halfway through and rotate the basket if your air fryer has hot spots.
- Second cook to crisp the skin. Increase to 400°F (204°C) and cook another 10–15 minutes, or until the skin is blistered and crisp.
If some spots lag behind, cook 3–5 minutes more.
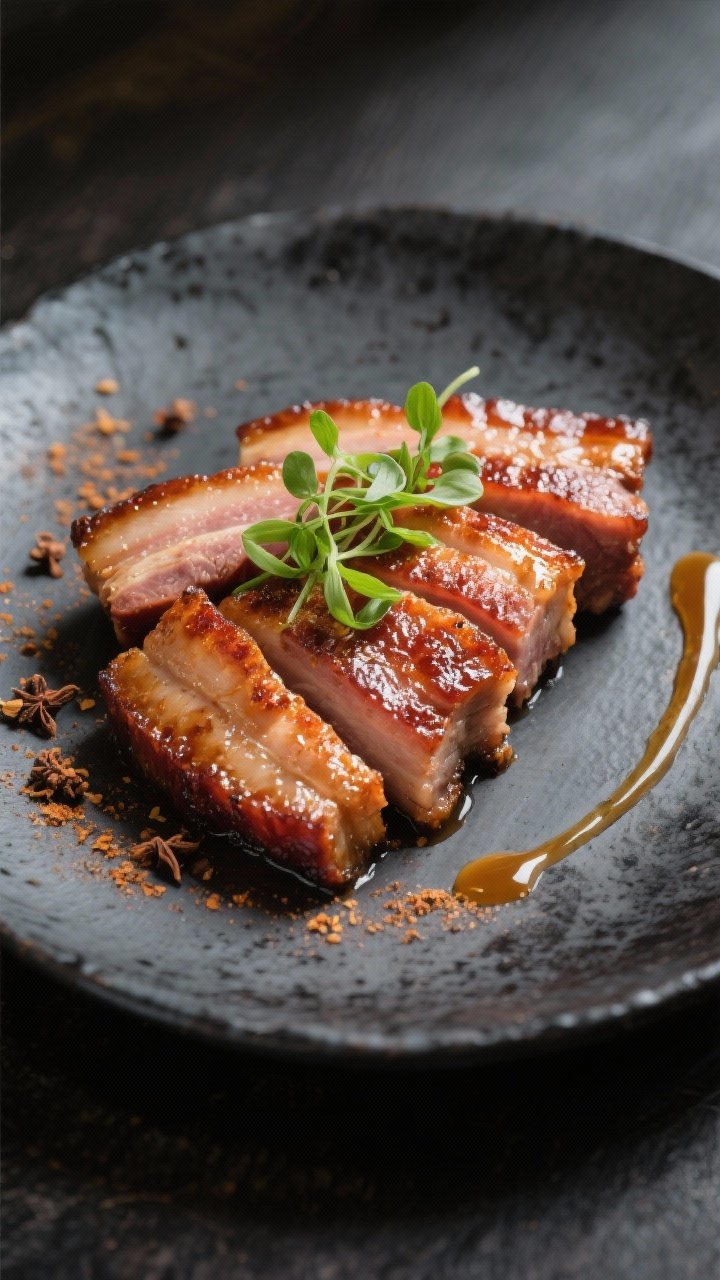
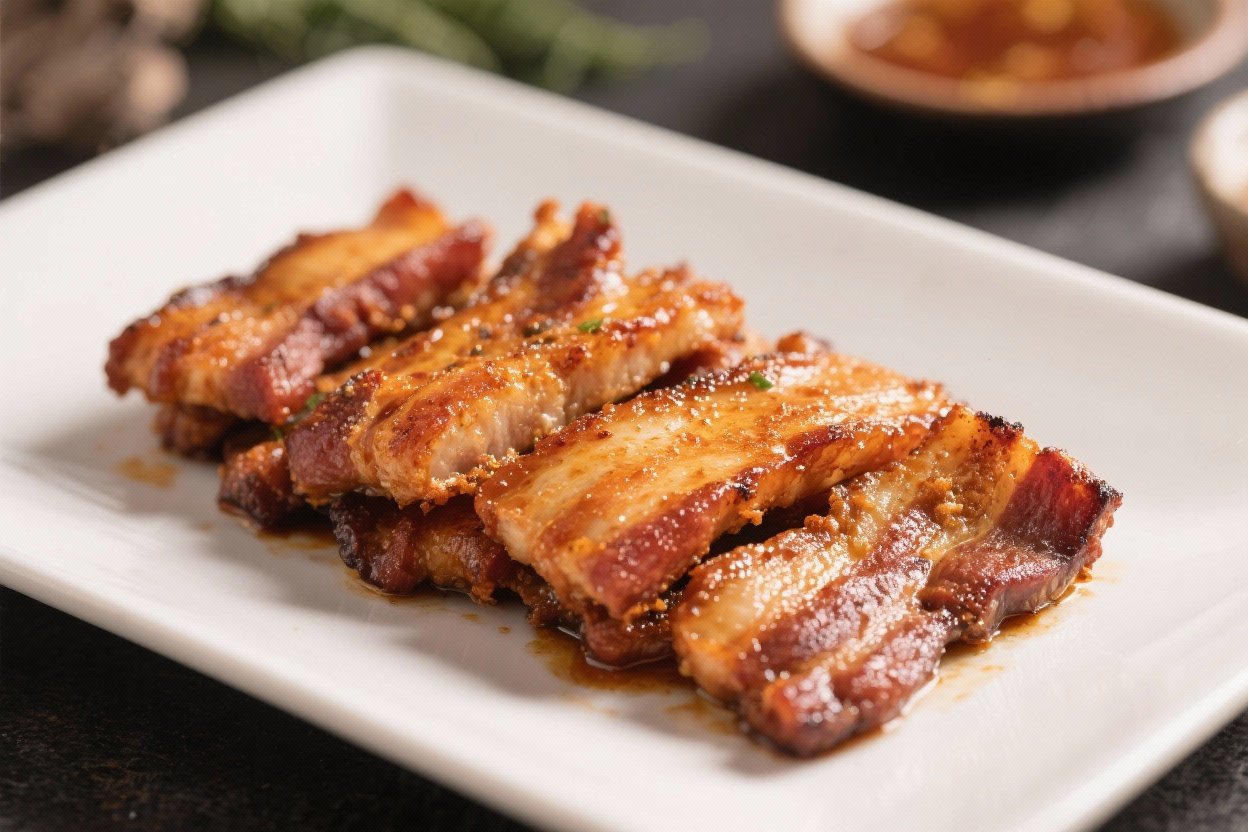
- Rest before slicing. Let the pork belly rest 10–15 minutes. Resting keeps the juices in the meat. Slice with a sharp knife: cut the skin first, then press through the meat for clean pieces.
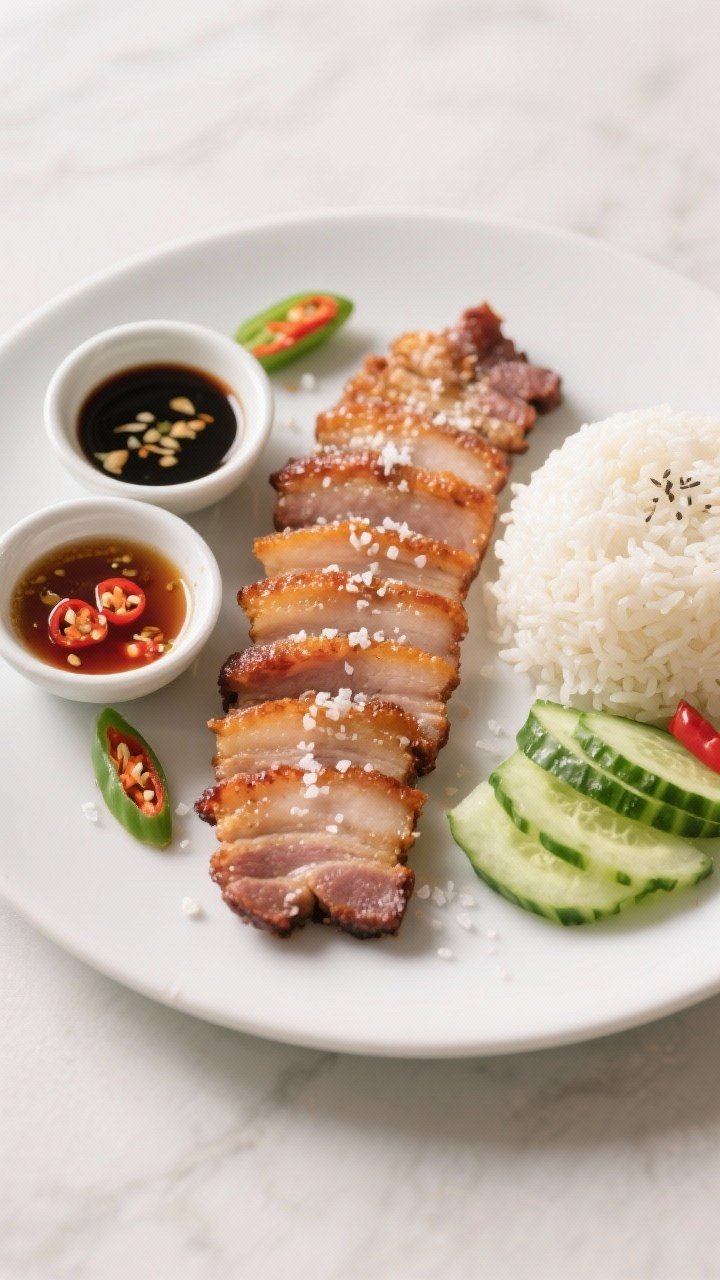
- Serve. Sprinkle a little flaky salt over the slices and serve with rice, greens, pickles, or a simple dipping sauce like soy, vinegar, and chili.
How to Store
- Fridge: Store cooled slices in an airtight container for up to 4 days.
Keep the skin as dry as possible.
- Freezer: Wrap slices tightly and freeze for up to 2 months. Thaw overnight in the fridge.
- Reheat to re-crisp: Air fry at 350°F (177°C) for 4–7 minutes until the skin re-blisters and the meat warms through. Avoid the microwave—it softens the skin.
Why This is Good for You
- High satisfaction, smaller portions: Rich, crunchy pork belly is deeply satisfying.
A few slices go a long way, which can help with portion control.
- Protein and healthy fats: Pork belly provides protein and fats that keep you fuller longer.
- Less oil than deep-frying: The air fryer reduces added oil while delivering the same crispy payoff.
- Customizable seasoning: You can adjust sodium and spices to your taste or dietary needs.
Pitfalls to Watch Out For
- Wet skin = soggy crackling: If the skin isn’t dry, it won’t blister. Fridge-drying overnight is the single best step.
- Cutting too deep: Scoring into the meat releases juices that steam the skin. Keep scores shallow or just prick the skin.
- Skipping the rest: Slicing right away causes juices to run out and softens the skin.
Rest at least 10 minutes.
- Crowded basket: Airflow is key. If cooking a larger piece, keep space around it or cook in batches.
- Uneven crisping: Hot spots happen. Rotate the basket or turn the pork midway for even color.
Alternatives
- Spice profiles: Swap five-spice for smoked paprika and cumin for a BBQ vibe, or use curry powder and turmeric for a warm, earthy finish.
- Glaze finish: After crisping, brush with a light honey-soy or gochujang glaze and air fry 2–3 more minutes.
Keep glazes off during the main cook to avoid burning.
- Cuts and sizes: This method works with smaller strips or cubes. Reduce cook time and watch closely for doneness.
- No vinegar? Use lemon juice. The acidity helps dry and tighten the skin for better crackle.
- Low-sodium option: Season the meat side lightly and finish with a sprinkle of flaky salt on just the skin when serving.
FAQ
Do I have to score the skin?
Scoring or pricking improves blistering, but it’s not mandatory.
If you keep the skin very dry and air fry hot at the end, you can still get a good crackle. Just avoid cutting into the meat.
Can I use skinless pork belly?
You can, but you won’t get the signature crackling. The result will be tender, juicy pork with browned edges.
Reduce cook time slightly and focus on seasoning the meat well.
Why is my skin bubbling unevenly?
Uneven moisture and air fryer hot spots are common causes. Dry the skin thoroughly, prick more evenly, and rotate halfway. A short final blast at 400–420°F can help even out the texture, but watch closely.
How do I know it’s done?
The skin should be hard and crisp to the tap, and the interior should be tender with rendered fat.
An internal temp of around 185–195°F yields a soft, luscious texture. You can go lower, but pork belly shines when cooked long enough for fat to render.
Can I make this ahead?
Yes. Cook fully, cool, and refrigerate.
Reheat in the air fryer at 350°F until the skin re-crisps. It often gets even crispier the next day after the skin dries out more in the fridge.
What dipping sauces work well?
Try a simple mix of soy sauce, rice vinegar, sugar, and chili flakes. Or serve with hoisin, hot mustard, or a lime-fish sauce dip for a bright, tangy contrast.
Does the foil boat really matter?
It helps a lot.
The foil keeps rendered fat from smoking and prevents the meat from drying while letting the skin stay exposed to direct heat.
In Conclusion
Air Fryer Crispy Prok Belly delivers big restaurant-style crunch with little effort. Dry the skin, season the meat, and finish hot for that perfect crackle. With simple tools and a few smart steps, you’ll have juicy slices and glassy skin any night of the week.
Pair with rice, greens, or your favorite pickles, and enjoy a plate that feels special without the fuss.
Air Fryer Crispy Prok Belly - Golden, Crunchy, and Juicy
Ingredients
Method
- Prep the pork belly. Pat the pork belly very dry on all sides.If the skin came packaged wet, blot thoroughly. The drier the skin, the better the crackling.
- Score or prick the skin. Using a sharp knife, make shallow scores across the skin, or prick the skin all over with a toothpick or skewer. Do not cut into the meat; keep it shallow so fat renders and the skin blisters properly.
- Season the meat side. Flip the pork belly skin-side down. Rub with kosher salt, pepper, garlic powder, and five-spice if using.Keep the skin plain for now.
- Dry out the skin. Flip back to skin-side up. Brush the skin with a thin layer of vinegar, then sprinkle a light dusting of salt over the skin. Place uncovered in the fridge for at least 6 hours, ideally overnight.This dries the skin and deepens flavor.
- Wrap the sides to control splatter. When ready to cook, create a “boat” with aluminum foil around the sides of the pork belly, leaving the skin fully exposed on top. This keeps the meat juicy and reduces drips.
- Preheat the air fryer. Heat to 360°F (182°C) for 3–5 minutes. A hot start helps the skin blister.
- Optional oil finish. Dab the skin dry again, then brush on a very thin layer of neutral oil.This helps even browning, especially if your skin isn’t super dry.
- First cook. Place pork belly skin-side up in the air fryer basket. Cook at 360°F (182°C) for 30–35 minutes. Check halfway through and rotate the basket if your air fryer has hot spots.
- Second cook to crisp the skin. Increase to 400°F (204°C) and cook another 10–15 minutes, or until the skin is blistered and crisp.If some spots lag behind, cook 3–5 minutes more.
- Rest before slicing. Let the pork belly rest 10–15 minutes. Resting keeps the juices in the meat. Slice with a sharp knife: cut the skin first, then press through the meat for clean pieces.
- Serve. Sprinkle a little flaky salt over the slices and serve with rice, greens, pickles, or a simple dipping sauce like soy, vinegar, and chili.
Printable Recipe Card
Want just the essential recipe details without scrolling through the article? Get our printable recipe card with just the ingredients and instructions.