I started baking cauliflower “wings” on weeknights when I wanted something craveable without the carb crash. My first pans came out pale and soft — great for mash, useless for snacking. After dialing in a few small details, I now get a shattering crust with a tender center, no fryer, and no specialty tools. In this guide I’ll show you the exact method, the why behind it, and quick ways to switch flavors so these bites actually earn a spot in your regular rotation.
What Makes Cauliflower Go Crispy Instead of Soggy
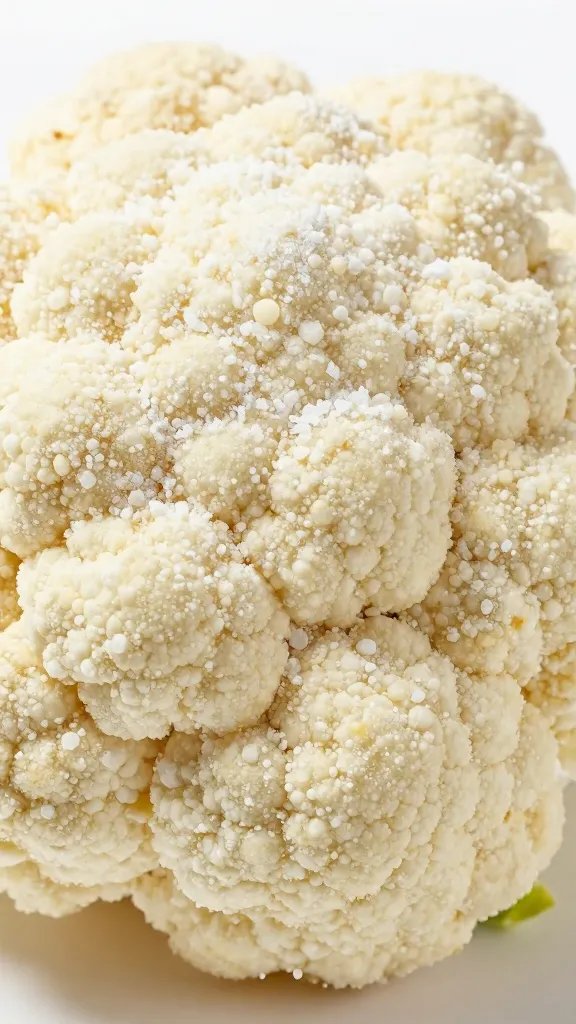
Cauliflower holds a lot of water. If you season and bake it straight from the cutting board, that moisture steams the surface and ruins crisping.
I solve this by managing moisture in three ways: cut uniform, bite-size florets; pre-dry them with salt; and use a thin, high-heat coating that sets before the centers overcook. A preheated pan and plenty of airflow finish the job.
Action today: After cutting florets, toss with 1/2 teaspoon salt and spread on a towel for 15 minutes — you’ll see beads of moisture you won’t have to fight in the oven.
The Crisping Mix: Low Carb Coatings That Actually Brown

Flour browns easily; low carb coatings need help. I use a two-part approach: a light binder to make the coating cling, then a dry mix built for color and crunch.
For the binder, whisk 1 large egg with 1 tablespoon water and 1 tablespoon oil. For the dry mix, combine 1/2 cup fine almond flour, 1/3 cup grated hard cheese (Parmigiano-Reggiano or Grana Padano), 1 teaspoon baking powder, 1 teaspoon garlic powder, 1 teaspoon paprika, 1/2 teaspoon salt, and 1/2 teaspoon black pepper.
Takeaway: Add a small amount of grated hard cheese and a pinch of baking powder to your almond flour — that duo boosts browning and texture without adding carbs.
Oven Setup: Heat, Airflow, and the Right Pan

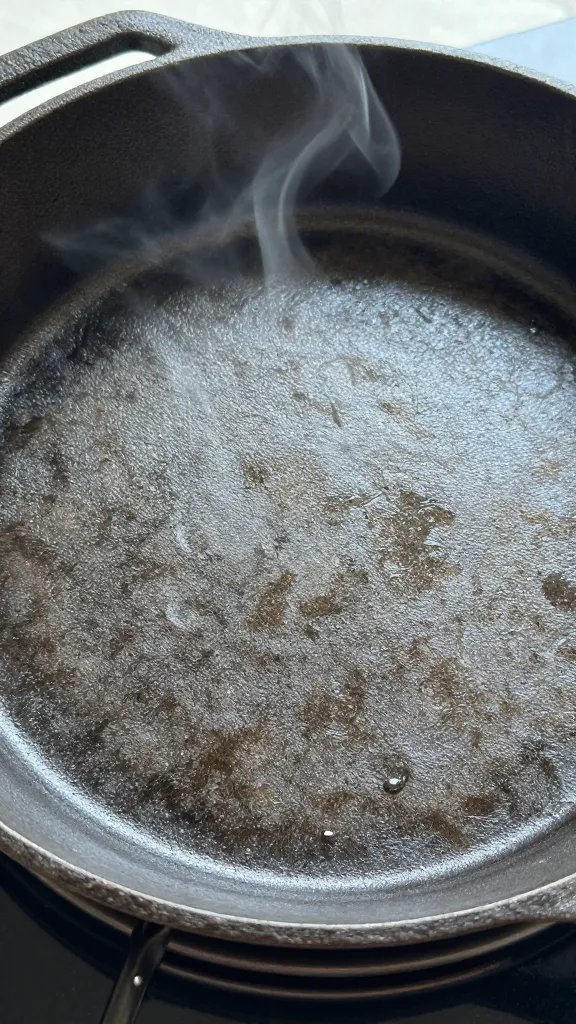
High, dry heat is your friend. I set the oven to 450°F (230°C) and preheat a heavy sheet pan inside for at least 10 minutes. A dark, sturdy pan transfers heat better than a shiny thin one.
If you have a wire rack that fits your sheet pan, use it. Lightly oil the rack and set the coated florets on top so hot air hits every side. No rack? Use parchment and give the pan a 180° turn halfway through.
Action today: Put your empty pan in the oven as it preheats — that single step jump-starts browning the second the bites touch the metal.
Step-by-Step: From Raw Florets to Shattering Crunch
Sequential Method
- Prep the cauliflower: Break 1 medium head into 1.5-inch florets. Rinse, dry well, then toss with 1/2 teaspoon salt and rest on a towel 15 minutes. Pat very dry.
- Make the binder: Whisk 1 egg, 1 tablespoon water, and 1 tablespoon oil in a large bowl. Add florets and toss to coat lightly.
- Mix the coating: Stir 1/2 cup almond flour, 1/3 cup grated hard cheese, 1 teaspoon baking powder, 1 teaspoon garlic powder, 1 teaspoon paprika, 1/2 teaspoon salt, 1/2 teaspoon pepper.
- Coat: Lift florets from the egg, let excess drip, then toss in the dry mix. Shake off loose crumbs — a thin, even layer crisps better than clumps.
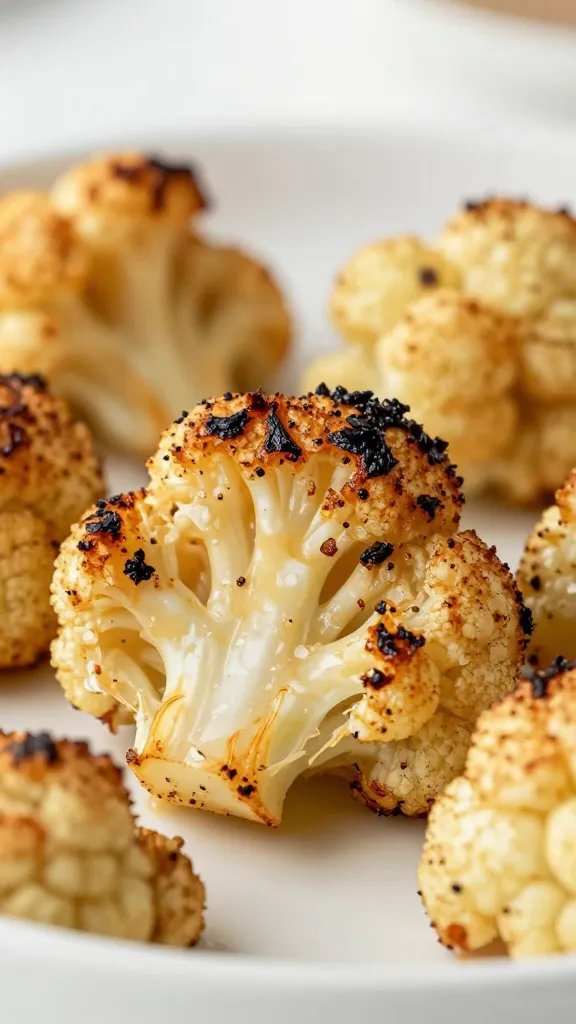
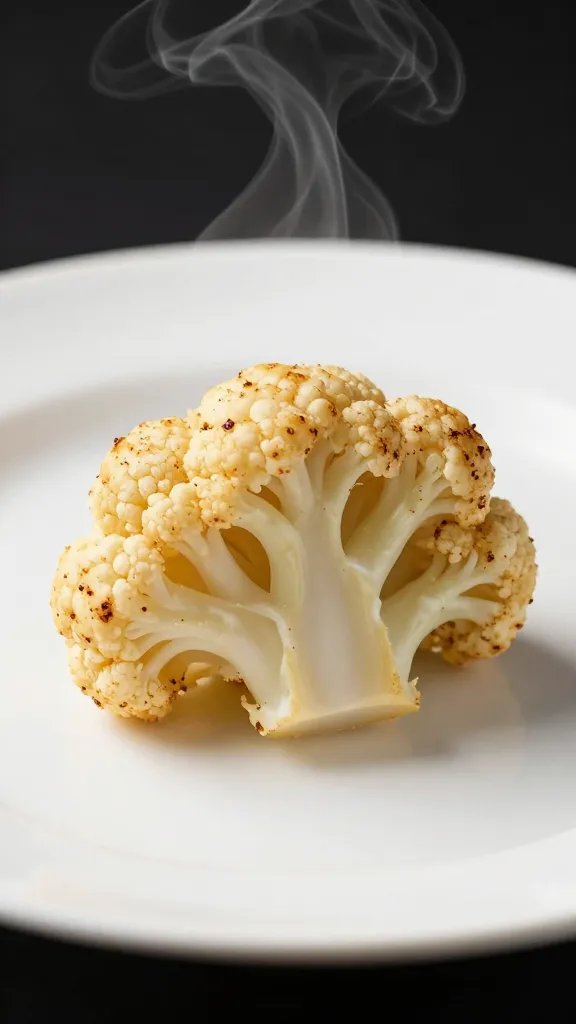
- Bake: Arrange on a hot, oiled rack or parchment-lined hot pan. Roast 18–22 minutes at 450°F (230°C), turning once at 12 minutes. They’re done when deep golden with crisp edges.
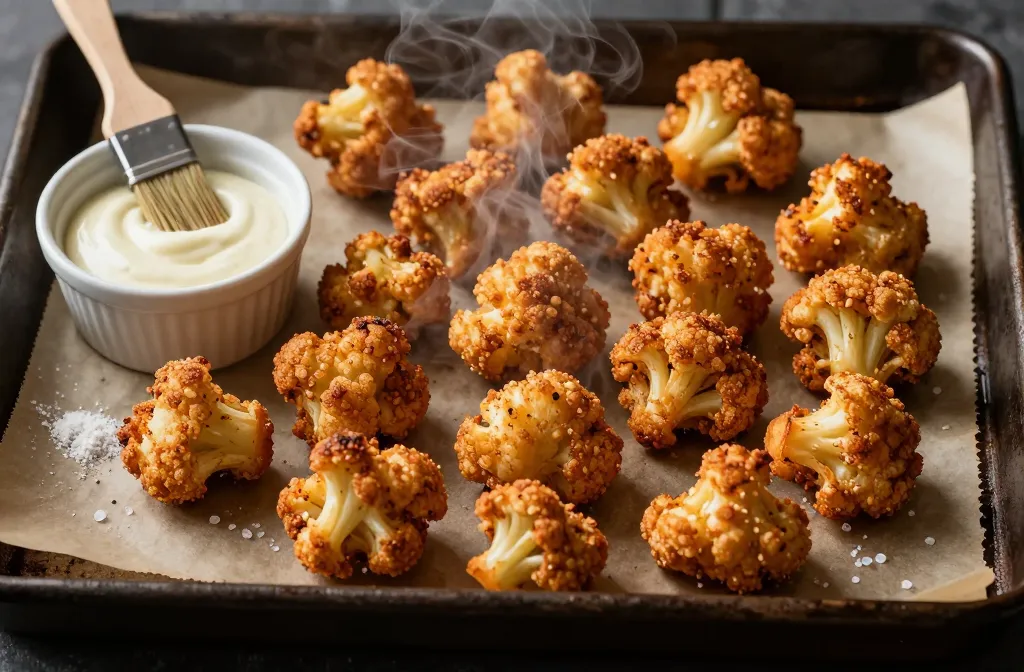
- Finish: Rest 3 minutes so the crust sets. Toss with a sauce or dust with seasoning while hot.
Takeaway: Keep the coating thin and even; excess crumbs burn before the cauliflower cooks and taste bitter.
Sauce and Seasoning Variations That Won’t Soak the Crust

Heavy, watery sauces undo your work. I use concentrated flavors and toss fast.
- Buffalo-Style: Melt 2 tablespoons butter with 2 tablespoons hot sauce and 1 teaspoon vinegar. Toss quickly and serve immediately.
- Lemon–Garlic: Mix 1 tablespoon olive oil, 1 teaspoon lemon zest, 1 minced garlic clove, pinch of salt. Drizzle and toss.
- Parmesan–Herb: While hot, shower with 2 tablespoons grated Parmesan, 1 teaspoon Italian seasoning, and a squeeze of lemon.
- Smoky BBQ Dry Rub: 1 teaspoon smoked paprika, 1/2 teaspoon garlic powder, 1/2 teaspoon chili powder, 1/4 teaspoon brown sugar substitute, pinch salt.
Action today: Warm your sauce in a small pan before tossing — a warm, thick sauce clings fast without softening the crust.
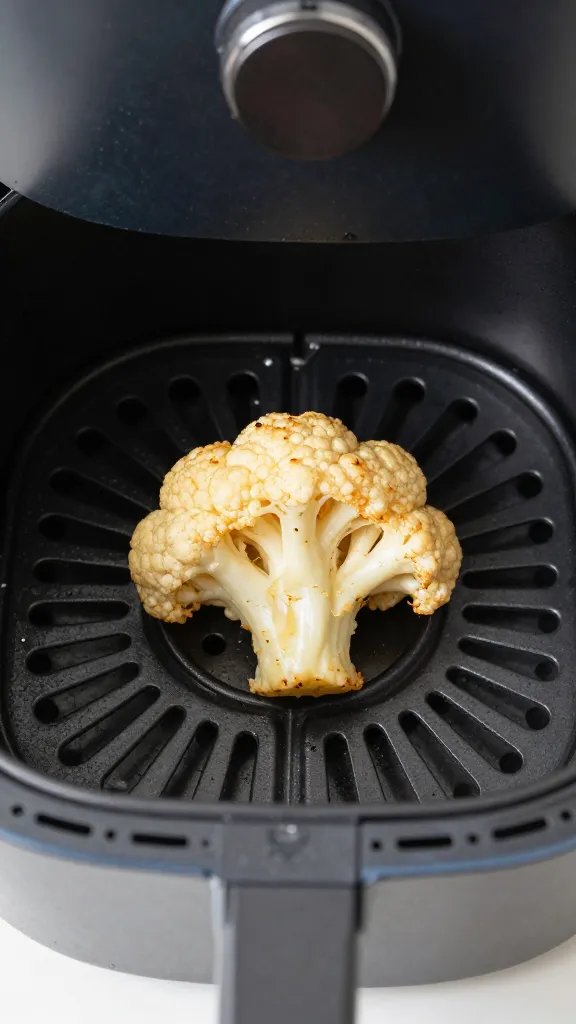
Air Fryer Method for Small Kitchens
An air fryer makes this even easier. Preheat to 400°F (205°C) for 5 minutes. Arrange coated florets in a single layer with a little space between.
Cook 12–15 minutes, shaking once at the halfway point. Check at 10 minutes — when edges go deep golden, they’re ready. Work in batches; crowding stops crisping.
Takeaway: Leave at least a fingertip of space between pieces in the basket — if they touch, they steam.
Common Pitfalls and Fast Fixes
Warning Signs and Fixes
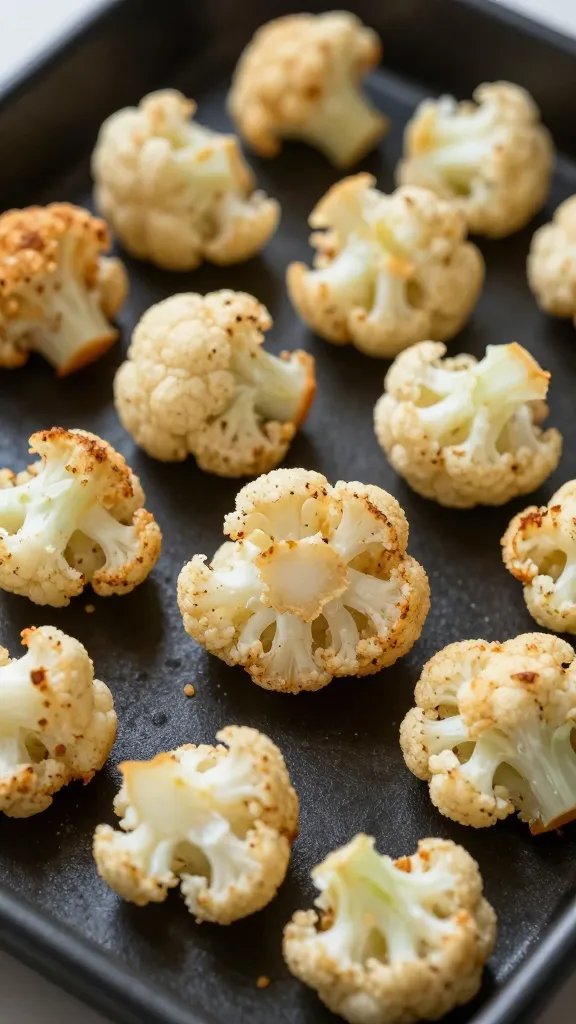
- Pale but cooked through: Raise oven rack one level and add 3 minutes. Next time, preheat longer and use a darker pan.
- Soggy after saucing: You used too much sauce or it was cold and thin. Toss with half the sauce, then add more only if the crust stays crisp.
- Coating falling off: Florets were wet. Increase the salting-and-drying step to 20 minutes and pat dry again before the egg.
- Bitter or burnt spots: Excess loose crumbs scorched. Shake off extra coating and switch to parchment or a rack.
Action today: If your batch looks pale at 15 minutes, switch the oven to convection (fan) or crack the door for 10 seconds to vent steam, then finish baking.
Nutrition and Make-Ahead Without Losing Crunch

For a standard batch (about 4 cups florets), each serving of bites lands roughly at 6–8g net carbs, depending on sauce. Using almond flour and hard cheese keeps carbs low and flavor high.
To make ahead, coat and refrigerate the raw florets on a sheet pan, uncovered, for up to 6 hours. Bake straight from the fridge and add 2 extra minutes. For leftovers, re-crisp at 425°F (220°C) for 6–8 minutes; do not microwave.
Takeaway: Store coated-but-raw florets uncovered in the fridge — the surface dries slightly and crisps even better when baked.
Frequently Asked Questions
Can I skip the egg and keep it dairy-free?
Yes. Use 2 tablespoons aquafaba (liquid from a can of chickpeas) whisked until lightly foamy as the binder. For dairy-free, replace cheese with 2 tablespoons nutritional yeast and add an extra teaspoon of oil to the binder. Expect a slightly lighter color; extend bake time 1–2 minutes for deeper browning.
What if I only have coconut flour?
Coconut flour absorbs more moisture and can taste dry. If using it, mix 1/4 cup coconut flour with 1/4 cup finely ground pork rinds or extra cheese to balance texture. Add 1 extra teaspoon oil to the binder. Watch closely in the last 5 minutes to avoid overbrowning.
How do I cut florets the right size?
Aim for pieces about 1.5 inches across — roughly the size of a whole walnut. Trim the stem flush so each piece sits flat on the pan. Uniform size ensures everything finishes in the same 18–22 minute window. Oversized pieces stay wet inside and under-browned outside.
Why are my bites crisp right out of the oven but soft after 10 minutes?
Residual steam trapped under the coating softens it. Rest the bites on a wire rack for 3 minutes so steam escapes, then sauce quickly with a thick, warm glaze. If holding for guests, keep them on a rack at 200°F (95°C) for up to 20 minutes.
Can I use frozen cauliflower?
Yes, but you must thaw and dry aggressively. Spread on a towel at room temperature for 30–40 minutes, then press dry and proceed with the recipe. Add 2–4 extra minutes of bake time and use a rack for better airflow.
Conclusion
You don’t need a fryer or specialty flours to get real crunch from cauliflower — you need dry florets, a smart low carb coating, and hot, moving air. Pick one flavor variation and preheat your pan tonight; once you taste the difference a thin, well-set crust makes, these bites replace weeknight cravings the way salads never do. Next step: try the air fryer batch with the Buffalo glaze and learn exactly how your kitchen hits that perfect golden window.