I started making chicken skin “chips” on weeknights when I wanted something salty and crunchy without hauling out a fryer or buying another snack. If your oven runs hot and you own a sheet pan and some baking paper, you can do this right now. I’ll show you how to prep skins so they render fully, bake into glassy-crisp chips, and stay crunchy for days. You’ll also learn quick seasonings, safe storage, and simple fixes when batches turn bendy instead of brittle.
What Makes Chicken Skin Turn Into a Chip
Chicken skin becomes a chip when you remove surface moisture and force the fat beneath to render while the collagen dries into a crisp sheet. Moisture is the enemy of crunch. Fat is your friend, but only after it escapes the skin and cooks off.
Two things guarantee success: very dry skin and firm, even pressure while baking. Drying lets the fat bubble out instead of steaming. Pressure keeps the skin flat so it cooks uniformly rather than curling into chewy pockets.
Action today: Pat your chicken skins bone-dry with paper towels, then leave them uncovered in the fridge for 30–60 minutes before cooking.
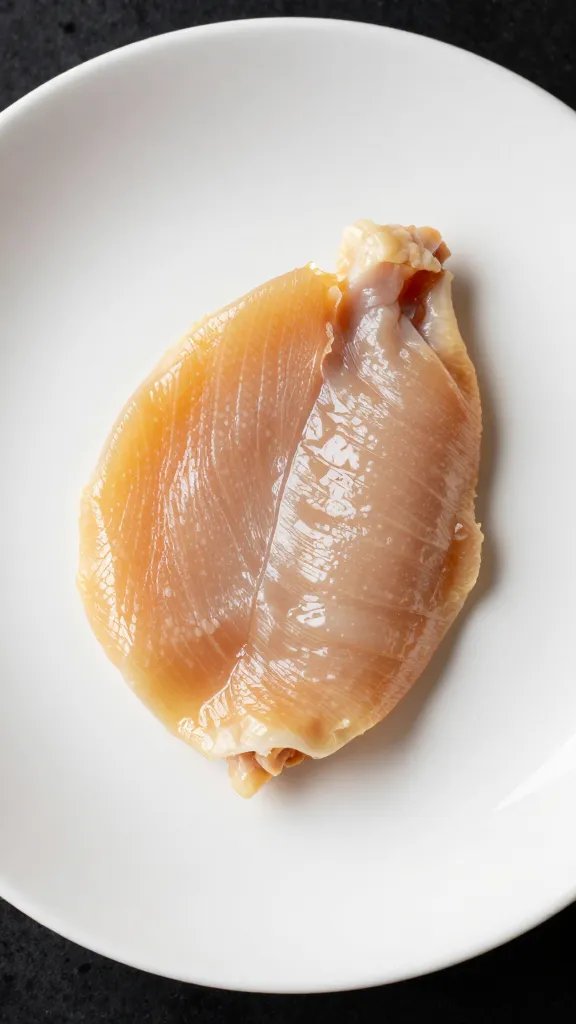
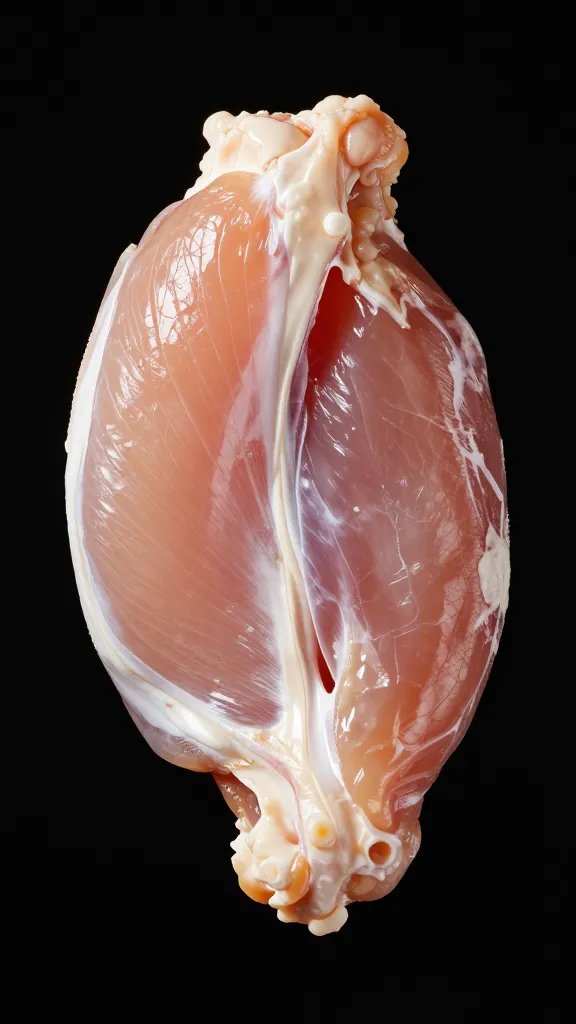
How To Prepare Raw Skins Without Tearing
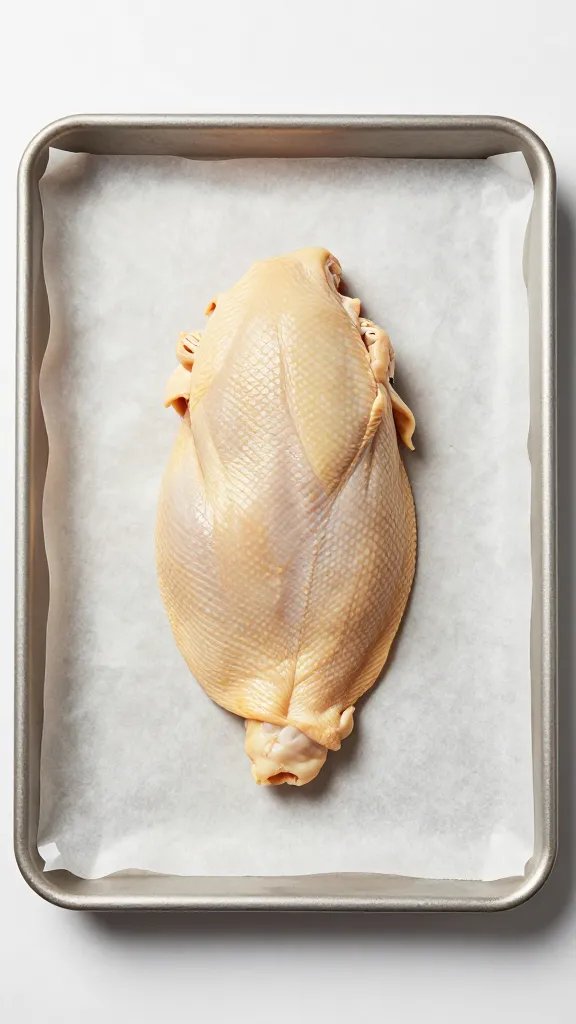
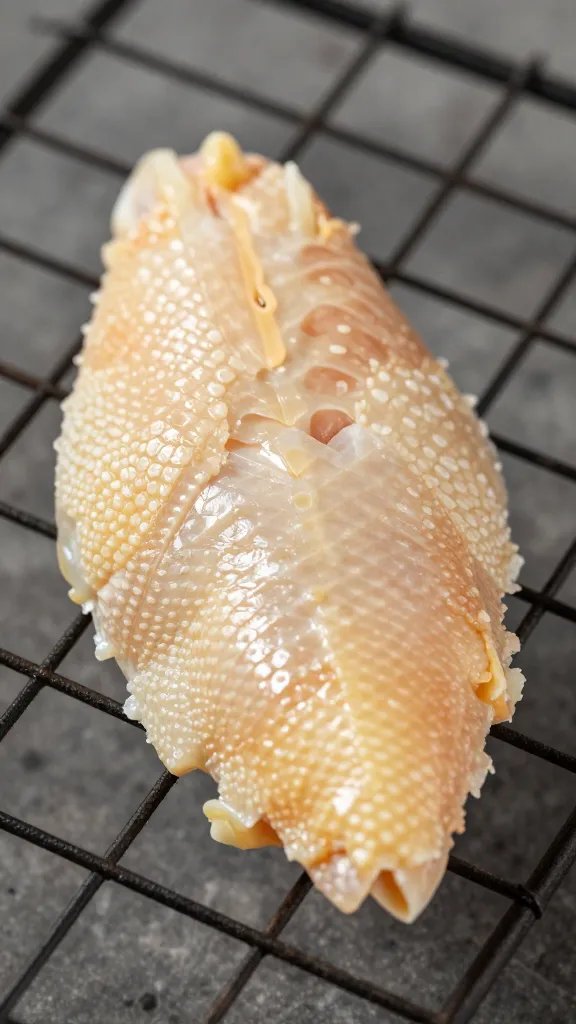
Start with skins from bone-in thighs or whole chickens. Peel them off cold; cold fat cuts cleanly and the skin resists tearing.
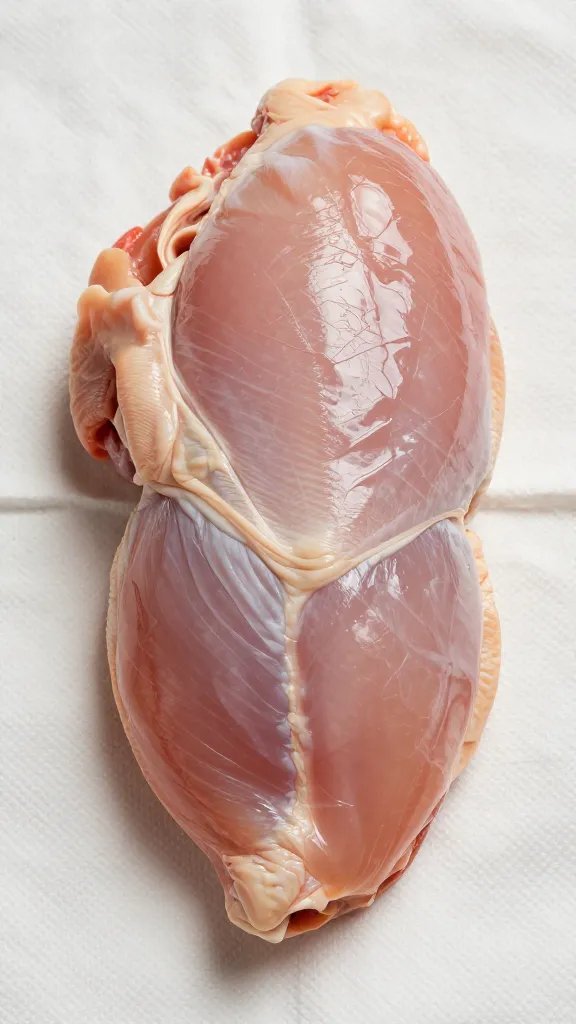
Lay the skin on a board, fat-side up. Use a small, sharp knife to gently scrape away thick white fat deposits without gouging through. You’re thinning bulky spots so they render at the same rate as thinner areas.
Warning signs you’ve prepped badly
- Thick blobby patches: These turn rubbery. Keep scraping until thickness feels even between fingers.
- Wet patches: If paper towels come away damp after several pats, you haven’t dried enough.
- Ragged edges: Trim them; ragged ends burn before the center crisps.
Action today: Scrape thick spots until the skin flexes evenly from edge to edge, then pat dry again.
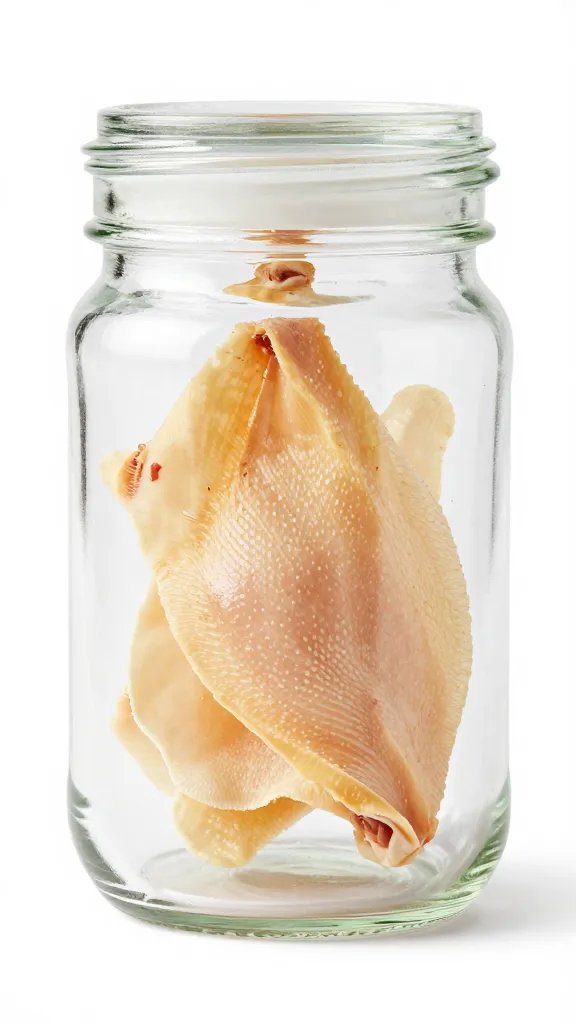
The No-Fail Oven Method (No Frying, No Mess)
You need a rimmed baking sheet, two pieces of baking paper (parchment), and another similar sheet pan to weigh the skins flat. If you only have one pan, use a heavy, oven-safe skillet as the weight.
- Heat the oven to 375°F (190°C). If your oven runs hot, set 360°F (182°C).
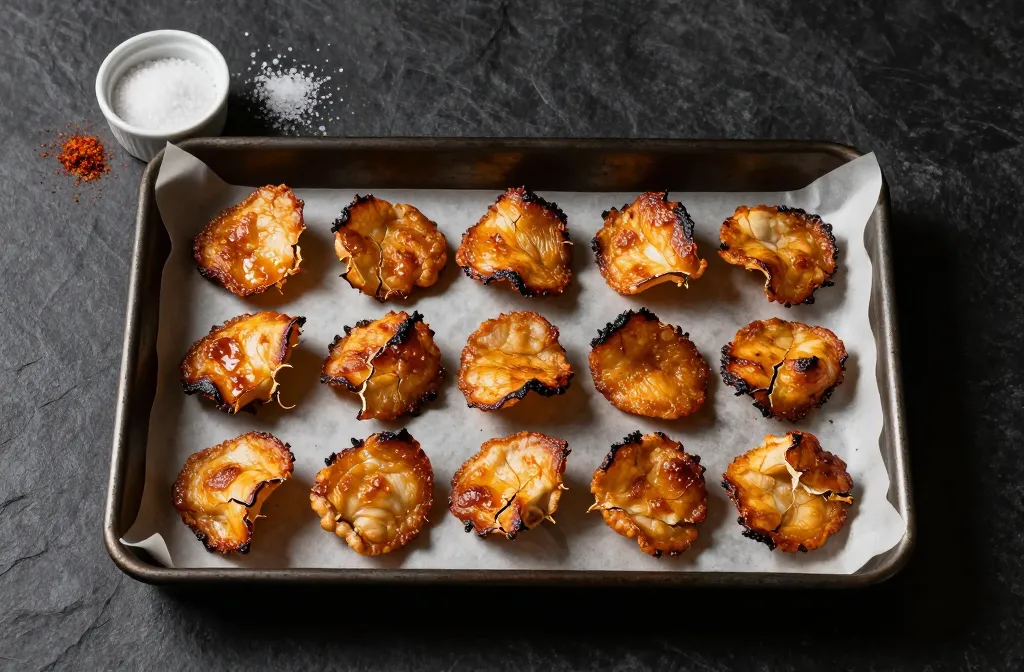
- Line the pan with baking paper. Lay skins flat, smooth side down, no overlap. Lightly season with salt.
- Cover with a second sheet of baking paper. Set another pan directly on top to press them flat.
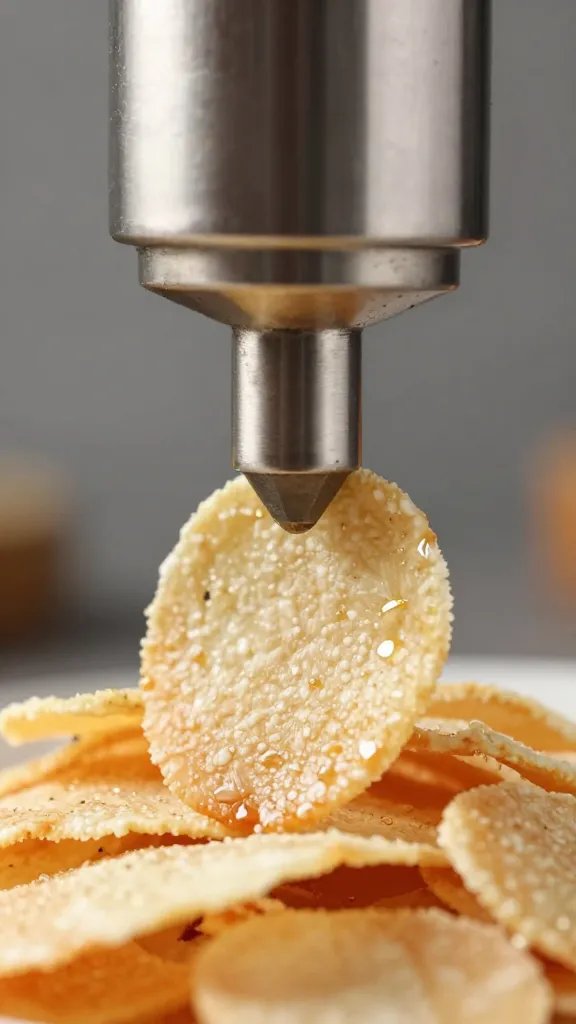
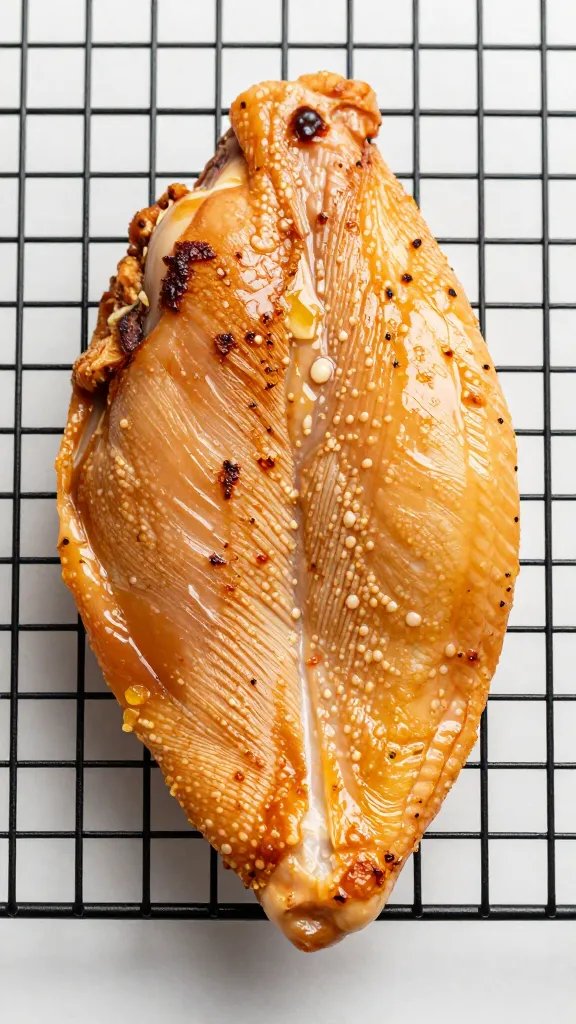
- Bake 20 minutes. Remove the top pan and paper, drain off rendered fat into a heatproof jar.
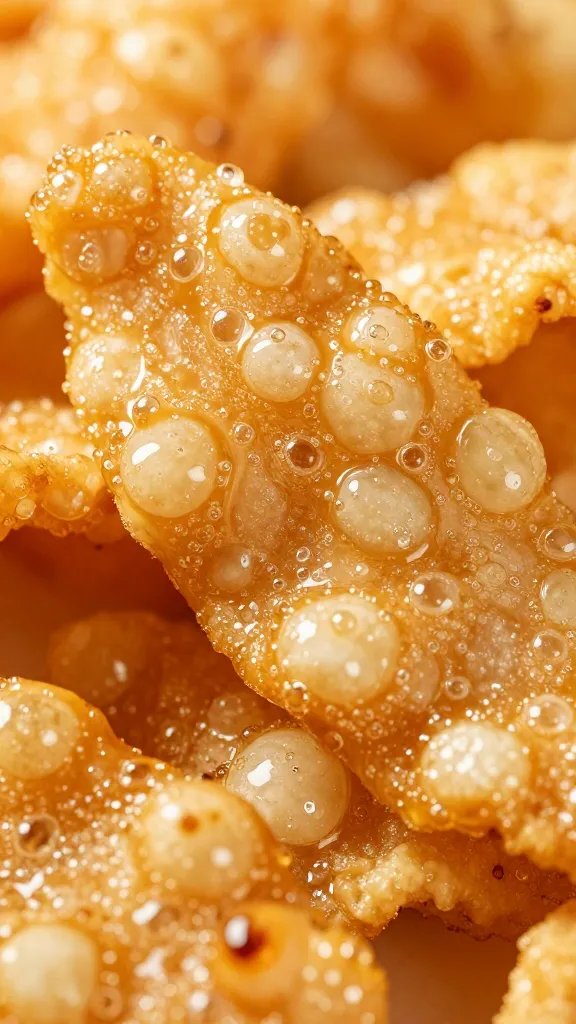
- Return skins to the oven, uncovered, 6–12 minutes more, until deep golden and rigid at the edges.
- Cool on a wire rack 5 minutes. They crisp fully as steam escapes.
Action today: Use the two-pan press. That single step stops curling and guarantees even crunch.
Seasoning That Actually Sticks
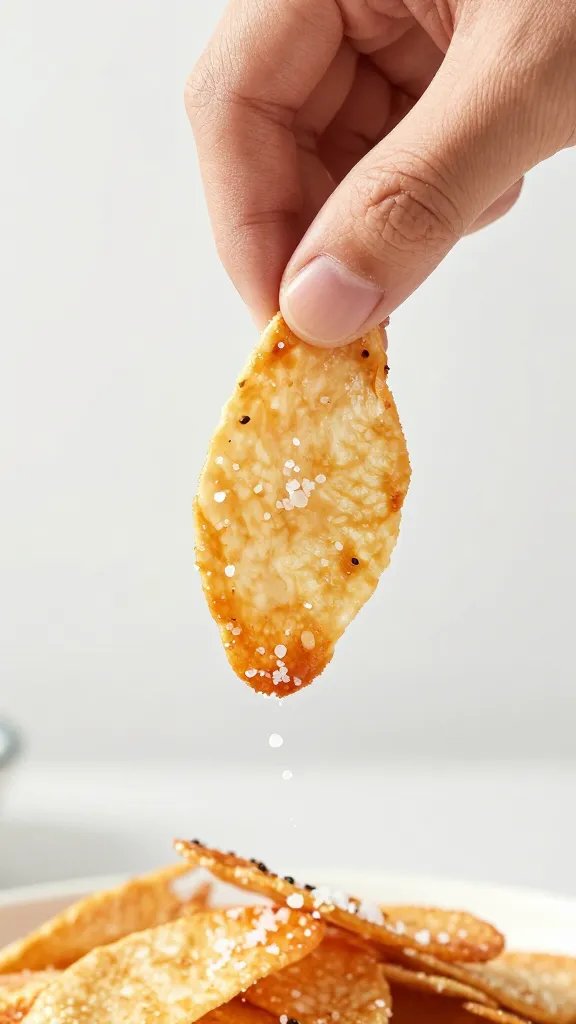
Season lightly with fine salt before baking. Add spices after the second bake when the surface is dry, or they scorch and taste bitter.
For even coating, toss warm chips in a bowl with a pinch at a time. Start with 1/8 teaspoon salt per skin; adjust to taste. Avoid sugar-based rubs unless you want a barbecue caramel—add those in the last 2 minutes only.
Reliable flavor combos
- Salt + Black Pepper: Classic, great with dips.
- Smoked Paprika + Garlic Powder: 2:1 ratio; add salt to taste.
- Lemon Zest + Chili Flakes: Zest onto warm chips; finish with flaky salt.
- Ranch-Style: Dried dill, garlic powder, onion powder, fine salt (equal parts).
Action today: Hold back any spice blends until the final 1–2 minutes or after baking to prevent scorching.
Keeping Chips Crunchy: Cooling, Storing, Recrisping
Crisp dies if you trap steam. Cool chips on a rack until room temperature and fully dry to the touch. If you see condensation in a container, they were still warm.
Store in a paper-towel-lined airtight container at room temperature for 1–2 days. For longer, refrigerate up to 5 days and recrisp 4–6 minutes at 350°F (175°C) on a rack set over a pan. Never microwave; it softens the fat.
Action today: Line your storage container with a dry paper towel and change it if it feels greasy.
Common Problems and Fast Fixes
When a batch goes wrong, it’s always moisture, temperature, or pressure. Fix those and you get crackly chips every time.
Step-by-step fixes
- Chewy centers: Bake 3–5 minutes more at 350–360°F, then cool on a rack. Next time, scrape thicker fat pockets thinner.
- Greasy chips: You under-rendered. Add 5 minutes under the top pan, then finish uncovered.
- Burnt edges, pale center: Oven too hot or edges too thin. Lower temp by 15°F and trim frayed edges before baking.
- Curled “boats”: You skipped the press. Use the two-pan method from the start.
Action today: If today’s batch is flexible, return to a 350°F oven for 4 minutes, then cool completely on a rack.
Using Chicken Chips: Snacks, Garnishes, and Zero-Waste Tips
Serve as chips with dips like sour cream and chives, or crumble over salads and soups for crouton-level crunch. They also replace bacon in BLTs—layer with tomato and lettuce on toast with mayo.
Save the rendered chicken fat (schmaltz). Strain it through a fine sieve into a jar and refrigerate up to a month. Use a spoonful to roast potatoes or sauté greens for deep flavor.
Action today: Strain the rendered fat while warm and label the jar with today’s date.
Air Fryer and Stovetop Options (When the Oven Is Busy)
Air fryer: 350°F (175°C), skins between two sheets of baking paper under a small rack or trivet to keep them flat. Cook 10–14 minutes, checking at 8. Remove weight for the last 2–4 minutes to brown.
Stovetop: Place skins in a cold nonstick skillet, press with a smaller pan, and set heat to medium. Render 8–10 minutes until most fat releases, then flip and finish 2–4 minutes. Drain on a rack; season while warm.
Action today: If you own an air fryer, use a small rack or trivet to keep skins flat—no curling, better crunch.
Frequently Asked Questions
Can I use skin from chicken breasts?
Yes, but breast skin is thinner and dries faster. Check 3–4 minutes earlier than thigh skin to prevent over-browning. If pieces are small, group them edge-to-edge under the press so they don’t shrink into curls. Season lightly; thin skin takes salt quickly.
Do I need oil on the pan?
No. The skin provides all the fat you need. Use baking paper to prevent sticking and to make cleanup easy. If you skip paper, expect to scrape; parchment guarantees smooth release and even browning.
How do I know they’re done?
Look for uniform deep golden color and rigid edges that don’t bend when nudged with tongs. Lift one tip—if it stays flat and feels light, it’s ready. Remember chips firm up more as they cool for 3–5 minutes on a rack.
Are chicken chips safe to leave out?
Treat them like cooked poultry. Serve at room temperature for a party, but store leftovers in a sealed container within 2 hours. For best texture, keep at room temp up to 2 days or refrigerate and recrisp before serving.
Can I season with wet sauces like hot honey?
Yes, but glaze lightly right after baking and return to the oven for 1–2 minutes to set. Too much liquid reintroduces steam and softens the chip. Start with 1 teaspoon per 4 chips and brush, don’t pour.
Conclusion
You don’t need a fryer, a thermometer, or special gear—just dry skins, steady pressure, and a short finish in the oven. Make one tray tonight, save the schmaltz, and pick a favorite seasoning once you’ve nailed the base crunch. When you’re ready to level up, batch-prep skins on the weekend and store them dried in the fridge so you can bake a fresh, crackly tray in under 20 minutes any night of the week.